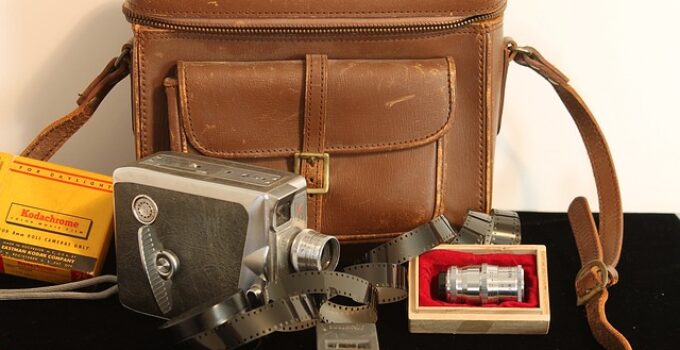
How do you make a leather camera bag?-Ever wondered about the artistry behind crafting a leather camera bag? This guide unveils the secrets, from selecting premium leather to intricate stitching and hardware.
Discover how skilled artisans transform simple materials into a stylish and functional accessory that safeguards your photography gear with elegance
Here if you wondered what is the naics code of the camera bag?
How do you make a leather camera bag?
1. Selecting the Right Leather
In crafting a leather camera bag, the initial step involves selecting the appropriate leather. This entails considering factors such as leather type (full-grain, top-grain, genuine, etc.), thickness, texture, and color.
The chosen leather should align with the bag’s durability, aesthetics, and intended use. Quality leather ensures a sturdy foundation for the bag while contributing to its visual appeal.
Thoroughly evaluating these aspects guarantees a successful start to crafting a functional and attractive leather camera bag.
2. Gathering Necessary Tools and Supplies
The second step in creating a leather camera bag involves gathering the essential tools and supplies.
This encompasses items like leather cutting tools (such as knives or rotary cutters), rulers, cutting mats, leather needles, waxed threads, edge burnishing tools, hole punchers, and hardware like buckles and zippers. Here what lenses carry in a camera bag city?

Adequate workspace and protective gear are also essential. Ensuring you have the right tools and materials readies you for the precise and intricate work of assembling the leather camera bag.
3. Designing Your Bag
Designing your leather camera bag is the third step, where creativity comes into play. Decide on the bag’s dimensions, compartments, closures, and straps based on your camera and equipment’s needs.
Sketch the bag’s layout and plan how the leather pieces will fit together. This step includes envisioning the bag’s aesthetics and functionality.
A well-thought-out design serves as a blueprint for the crafting process, ensuring the bag meets both practical and visual requirements effectively.
4. Measuring and Cutting Leather Pieces
In the fourth step of crafting a leather camera bag, precision is key. Measure and mark the leather according to your design’s specifications using rulers, templates, or patterns.
Carefully cut the leather pieces using sharp tools like knives or rotary cutters on a cutting mat to ensure clean edges.
Accurate measurements and cuts are vital for assembling the bag neatly and securely, ensuring a polished final product that aligns with your envisioned design.
Here, how to carry around 2 lens and a camera in a side bag?
5. Creating Pockets and Compartments
The fifth step involves crafting pockets and compartments for your leather camera bag. Using the cut leather pieces, mark and create spaces for storing camera accessories, lenses, and personal items.
Employ techniques like stitching, riveting, or gluing to secure the compartments in place.
This step demands attention to detail to ensure proper sizing and alignment, ultimately resulting in a functional bag that offers organized storage for your camera gear while maintaining the bag’s structural integrity.
6. Stitching the Main Structure
During the sixth step, assemble the main structure of the leather camera bag by stitching the previously cut pieces together. Employ a suitable leather needle and strong waxed thread for durable seams.

Utilize techniques like saddle stitching or machine sewing, depending on your skill level and design. Precise stitching ensures the bag’s sturdiness and longevity, while also contributing to its aesthetic appeal.
This crucial step brings the bag’s form to life and sets the foundation for its functionality.
7. Adding Straps and Handles
In the seventh step, incorporate straps and handles to enhance the usability of your leather camera bag.
Craft these components from sturdy leather strips or pre-made options. Attach them securely using techniques like riveting, stitching, or attaching hardware.
The straps and handles contribute to the bag’s comfort and functionality, allowing for easy carrying and access to your camera equipment.
Attention to detail in this step ensures both practicality and aesthetic cohesion with the bag’s design.
8. Attaching Closures and Hardware
In the eighth step, finalize your leather camera bag by affixing closures and hardware. Attach zippers, buckles, snaps, or other chosen closures to ensure secure and convenient access to the bag’s contents.
Utilize rivets, stitching, or adhesive to secure hardware firmly to the leather.
This step enhances both the bag’s functionality and visual appeal, creating a polished and professional finish while ensuring the bag remains practical and user-friendly for its intended purpose.
Here do you need to take off camera lens when put in camera bag?
9. Burnishing and Finishing
In the ninth step, focus on refining the details of your leather camera bag through burnishing and finishing. Use tools to smooth and round the edges of the leather, providing a polished appearance and a comfortable feel.
Apply edge paints or dyes for a consistent color and added protection.
This meticulous process enhances the bag’s aesthetics and durability, ensuring it presents a professional and attractive look while withstanding daily use.
10. Applying Leather Conditioner
In this step, treat your leather camera bag by applying leather conditioner. This moisturizing product helps maintain the leather’s suppleness, prevent cracking, and enhance its overall lifespan.
Gently rub the conditioner onto the surface using a clean cloth, allowing it to be absorbed. This step not only nourishes the leather but also enriches its color and texture.
Regular conditioning keeps your bag looking and feeling its best, ensuring its enduring quality and appearance over time.
11. Personalizing Your Bag
In the last step, add a personal touch to your leather camera bag. This involves optional customization such as embossing initials, adding decorative elements, or incorporating design elements that reflect your style.
Utilize tools like leather stamps, embossing machines, or hand-painted details to make the bag uniquely yours.
Personalization adds character and uniqueness to the bag, creating a one-of-a-kind piece that showcases your creativity and identity.
Here strap inside is camera bag is for what?
Now you have seen 7 steps of making leather camera bag. Now look at some related faqs.
Conclusion
Creating your own leather camera bag is a fulfilling endeavor that combines functionality and creativity.
By following this step-by-step guide, you’ve crafted a unique accessory that complements your photography journey.

