How to adjust settings on film camera?
How do you master the settings on a film camera for the perfect shot? Adjusting the settings on a film camera is an essential skill for capturing stunning photographs.
Unlike digital cameras, film cameras require a deeper understanding of manual controls, including shutter speed, aperture, and ISO.
Learning to balance these elements allows you to manipulate light, focus, and depth of field to create images with character and artistry.
Whether you’re a beginner exploring film photography or a seasoned photographer rekindling a passion for analog, this guide will help you unlock the creative potential of your film camera step by step.
What settings for film camera?
How to adjust settings on film camera?
How to adjust exposure on film camera?
Adjusting exposure on a film camera involves balancing aperture, shutter speed, and ISO to achieve the desired lighting in your photograph. Here’s how:
- Set the ISO: Start by choosing a film with the appropriate ISO for your lighting conditions. Once loaded, set your camera’s ISO dial to match the film speed (e.g., ISO 200).
- Adjust the Aperture: The aperture controls how much light enters the lens. A smaller f-stop (e.g., f/2.8) allows more light for brighter images, while a larger f-stop (e.g., f/16) limits light for brighter scenes.
- Modify the Shutter Speed: Shutter speed determines how long the film is exposed to light. Use faster speeds (e.g., 1/1000s) for bright settings and slower speeds (e.g., 1/30s) for low light.
- Use a Light Meter: Many film cameras have built-in light meters. Align the needle or indicator to ensure proper exposure. For cameras without a meter, use a handheld light meter or the Sunny 16 Rule.
Fine-tune these settings to achieve a perfectly exposed shot.
Can you adjust ISO on film camera?
How to adjust settings on film camera?
In film cameras, ISO is determined by the film you load and cannot be adjusted electronically like in digital cameras. Each roll of film has a fixed ISO rating (e.g., ISO 100, 400, or 800), which dictates its sensitivity to light. However, you can influence how the camera handles the film’s ISO through certain techniques:
- Set the ISO Dial: Adjust the camera’s ISO setting to match the film’s ISO for accurate metering. If using ISO 400 film, set the camera dial to ISO 400.
- Push or Pull Processing: If you want to simulate higher or lower ISO, you can intentionally underexpose or overexpose the film during shooting and then adjust the development process. For example, shooting ISO 400 film at ISO 800 requires push processing.
- Filter Choices: For creative control, you can also use filters to adjust the light reaching the film.
While ISO is fixed per roll, these techniques offer flexibility in exposure and creative outcomes.
How to set up a 35mm film camera?
How to adjust settings on film camera?
Setting up a 35mm film camera involves a few essential steps to prepare it for shooting:
- Load the Film: Open the camera’s back by releasing the latch or pressing the release button. Insert the 35mm film roll into the film chamber, ensuring the spool is secure. Pull the film leader across to the take-up spool and insert it into a slot. Advance the film using the winder until it catches, then close the back.
- Set the ISO: Adjust the camera’s ISO dial to match the film’s speed (e.g., ISO 200). This ensures accurate exposure readings from the light meter.
- Check Batteries: If your camera has an electronic light meter or other functions, ensure the batteries are working.
- Set Aperture and Shutter Speed: Choose initial settings based on lighting conditions.
- Advance the Film: Wind the film to the first frame.
Your camera is now ready to capture stunning analog images!
How to adjust settings on film camera?
Adjusting settings on a film camera involves manually controlling three key elements: ISO, aperture, and shutter speed. Here’s how:
- Set ISO: ISO is fixed by the film you load (e.g., ISO 200 or 400). Set the camera’s ISO dial to match the film speed for accurate exposure readings.
- Adjust Aperture: The aperture controls the size of the lens opening. A lower f-stop (e.g., f/2.8) allows more light and creates a shallow depth of field, while a higher f-stop (e.g., f/16) restricts light and increases depth of field. Adjust this based on your lighting and creative preferences.
- Modify Shutter Speed: This controls how long the film is exposed to light. Faster speeds (e.g., 1/1000s) freeze motion, while slower speeds (e.g., 1/30s) are ideal for low light or motion blur.
- Use a Light Meter: Many film cameras include a light meter. Align the meter’s needle or indicator for balanced exposure.
Experiment with these settings to achieve your desired photo.
7 Steps to adjust setting on film camera
Here are 7 steps to adjust settings on a film camera:
1. Load the Film
The first step is to load your 35mm film into the camera. Open the back of the camera, place the film roll in the film chamber, and pull the film leader across to the take-up spool. Ensure the film is securely inserted, then close the camera back.
2. Set the ISO
Set the camera’s ISO dial to match the ISO rating of the film you are using (e.g., ISO 100 or ISO 400). This ensures accurate light metering. If you’re using a higher ISO film, you can push the film for underexposure, or pull it for overexposure during development.
3. Adjust the Aperture
The aperture controls the amount of light entering the lens. Set the aperture (f-stop) based on your desired depth of field and available light. A lower f-stop (e.g., f/2.8) allows more light and creates a shallow depth of field, while a higher f-stop (e.g., f/16) provides more focus depth and less light.
4. Set the Shutter Speed
Shutter speed determines how long the film is exposed to light. Select a shutter speed appropriate for your scene. For fast-moving subjects or bright light, use faster speeds (e.g., 1/1000s). For low light or capturing motion, use slower speeds (e.g., 1/30s).
5. Focus the Lens
After setting the aperture and shutter speed, focus the lens on your subject. Many film cameras have a manual focus ring, so rotate the lens until the subject appears sharp in the viewfinder. For autofocus cameras, press the shutter button halfway to lock focus.
6. Meter the Light
Use the camera’s built-in light meter or a handheld light meter to measure the light in your scene. Align the meter’s needle or the digital indicator to ensure a balanced exposure. Adjust the aperture or shutter speed if needed to achieve correct exposure.
7. Advance the Film
Once the first exposure is taken, use the camera’s film advance lever to move the film to the next frame. This prepares the camera for the next shot and prevents double exposure. Keep advancing the film after each shot until the roll is finished.
Related faq’s
How Do you adjust settings of a film camera when taking a picture if you can’t see on a screen?
When taking a picture on a film camera without a screen, you rely on manual settings and the camera’s built-in light meter.
First, set the ISO based on the film you’re using. Next, adjust the aperture (f-stop) for depth of field and shutter speed for motion or light exposure.
Use the light meter (either in-camera or handheld) to check the exposure and balance aperture and shutter speed accordingly. With practice, you’ll become familiar with how different settings impact your photos, allowing you to capture images without the need for a screen preview.
What settings should I use on my film camera?
The settings you use on your film camera depend on the lighting and the desired effect.
For general outdoor photography with natural light, start with an ISO of 200 or 400 film, an aperture of f/8 to f/11 for a balanced depth of field, and a shutter speed of 1/125s. In low light, use a wider aperture (e.g., f/2.8 or f/4) and a slower shutter speed (e.g., 1/60s).
Always meter the light to ensure proper exposure. Adjust the settings for creative control—faster shutter speeds for motion capture or wide apertures for shallow depth of field.
How to get the “film look” from a digital camera?
To achieve the “film look” from a digital camera, start by using a low ISO (e.g., 100 or 200) to reduce noise and mimic the smooth grain of film. Shoot with a wide aperture (e.g., f/1.8 to f/2.8) for shallow depth of field and soft background blur.
Set a slower shutter speed, ideally around 1/50s, to replicate the motion blur seen in film. Additionally, shoot in a flat color profile or log format, then apply film-inspired color grading and slight grain in post-production. This combination mimics the warmth, texture, and organic feel of traditional film.
How do I use a 35mm film camera when I don’t have control of the shutter speed?
If you don’t have control of the shutter speed on a 35mm film camera, you can still adjust other settings to manage exposure.
Start by setting the ISO to match the film’s rating, ensuring the camera’s light meter is accurate. Adjust the aperture (f-stop) to control the amount of light entering the lens—wider apertures (e.g., f/2.8) allow more light, while smaller ones (e.g., f/16) reduce it.
If the camera automatically sets the shutter speed, rely on the light meter to check if the exposure is correct, and adjust the aperture accordingly to compensate for lighting conditions.
Can I change my shutter speed multiple times for one film?
What settings should I use on my film camera?
The settings you should use on your film camera depend on the lighting and your desired effect.
For daytime photography with natural light, start with ISO 200 or 400 film, set the aperture around f/8 to f/11 for a balanced depth of field, and choose a shutter speed of 1/125s. In low light, use a wider aperture (e.g., f/2.8) and a slower shutter speed (e.g., 1/60s).
Always check your light meter and adjust as necessary. For creative control, use a wider aperture for a shallow depth of field or a faster shutter for motion freeze.
How can I effectively use my film camera if its shutter speed is locked at 500 and the light meter doesn’t work?
If your film camera’s shutter speed is locked at 1/500s and the light meter doesn’t work, you can still achieve proper exposure by relying on other settings.
Start by using film with an ISO rating that suits your lighting conditions—ISO 100 or 200 for bright daylight, and ISO 400 or higher for lower light. Since the shutter speed is fixed, adjust the aperture to control light exposure.
In bright light, use a higher f-stop (e.g., f/16 or f/22) to avoid overexposure. In low light, open the aperture (e.g., f/2.8 or f/4) to let in more light. Keep an eye on the overall exposure.
Is it possible to adjust the ISO on an old film camera? If so, how?
On an old film camera, the ISO setting is generally fixed by the film you load, meaning you can’t change it electronically like a digital camera.
However, you can adjust the ISO manually by setting the camera’s ISO dial to match the ISO rating of the film you’re using (e.g., ISO 100, 400).
If your camera doesn’t have an ISO dial, you’ll need to rely on the film’s ISO rating and adjust your exposure settings (aperture and shutter speed) accordingly. Additionally, you can push or pull process the film during development to simulate a higher or lower ISO.
How to adjust settings on film camera for beginners
For beginners, adjusting settings on a film camera starts with understanding the three key elements: ISO, aperture, and shutter speed. First, set the ISO based on the film you’re using (e.g., ISO 200 for bright daylight).
Next, adjust the aperture (f-stop) to control how much light enters—use a smaller f-stop (e.g., f/2.8) for low light or a shallow depth of field, and a larger f-stop (e.g., f/16) for bright conditions or more depth of field.
Finally, set the shutter speed: faster speeds (e.g., 1/500s) freeze motion, while slower speeds (e.g., 1/60s) capture movement. Use your camera’s light meter to balance exposure.
How to adjust settings on film camera reddit
On Reddit, many film photography enthusiasts recommend adjusting your film camera settings based on the “Sunny 16 Rule” for beginners.
Set your aperture to f/16 on a sunny day, and match your shutter speed to your film’s ISO (e.g., ISO 400 film → 1/400s shutter speed).
Adjust for different lighting: use a wider aperture (e.g., f/2.8) for low light or portraits, and slower shutter speeds (e.g., 1/60s) for motion or dim conditions.
Always check your camera’s ISO dial to match the film and consider the light meter (if available) for exposure accuracy. Reddit users often suggest experimenting with settings for better results.
How to adjust settings on film camera iphone
To adjust settings on a film camera using an iPhone, you’ll likely need a third-party app that simulates manual camera settings. Apps like Filmic Pro allow you to control ISO, shutter speed, and focus. Set the ISO to match the lighting: lower for bright conditions and higher for low light. Adjust shutter speed to control motion blur—faster speeds freeze motion, while slower speeds capture movement. Use the app’s manual focus for more creative control.
These apps mimic the flexibility of a film camera, allowing you to experiment with settings for a more authentic film look on your iPhone.
How to adjust settings on film camera nikon
To adjust settings on a Nikon film camera, start by setting the ISO based on the film you’re using. Use the ISO dial to match the film’s ISO rating (e.g., ISO 400).
Next, adjust the aperture using the lens’s aperture ring—smaller f-stop numbers (e.g., f/2.8) let in more light and create a shallow depth of field, while larger f-stop numbers (e.g., f/16) reduce light and increase depth of field.
Set the shutter speed using the camera’s dial—faster speeds (e.g., 1/500s) freeze motion, while slower speeds (e.g., 1/60s) allow motion blur. Use the light meter to check exposure.
How to adjust settings on film camera canon
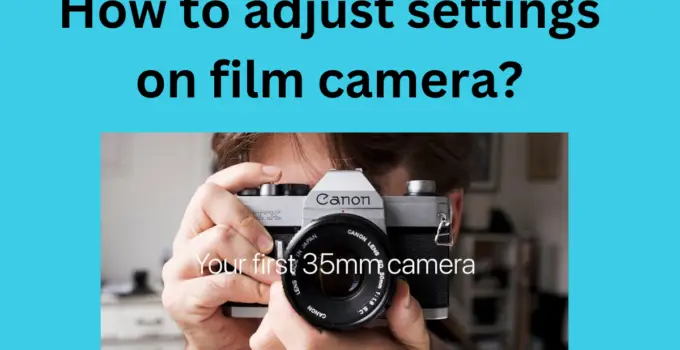
To adjust settings on a Canon film camera, start by setting the ISO to match the film you’re using. The ISO is typically set using a dial on the camera’s top.
Adjust the aperture using the lens’s aperture ring—larger apertures (e.g., f/2.8) allow more light for low-light conditions and create a shallow depth of field, while smaller apertures (e.g., f/16) are better for bright environments.
Set the shutter speed using the camera’s dial; faster speeds (e.g., 1/500s) freeze motion, while slower speeds (e.g., 1/60s) capture motion blur. Use the light meter to gauge proper exposure.
How to adjust settings on film camera canon
Film camera settings cheat sheet
For a 35mm film camera, settings depend on lighting and your creative intent.
Start by setting the ISO to match the film (e.g., ISO 100 for bright conditions or ISO 400 for versatility). Adjust the aperture (f-stop) based on desired depth of field: use a wide aperture (e.g., f/2.8) for portraits with blurred backgrounds, and a smaller aperture (e.g., f/16) for landscapes.
Set the shutter speed to control motion; faster speeds (e.g., 1/500s) freeze action, while slower speeds (e.g., 1/60s) capture motion blur. Always check the light meter for proper exposure and adjust as needed.
35mm film camera settings
In conclusion, adjusting the settings on a film camera requires understanding the relationship between ISO, aperture, and shutter speed.
The ISO is determined by the film you’re using and affects the camera’s sensitivity to light. Aperture controls how much light enters and influences depth of field, while shutter speed determines how long the light hits the film, affecting motion and exposure.
By mastering these settings and using a light meter to guide adjustments, you can achieve the desired exposure and creative effects. Experimenting with different combinations of settings will help you improve your film photography skills over time.
Conclusion


