
Are you an avid cyclist looking to capture breathtaking moments on your rides? If so, you’ve probably considered attaching a front handlebar camera bag to your bike.
But how exactly do you go about it? Fret not, for we have the solution you need. In just a few simple steps, you can secure your camera bag and hit the road with confidence, knowing that your valuable equipment is within easy reach.
So, whether you’re planning an epic mountain biking adventure or a leisurely city tour, we’ve got you covered.
To attach your front handlebar camera bag, start by selecting a bag specifically designed for this purpose. Look for one with secure attachment straps and a sturdy mounting system.
Once you have the right bag, position it on your handlebars, ensuring it doesn’t interfere with your cycling or obstruct your view.
Then, use the straps to secure it tightly, double-checking for stability. With this setup, you can now focus on capturing stunning footage while enjoying your ride to the fullest.
But wait, there’s more! In our comprehensive guide on attaching camera bags to handlebars, we’ll delve deeper into the topic.
We’ll explore different bag options, provide detailed step-by-step instructions, and even offer valuable tips from expert cyclists.
So, whether you’re a seasoned cyclist or a beginner exploring the world of bike photography, join us as we embark on this exciting journey together.
Don’t miss out on the chance to elevate your cycling adventures and capture memories like never before.
Let’s dive in and unlock the full potential of your front handlebar camera bag! Here if you want to protect your camera bag with plastic.
How to attach my front handlebar camera bag? (8 hidden steps revealed)
Here take a look at 8 step on how to attach your front handlebar camera bag.
Step 1: Choose the Right Camera Bag
Before attaching the camera bag, it’s important to select the right one that suits your needs. Consider factors such as size, capacity, mounting system, and waterproofing.
Ensure the bag has enough space for your camera and any additional accessories, a secure mounting system to keep it in place, and protection against water damage.
Step 2: Gather the Necessary Tools
To attach the camera bag, you’ll need a few basic tools. These may include Allen wrenches, zip ties, or other fastening accessories. Make sure you have everything ready before you begin the installation process to avoid any delays or interruptions.
Step 3: Adjust the Handlebar Height
Check the height of your handlebars and make adjustments if necessary. You’ll want to have enough clearance between the camera bag and the bike’s frame or other components to ensure a secure fit.
Follow the manufacturer’s instructions or consult a professional if you’re unsure how to adjust the handlebar height.
Step 4: Position the Camera Bag
Start by positioning the camera bag on the handlebars. Most camera bags are designed to be attached in the center or slightly off-center to maintain balance and stability.

Find a location that provides easy access to your camera’s controls while allowing for a clear view of the road ahead.
Here you can check out how to store a dslr camera bag?
Step 5: Secure the Camera Bag
Once you have positioned the camera bag, it’s time to secure it in place. Depending on the mounting system of your bag, there are different methods you can use:
Method 1: Adjustable Straps
If your camera bag comes with adjustable straps, wrap them around the handlebars and pull them tight. Ensure the straps are securely fastened but not overly tightened, as this could cause discomfort or affect the bike’s handling.
Method 2: Clamp Mechanism
Some camera bags feature a clamp mechanism that attaches directly to the handlebars.
Follow the manufacturer’s instructions to properly position and secure the clamp. Use the provided screws or fasteners to tighten the clamp securely without over-tightening.
Method 3: Custom Mounting System
In some cases, the camera bag may come with a custom mounting system designed specifically for your bike model.
Refer to the instructions provided with the bag to install the custom mount securely. Make sure to follow the manufacturer’s guidelines to ensure a proper and stable attachment.
Step 6: Ensure Stability and Safety
Once the camera bag is attached, double-check its stability and safety. Give it a gentle tug and ensure it doesn’t move or wobble excessively. Test the stability by simulating the movements you would encounter during a ride, such as turning, braking, and riding on rough terrain. If the bag feels loose or unstable, adjust the straps or mounting system accordingly until it’s secure.
Step 7: Test the Bag’s Functionality
Before heading out on your ride, test the functionality of the camera bag. Ensure that you have easy access to your camera’s controls and buttons while it’s inside the bag.
Test the bag’s opening and closing mechanism to ensure smooth operation. Take a short test ride to verify that the bag doesn’t interfere with your riding experience or obstruct your view.
Herr you can check out how to pack a canon camera bag?
Step 8: Maintenance and Care
To ensure your front handlebar camera bag stays in optimal condition, regularly check the attachment straps and mounting system for security and wear.

Keep it clean by wiping off dirt after each ride and consider applying a waterproofing treatment for added protection. Store the bag in a safe place when not in use.
Here if you want to know what are the USB cords in camera bag.
Let’s move to some related faq’s.
Related faq’s
How do you attach a bag to handlebars?
To attach a bag to your bicycle’s handlebars, you have a few options depending on the type of bag and your bike setup. Here are some common methods:
- Handlebar Bag with a Mounting System:
- Many handlebar bags come with a mounting system that attaches directly to your handlebars. Typically, these bags have straps or a bracket that securely fastens them to the handlebars.
- Follow the manufacturer’s instructions to mount the bag onto your handlebars. This may involve wrapping straps around the handlebars or attaching a bracket to the stem or handlebar clamp.
- Handlebar Bag with Straps or Velcro:
- If your bag doesn’t have a dedicated mounting system, it might come with straps or Velcro closures.
- Wrap the straps or Velcro around the handlebars, making sure they are secure. Adjust the straps as needed to achieve a tight fit and prevent the bag from shifting during your ride.
-
DIY Solutions:
- If you have a bag that doesn’t come with any attachments, you can improvise by using bungee cords, adjustable straps, or zip ties.
- Loop the bungee cords, straps, or zip ties around the handlebars and secure them tightly. Then, attach the bag to these makeshift fasteners, ensuring it is stable and won’t interfere with your steering.
Remember to ensure that the bag is securely attached and doesn’t obstruct your view or access to the bike’s controls.
Test the stability of the bag by giving it a gentle tug before heading out on your ride. Additionally, be mindful of the weight and balance of the bag to maintain safe and stable handling of your bicycle.
How do you carry a camera bag on a bike?
Carrying a camera bag on a bike requires careful consideration to protect your equipment and ensure a comfortable and safe ride. Here are a few methods to carry a camera bag on a bike:
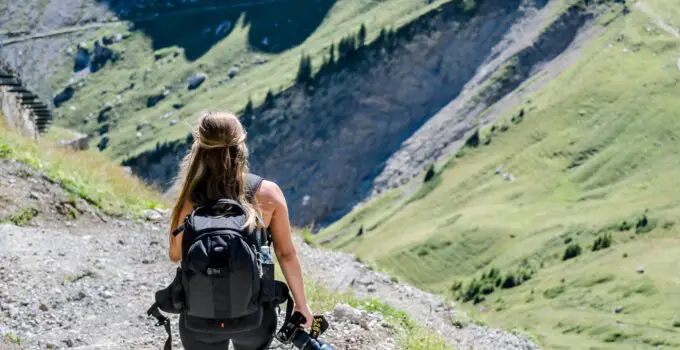
- Backpack:
- Using a backpack designed specifically for cameras is a popular option. Look for a camera backpack that provides padded compartments and dividers to protect your gear.
- Wear the backpack on your back while riding. Adjust the straps to ensure a secure and comfortable fit. Make sure the backpack doesn’t restrict your movement or interfere with your ability to maintain control of the bike.
- Handlebar Bag:
- Some camera bags are designed specifically to attach to your bike’s handlebars. These bags typically have padding and compartments to protect your camera gear.
- Follow the instructions provided with the handlebar bag to securely attach it to your handlebars. Ensure it is stable and doesn’t interfere with your ability to steer the bike or access the controls.
- Frame Bag or Top Tube Bag:
- Frame bags or top tube bags are small bags that attach to the frame of the bike, usually positioned between the handlebars and saddle.
- These bags can accommodate smaller camera setups or accessories. Ensure that the bag is securely attached and doesn’t interfere with your pedaling or leg movement.
- Panniers or Rear Rack:
- If you have a rear rack installed on your bike, you can use panniers or bags designed for bicycle touring to carry your camera equipment.
- Look for panniers that offer padding or use padded inserts to protect your gear. Ensure that the bags are securely attached to the rear rack to maintain stability while riding.
Regardless of the method you choose, it’s important to secure your camera bag properly to prevent it from shifting or falling during the ride.
Additionally, consider using protective cases or wraps for your individual camera and lenses to further safeguard them from any potential impacts or vibrations while cycling.
How do you attach an Ortlieb front bag?
To attach an Ortlieb front bag, such as the Ortlieb Front-Roller or Ortlieb Ultimate Six, follow these steps:
- Mounting Hardware:
- Ensure that your bike is equipped with a front rack or a compatible mounting system designed to fit the Ortlieb bag.
- The Ortlieb front bags usually come with mounting hardware, such as hooks or brackets, specific to their design. Locate these components.
- Positioning the Bag:
- Decide on the desired placement of the bag on your front rack or handlebars. Keep in mind that the bag should not interfere with your bike’s steering or your ability to access the controls.
- Place the bag on the front rack or handlebars, aligning it with the mounting points.
- Attaching the Hooks/Brackets:
- Ortlieb bags typically use a hook-based attachment system. The hooks should be located on the backside of the bag.
- Hook the bag’s attachment points onto the front rack or handlebars, ensuring they are securely engaged.
- Adjusting and Securing:
- Once the hooks are attached, adjust the bag’s position if needed to achieve a balanced and secure fit.
- Make sure the bag is evenly positioned on the rack and is not tilted or hanging too low.
- Additional Security:
- Some Ortlieb bags include additional straps or fasteners to enhance stability and prevent movement while riding.
- If your bag has such features, use them according to the manufacturer’s instructions to further secure the bag in place.
- Test and Adjust:
- Before heading out on your ride, test the bag’s stability by gently shaking or tugging it. Ensure that it remains securely attached and doesn’t sway or interfere with your bike’s handling.
It’s important to consult the specific instructions provided by Ortlieb for your particular bag model, as the attachment methods may vary slightly.
Following the manufacturer’s guidelines will ensure the correct installation and maximize the bag’s stability and functionality during your bike rides.
Conclusion:
In conclusion, attaching your front handlebar camera bag is a straightforward process that ensures convenience and safety during your cycling adventures.
Start by selecting a bag that is designed specifically for handlebar attachment, ensuring a secure fit. Position the bag in a way that doesn’t obstruct your vision or interfere with your bike’s controls.
Utilize the provided straps or mounting systems to securely fasten the bag to your handlebars, ensuring it is tightly secured.
Remember to distribute the weight evenly to maintain balance and stability while riding. By following these steps, you’ll have your camera bag securely attached, ready to capture stunning footage as you explore the world on two wheels.


