How to carry camera gear in hiking bag?
Are you an outdoor enthusiast who loves capturing stunning landscapes and wildlife on your hikes?
Carrying camera gear in a hiking bag can be a challenge, but with the right approach, you can ensure your equipment stays safe and accessible.
Properly organizing your camera gear not only protects it from the elements but also makes it easier to retrieve your gear when you spot the perfect shot.
In this guide, we’ll explore effective strategies for packing your camera equipment, choosing the right bag, and keeping everything secure while you navigate the trails. Let’s dive in!
Here what’s the difference between billingham fibernyte and canvas?
Can you carry camera gear in hiking bag
Yes, you can carry camera gear in a hiking bag, but there are a few important considerations to ensure your equipment stays safe and accessible.
Choosing the Right Bag
- Padded Compartments: Look for a hiking bag with padded sections or a dedicated camera insert to protect your gear from impacts.
- Water Resistance: Opt for a water-resistant or waterproof bag to shield your camera from rain or moisture.
Organization
- Dividers: Use customizable dividers or padded pouches to keep lenses and accessories organized and secure.
- Accessibility: Ensure that the bag allows easy access to your camera without needing to remove it completely, so you can capture spontaneous moments.
Weight Distribution
- Comfort: Choose a bag with adjustable straps and a hip belt to distribute weight evenly, reducing strain on your back during hikes.
By selecting the right hiking bag and organizing your gear thoughtfully, you can enjoy photography while exploring the outdoors.
What to carry in a hiking bag?
When packing a hiking bag, it’s essential to include items that ensure both safety and comfort during your adventure.
Start with the basics: water and a water filtration system or purification tablets to stay hydrated.
Here, how do you support a heavy camera lens?
Add lightweight, high-energy snacks like granola bars or trail mix for quick fuel. A first-aid kit is crucial for handling minor injuries, while a multi-tool can be handy for various tasks.
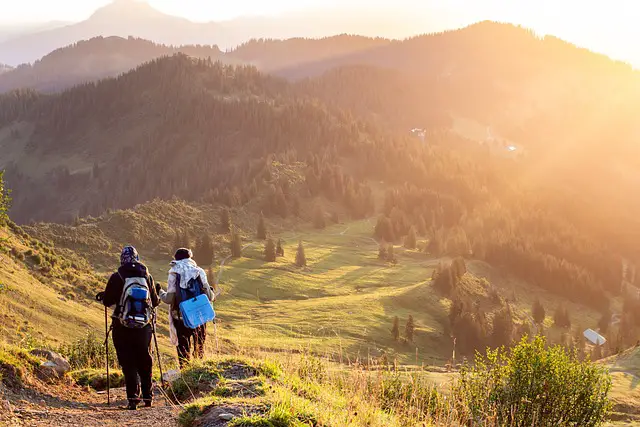
Layered clothing is important; pack an extra layer for warmth and a waterproof jacket in case of rain.
Don’t forget navigation tools like a map and compass or a GPS device, and consider bringing a portable charger for your electronics.
If you’re carrying camera gear, ensure it’s securely padded. Lastly, include a headlamp or flashlight for visibility in low-light situations.
By thoughtfully organizing these essentials, you’ll be well-prepared for a safe and enjoyable hiking experience.
Things to know before carrying camera gears in hiking bag
Before carrying camera gear in a hiking bag, there are several key considerations to keep in mind to protect your equipment and enhance your photography experience.
First, choose a hiking bag that has adequate padding and customizable compartments to prevent your camera and lenses from shifting or getting damaged during the hike.
Consider the weight of your gear; bringing heavy equipment can lead to fatigue, so prioritize essential items and opt for lightweight options when possible.
Weather is another important factor; pack protective covers for your camera and lenses to shield them from rain, dust, or dirt.
Plan your shooting strategy by identifying the best spots for photography along your route, ensuring you can capture the scenery without extra strain.
Lastly, familiarize yourself with quick access points in your bag to grab your camera swiftly for unexpected photo opportunities. Being prepared will help you enjoy both hiking and photography.
How to carry camera gear in hiking bag?
Carrying camera gear in a hiking bag requires careful planning to ensure safety and accessibility.
First, select a hiking bag with a dedicated camera compartment or insert that provides ample padding to protect your gear from bumps and shocks.
Use dividers or padded cases to organize your camera, lenses, and accessories, preventing them from moving around.
When packing, place heavier items, like your camera body, closer to your back for better weight distribution. Utilize side pockets for smaller items, such as filters or batteries, for easy access.
Here, how do you unwrinkle a prade nylon camera bag?
Ensure the bag is comfortable by adjusting the straps and using a hip belt to distribute weight evenly, minimizing strain on your shoulders. Consider adding a rain cover for the bag to protect your gear from unexpected weather.
Lastly, practice accessing your camera quickly, so you’re ready to capture moments without delaying your hike. This approach helps you enjoy both photography and the great outdoors.
7 Tips to carry camera gear in hiking bag
How to carry camera gear in hiking bag?- Here take a look at 7 tips.
1. Choose a Camera-Specific Bag
Opt for a hiking bag designed with dedicated compartments for camera gear. These bags often come with padded, customizable dividers that protect your camera body, lenses, and accessories from impacts and bumps.
A well-designed camera bag will help keep your gear organized, reducing the risk of damage and making it easier to access your equipment quickly.
When selecting a bag, consider one with additional features such as weather-resistant materials and easy-access pockets.
The right bag will ensure that your camera gear remains secure and easily reachable, which is crucial for capturing spontaneous moments during your hike.
Additionally, a camera-specific bag often has ergonomic features like adjustable straps and a hip belt to distribute weight evenly, making your hiking experience more comfortable.
Here, how to clean manfrotto camera bag?
2. Use Protective Pouches and Cases
Invest in protective pouches or cases for individual camera components.
Padded lens cases and waterproof covers can shield your gear from physical damage and environmental factors like rain and dust.
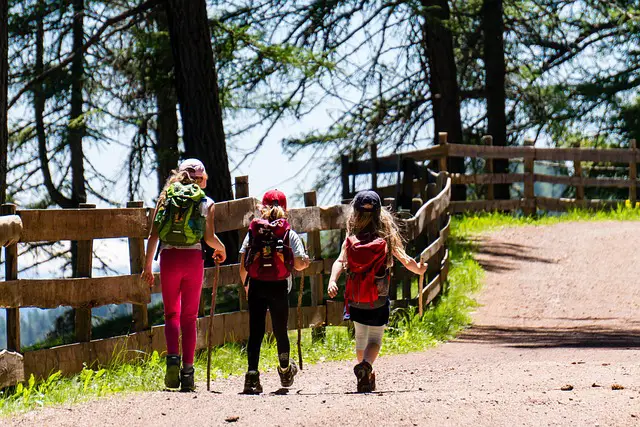
By using these accessories, you can add an extra layer of protection against scratches, impacts, and moisture. Place each lens and accessory in its dedicated pouch or case before packing them into your hiking bag.
This organization helps to prevent any potential damage that could occur from the gear rubbing against each other or from accidental drops.
Additionally, protective pouches make it easier to find and access specific items quickly, which is essential for capturing the perfect shot during your hike.
3. Balance Weight Distribution
Proper weight distribution is crucial for comfort and stability when hiking with camera gear.
Pack heavier items, such as your camera body, closer to your back to maintain balance and reduce strain on your shoulders and hips. Place lighter items like batteries and memory cards in outer pockets or smaller compartments.
Ensuring that the weight is evenly distributed helps prevent fatigue and allows you to hike more comfortably.
Adjust the straps and hip belt of your bag to fit your body snugly and evenly distribute the load.
A well-balanced bag will help you maintain good posture and stability on uneven terrain, making your hiking experience more enjoyable and less physically taxing.
4. Secure Gear with Dividers
Using dividers within your hiking bag helps to keep your camera gear organized and secure.
Customizable dividers allow you to create compartments tailored to your specific equipment, reducing the risk of items shifting or colliding.
Arrange your gear in a way that ensures stability, with heavier items placed at the bottom and smaller, lighter items on top. Secure each component with adjustable dividers to prevent movement during your hike.
Proper organization not only protects your gear but also makes it easier to find and access specific items quickly.
This setup is especially useful for fast-paced hikes or when you need to capture spontaneous shots without delay.
5. Protect Against Weather
Weather protection is essential for preserving the integrity of your camera gear during hikes. Use a rain cover designed for your hiking bag to shield it from rain, snow, and moisture.
Here, is it safe to pack camera bag inside a camera when going through the airpot security?
Additionally, consider using lens and camera body covers to provide extra protection against the elements.
When hiking in unpredictable weather conditions, having these protective measures in place can prevent water damage, condensation, and other weather-related issues that could affect your equipment.
Ensure that all covers fit securely and are easy to deploy quickly if the weather changes suddenly. Proper weather protection allows you to focus on capturing great shots without worrying about potential damage to your gear.
6. Optimize Access Points
Choose a hiking bag with convenient access points for your camera gear. Some bags feature side or top openings that allow you to quickly reach your camera without removing the entire pack.
This is especially important when you need to capture spontaneous or fleeting moments. Ensure that the access points are secure and easy to open while on the move.
Practicing accessing your camera through these openings before your hike will help you become familiar with the process, making it more efficient during your adventure.
Efficient access points can significantly enhance your ability to capture photos quickly and seamlessly while navigating challenging terrain.
7. Carry Essential Extras
In addition to your camera gear, carry essential extras to enhance your hiking experience and ensure you’re prepared for any situation.
Pack extra batteries, memory cards, and a lens cleaning kit to keep your equipment functioning optimally. A small tripod or selfie stick can be useful for capturing stable shots or group photos.
Also, consider including a portable charger for your electronics and a small multi-tool for any unexpected repairs or adjustments.
These extras will ensure that you’re well-prepared for various scenarios and can make the most of your photography opportunities while hiking.
Being prepared with these essentials will contribute to a smoother and more enjoyable hiking experience.
7 Steps to carry camera gear in hiking bag
1. Choose the Right Bag
Selecting a hiking bag designed for camera gear is the first step. Look for one with padded compartments and customizable dividers to protect your camera and lenses.
Here, 10 best shimoda camera bag?
Ensure the bag is lightweight and has weather-resistant materials to shield against rain or dust. Features like adjustable straps and a hip belt are essential for comfort and proper weight distribution.
A camera-specific bag will make accessing your gear easier and provide better organization during your hike, helping to ensure that your equipment remains secure and ready for spontaneous photography.
2. Organize Your Gear
Before packing, organize your camera gear based on usage and importance.
Separate items like your camera body, lenses, and accessories into distinct categories. Use padded pouches or cases for fragile items, such as lenses, to prevent damage.
Arrange your gear so that the heaviest items are packed closest to your back, which will improve balance and stability.
A well-organized bag allows for quicker access to essential items while minimizing the risk of damage, ensuring that you can focus on capturing the best shots during your hike.
3. Use Protective Covers
Utilizing protective covers for your camera gear is crucial, especially when hiking in varying weather conditions.
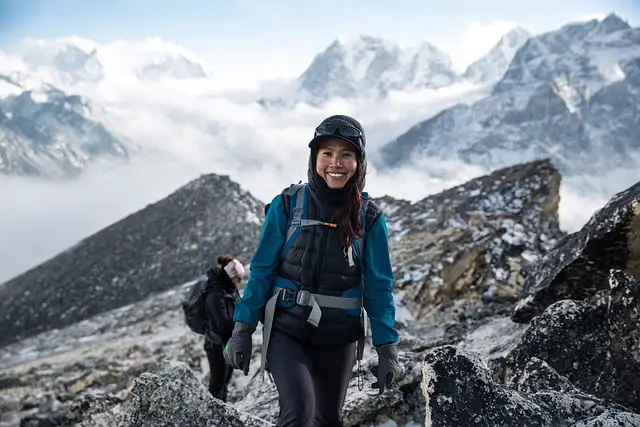
Invest in rain covers for your hiking bag and individual lens and camera body covers to shield against moisture, dirt, and debris. These covers can help prevent damage from unexpected rain or dust during your hike.
Ensure that the covers are easy to deploy and fit snugly over your equipment.
Being proactive about protection will give you peace of mind, allowing you to concentrate on enjoying your hike and capturing memorable moments.
4. Pack for Weight Distribution
Proper weight distribution is essential for comfort while hiking with camera gear.
Place heavier items, like your camera body, closest to your back to maintain balance and reduce strain on your shoulders.
Lighter items, such as batteries and memory cards, should be placed in outer pockets or smaller compartments. Adjust the straps and hip belt to ensure that the load is evenly distributed across your body.
A well-balanced pack will help you maintain good posture and stability on uneven terrain, making your hiking experience more enjoyable and less physically taxing.
5. Secure with Dividers
Using dividers within your hiking bag is an effective way to keep your camera gear organized and secure.
Customizable dividers allow you to create tailored compartments that prevent your equipment from shifting during your hike. Arrange your gear so that heavier items are at the bottom and lighter items are on top.
Make sure the dividers are adjustable to accommodate different gear sizes.
This organization not only protects your gear but also makes it easier to find and access specific items quickly, enhancing your overall hiking and photography experience.
6. Plan for Quick Access
Planning for quick access to your camera gear is essential during hikes. Choose a bag with side or top openings that allow you to reach your camera without removing the entire pack.
This design is particularly useful for capturing spontaneous moments without missing opportunities. Practice accessing your camera through these openings before your hike to ensure you can do so efficiently.
Quick access points will enhance your ability to take photos promptly, allowing you to enjoy the hike while remaining ready to capture the beauty around you.
7. Carry Essentials and Extras
In addition to your camera gear, include essential extras to enhance your hiking experience. Pack extra batteries and memory cards to avoid running out of power or storage.
Here, for shoulder pain what kind of camera bag?
A lens cleaning kit will help you maintain your gear’s functionality in various conditions. Consider carrying a portable charger for your devices and a small multi-tool for unforeseen adjustments.
These extras will prepare you for a range of scenarios, ensuring you can make the most of your photography opportunities while hiking. Being well-prepared contributes to a smoother and more enjoyable experience.
5 Methods to carry camera gear in hiking bag
1. Use a Camera Insert or Modular System
A camera insert or modular system is a versatile method for carrying camera gear in a hiking bag.
These inserts are padded, removable compartments designed specifically for camera equipment, providing structured protection and organization.
They can be adjusted to fit various sizes of gear and can be placed inside any compatible hiking bag. This method allows you to use your preferred hiking bag while still keeping your camera gear safe and accessible.
The modular nature means you can rearrange the dividers to accommodate different gear setups, making it a flexible solution for various hiking and photography needs.
Additionally, the insert can be removed and used independently or transferred to another bag, offering convenience and adaptability for different outdoor adventures.
2. Use a Dedicated Camera Backpack
A dedicated camera backpack is designed specifically for carrying photography gear while hiking.
These backpacks come with built-in, padded compartments and dividers to protect your camera, lenses, and accessories. They often include features such as weather-resistant materials, easy-access pockets, and ergonomic straps for comfort and stability.
By using a camera-specific backpack, you ensure that your gear is well-organized and protected from physical impacts and environmental conditions.
Some models also offer quick access points, allowing you to retrieve your camera swiftly without fully removing the backpack.
This specialized design helps maintain a balance between carrying comfort and gear protection, making it ideal for serious photographers who hike regularly.
3. Utilize Lens and Camera Pouches
Lens and camera pouches are an effective method for carrying individual components of your camera gear. These pouches are often padded and come in various sizes to fit different lenses and camera bodies.
By using separate pouches, you can organize and protect each item individually, reducing the risk of damage from impacts or scratches.
Here, how to add camera padding to bag?
The pouches can be secured inside a larger hiking bag or attached externally with clips or straps for quick access.
This method allows for flexible packing arrangements and easy access to specific items without having to unpack your entire bag.
Additionally, lens pouches often have waterproof or weather-resistant features to safeguard your equipment from environmental elements.
4. Implement a Camera Sling or Chest Harness
A camera sling or chest harness is a convenient method for carrying your camera while hiking.
These systems are designed to hold your camera securely and allow for quick, easy access without needing to remove a backpack.
The sling is worn across one shoulder and chest, or the chest harness is worn around the torso, both providing secure attachment points for your camera.
This method is particularly useful for capturing spontaneous shots while keeping your hands free for other tasks. It distributes the weight of the camera more evenly and can be adjusted for comfort.
For added protection, ensure the harness or sling has padded areas and adjustable straps to fit securely and comfortably during your hike.
5. Use a Hydration Pack with Camera Compartments
A hydration pack with camera compartments is a practical solution for carrying camera gear along with hydration essentials.
These packs feature built-in compartments specifically designed to house a camera and lenses, in addition to a reservoir for water. This dual-purpose pack allows you to stay hydrated while keeping your camera gear protected and easily accessible.
The camera compartments are usually padded and can include dividers to organize your equipment effectively. This method is ideal for long hikes where hydration and camera accessibility are equally important.
The combination of water storage and gear protection makes it a versatile option for photographers who want to streamline their hiking gear while ensuring they have everything they need for both adventure and photograpy.
5 Benefits to carry camera gear in hiking bag
To those who bring a DSLR on long backpacking trips, how do you carry it?
Carrying a DSLR on long backpacking trips requires careful planning to ensure safety and accessibility.
First, invest in a padded camera insert that fits inside your backpack, providing protection from impacts and moisture. This insert should have customizable dividers to secure your camera body and lenses.
When packing, position the heavier camera closer to your back for better weight distribution.
Use additional padded pouches for extra lenses and accessories, keeping them organized and protected.
Opt for a backpack with side or top access, allowing you to retrieve your camera quickly without fully unpacking.
Ensure your backpack has comfortable, adjustable straps and a hip belt to distribute weight evenly, minimizing strain during long hikes.
Consider using a lightweight tripod or a camera sling for quick access while maintaining mobility.
Finally, practice proper techniques for storing and securing your camera to prevent accidental damage while navigating challenging terrain.
Related faq’s
Hiking photographers, what do you use to carry your camera around while hiking?
As a hiking photographer, I use a dedicated camera backpack designed for outdoor adventures.
It features padded compartments to protect my camera and lenses, ensuring they’re secure during the hike.
I also utilize lens pouches for additional protection and organization. For quick access, I often carry my camera on a sling strap, allowing me to grab it swiftly without removing my backpack.
On longer hikes, I may bring a lightweight tripod for stability in capturing shots.
This setup ensures that I can carry my gear comfortably while remaining ready to capture beautiful moments in nature.
How do you carry your DSLR when hiking and camping for easy access?
When hiking and camping with a DSLR, I carry it using a camera sling strap, which allows for quick and easy access while keeping my hands free.
I ensure the camera is securely attached to the strap so I can quickly lift it to take photos. Additionally, I pack my DSLR in a padded camera insert within my backpack to protect it from impacts.
Choosing a backpack with side access makes retrieving the camera even easier without having to take the pack off completely.
Here, 10 best stylish DSLR camera bag?
This combination provides protection and quick accessibility for capturing spontaneous moments during my outdoor adventures.
What are some good ways to carry camera equipment on significant through hikes or more than two weeks?
For significant through hikes lasting more than two weeks, consider using a specialized camera backpack designed for extended trips, featuring ample padding and weather-resistant materials.
A camera insert with adjustable dividers can keep your gear organized and protected. Use lightweight, compact lenses to minimize weight, and carry extra batteries and memory cards for reliability.
A hydration pack with a camera compartment can provide easy access to water while keeping your gear safe. Additionally, consider using a sling strap for quick access during day hikes.
Regularly check and secure your equipment to ensure everything stays safe and functional throughout the journey.
Question for hikers / active people — how do you carry your gear around?
As an active person, I carry my gear using a versatile and comfortable backpack designed for outdoor activities.
I ensure it has padded straps and a hip belt for even weight distribution, making it easier to hike for extended periods.
For quick access, I choose a bag with side pockets and top openings, allowing me to grab essential items without unpacking everything. I also use smaller pouches or packing cubes to organize my gear, ensuring that everything is easy to find.
Additionally, I secure hydration packs for water access while keeping my hands free for other tasks, enhancing my overall experience.
Conclusion
Carrying camera gear in a hiking bag requires careful planning and organization to ensure both protection and accessibility.
By choosing a suitable bag with padded compartments, using protective pouches, and optimizing weight distribution, you can safeguard your equipment from the elements and impacts.
Implementing quick access points and modular systems will allow you to capture spontaneous moments without hassle.
Prioritizing comfort through adjustable straps and ergonomic designs will enhance your overall hiking experience.
With the right strategies in place, you can enjoy your outdoor adventures while confidently documenting the beauty of nature through your lens.


