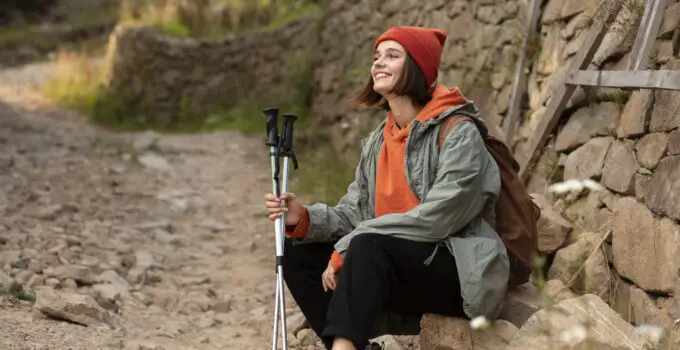
How can you comfortably carry a tripod while hiking without compromising convenience or safety?
For photographers, capturing breathtaking landscapes often requires a stable platform to ensure sharp images, making a tripod an essential piece of gear.
However, its size and weight can pose challenges during a hike.
The key is to find a method that balances accessibility and comfort.
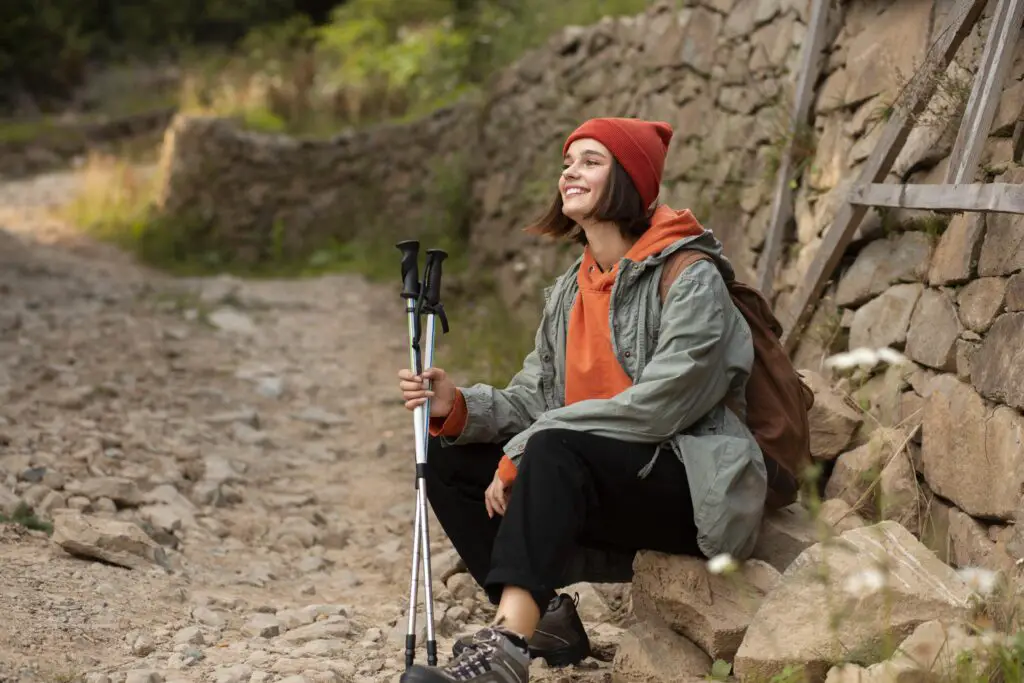
Options range from attaching it to your backpack, using a dedicated tripod carrying system, or opting for a lightweight, collapsible model.
Each approach has its benefits, allowing you to choose the one that best suits your hiking style and photography needs.
Here how to put tripod strap on a camera bag?
Is it safe to carry a tripod while hiking?
Carrying a tripod while hiking is generally safe and can be beneficial for capturing stable, high-quality photos. However, there are a few considerations to keep in mind:
- Weight and Balance: Ensure the tripod is lightweight and doesn’t unbalance your backpack. Distribute weight evenly to avoid strain.
- Attachment: Secure the tripod properly to your backpack, preferably on the side or bottom, to prevent it from shifting or getting caught on branches.
- Durability: Use a sturdy tripod that can withstand rough terrain and weather conditions. Carbon fiber tripods are lightweight and durable.
- Safety: Be mindful of the tripod’s legs when walking to avoid tripping. In crowded trails, be cautious not to hit other hikers with the extended legs.
- Environmental Impact: Avoid placing the tripod in sensitive ecological areas to protect the environment.
By considering these factors, you can safely carry a tripod and enhance your hiking photography.
How to carry a tripod on a hike?
To carry a tripod on a hike, follow these steps for comfort and safety:
- Secure Attachment: Use the straps or loops on your backpack designed for holding tripods. Many hiking backpacks have side straps or daisy chains specifically for this purpose.
- Weight Distribution: Attach the tripod to the side or center of your backpack to maintain balance. Ensure it’s not top-heavy to avoid tipping.
- Fold and Compact: Collapse the tripod to its shortest length and lock the legs. This makes it easier to manage and less likely to snag on branches.
- Padding: Use padding or a protective case to prevent the tripod from being damaged and to avoid it poking you or causing discomfort.
- Easy Access: Ensure the tripod is accessible without unpacking your entire bag, so you can quickly set it up when needed.
By securing and balancing the tripod properly, you can carry it comfortably on your hike.
Here, what size dry bag for camera should you use?
How to carry a tripod while travelling?
Carrying a tripod while traveling involves ensuring convenience, safety, and accessibility. Here’s how:
- Choose the Right Tripod: Opt for a travel-friendly tripod that is lightweight and compact. Carbon fiber models are often ideal for their durability and reduced weight.
- Use a Tripod Bag: Store your tripod in a dedicated tripod bag or case. This provides protection and makes it easier to carry.
- Backpack Attachment: Attach the tripod to your backpack using side straps or loops. Ensure it’s secure and doesn’t shift during movement.
- Inside Luggage: For air travel, place the tripod inside your checked luggage if it’s too long for carry-on requirements. Wrap it in clothing for added protection.
- Carry-On: If allowed, carry the tripod in your carry-on bag for easy access and to avoid potential damage in checked luggage.
- Accessibility: Ensure the tripod is easily accessible for quick setup during travel.
By following these steps, you can carry your tripod safely and conveniently while traveling.
Here, how to put on a tripod strap on a camera bag?
How do you hold a camera while hiking?
Holding a camera while hiking involves ensuring it’s accessible, protected, and comfortable to carry:
- Camera Strap: Use a sturdy, padded camera strap. Wear it across your body or around your neck to distribute the weight evenly and keep the camera within easy reach.
- Camera Clip or Holster: Consider using a camera clip or holster system that attaches to your backpack strap or belt. This keeps the camera secure and ready for quick shots.
- Protective Case: Use a protective case or cover to shield the camera from dust, moisture, and impacts. A weatherproof case is ideal for varied hiking conditions.
- Accessibility: Ensure the camera is easily accessible without needing to remove your backpack. Quick-release straps or clips can facilitate this.
- Secure Grip: When actively using the camera, maintain a secure grip, especially on uneven terrain. Use a wrist strap for added security.
By using these methods, you can hold your camera comfortably and safely while hiking.
Things to know before carrying tripod while hiking
Before carrying a tripod while hiking, consider these essential points:
- Weight and Portability: Choose a lightweight and compact tripod, preferably made of carbon fiber, to reduce the burden and ensure easy transport.
- Durability: Ensure the tripod is durable and can withstand rough terrains and adverse weather conditions. Check for sturdy construction and reliable locking mechanisms.
- Carrying Method: Plan how to carry the tripod. Use backpack straps, side pockets, or a dedicated tripod case to secure it. Ensure it’s balanced to avoid discomfort or unbalancing your pack.
- Quick Setup: Opt for a tripod with a quick setup mechanism, such as flip locks or twist locks, to save time and effort when you need to capture a shot swiftly.
- Environmental Considerations: Be mindful of the environment. Avoid placing the tripod in sensitive areas to protect local flora and fauna.
- Legal Restrictions: Check for any restrictions in the hiking area regarding tripods or photography equipment to ensure compliance.
Considering these factors will help you carry and use your tripod effectively and responsibly while hiking.
Here, how to use camera bag dividers?
How to carry tripod while hiking?
To carry a tripod while hiking, follow these steps for optimal comfort and accessibility:
- Choose the Right Tripod: Select a lightweight, compact, and durable tripod, ideally made of carbon fiber, to minimize the weight burden.
- Backpack Attachment: Secure the tripod to your backpack using built-in side straps, loops, or dedicated tripod holders. Ensure it’s tightly fastened to prevent shifting.
- Balance and Weight Distribution: Attach the tripod to the side or bottom of your backpack to maintain balance. Distribute the weight evenly to avoid strain.
- Protective Measures: Use a protective case or padding to safeguard the tripod from damage and prevent it from poking you or snagging on branches.
- Accessibility: Ensure the tripod is easily accessible for quick setup without having to unpack your entire bag.
- Comfort: Adjust your backpack’s straps to accommodate the added weight and ensure a comfortable fit.
By following these steps, you can carry your tripod comfortably and securely while hiking.
Here, how to clean manfrotto camera bag?
7 Tips to carry tripod while hiking
1. Choose the Right Tripod
Selecting the right tripod for hiking is crucial. Opt for a lightweight and compact model, preferably made from carbon fiber. These materials provide a good balance between strength and weight.
A lighter tripod will reduce the overall load you carry, making your hike more enjoyable.
Look for a model that can collapse to a small size, fitting easily in or on your backpack.
Also, consider the tripod’s maximum load capacity to ensure it can support your camera and lens setup. Features like quick-release plates and adjustable legs can add convenience during use.
2. Use a Secure Attachment Method
How you attach the tripod to your backpack significantly impacts your comfort and safety.
Use the backpack’s built-in tripod holder, side straps, or daisy chains to secure it.
Ensure the tripod is tightly fastened to prevent it from shifting or swinging, which can throw off your balance and increase the risk of falls.
Some backpacks come with dedicated tripod carrying systems that offer better security and ease of access. A secure attachment method also protects the tripod from damage and makes it easier to carry.
3. Distribute Weight Evenly
Balancing the load is vital for a comfortable hiking experience. Attach the tripod in a way that evenly distributes the weight.
Here, how to make a spy camera bag?
Placing it on the side or bottom of your backpack can help maintain balance and prevent strain on your back and shoulders. If the tripod is on one side, balance the other side with a water bottle or similar weight.
An evenly distributed load reduces fatigue and the risk of injury, allowing you to hike longer and more comfortably.
4. Use a Protective Case
Using a protective case or padded cover for your tripod can safeguard it against bumps, scratches, and the elements.
A case with weather-resistant materials protects the tripod from rain, dust, and dirt. This is especially important when hiking in rugged terrains or adverse weather conditions.
The case can also prevent the tripod from poking into your back or catching on branches. Look for a case with a shoulder strap or attachment points for added versatility in how you carry it.
5. Ensure Easy Accessibility
Quick access to your tripod is essential for capturing spontaneous moments.
Attach the tripod in a manner that allows you to easily reach it without unpacking your entire bag. Side attachments or quick-release systems can be beneficial.
Here, how to clean a tenba polyethelene camera bag?
Practice removing and setting up the tripod swiftly to minimize the time spent fiddling with gear and maximize the time spent enjoying and photographing your surroundings.
Easy accessibility ensures you’re always ready to capture the perfect shot.
6. Adjust Your Backpack
Adjusting your backpack’s straps and settings to accommodate the additional weight of the tripod is crucial for comfort.
Ensure the shoulder straps, hip belt, and sternum strap are snug and properly positioned to distribute the load evenly.
A well-adjusted backpack can significantly reduce the strain on your shoulders and back, making your hike more enjoyable. Periodically check and adjust the straps during your hike, especially if you feel discomfort.
A well-fitted backpack also enhances stability, preventing the tripod from causing imbalance.
7. Be Mindful of Your Surroundings
When carrying a tripod, be extra cautious of your surroundings to avoid accidents and damage to your equipment.
Watch out for low branches, narrow paths, and rocky terrains where the tripod could snag or cause you to trip.
When setting up the tripod, choose stable, flat surfaces to prevent it from tipping over. Being mindful of your environment helps protect your gear and ensures your safety.
Additionally, respect local wildlife and natural features by minimizing disturbances and leaving no trace.
7 Steps to carry tripod while hiking
1. Choose a Lightweight Tripod
Select a tripod made from lightweight materials such as carbon fiber or aluminum.
These materials reduce the overall weight you have to carry, making your hike more comfortable.
Ensure the tripod is also compact, with legs that fold down to a small size, which helps in easily attaching it to your backpack without taking up too much space.
Lightweight tripods are easier to handle and less likely to cause fatigue during long hikes.
Here, how do you support a heavy camera lens?
2. Secure the Tripod to Your Backpack
Attach the tripod to your backpack using side straps, loops, or a dedicated tripod holder. Ensure it’s tightly fastened to prevent it from moving around, which could disrupt your balance.
Properly securing the tripod also protects it from damage and makes your hike safer by avoiding accidental trips or falls caused by loose equipment.
A well-secured tripod allows for hands-free hiking, keeping you agile and comfortable.
3. Balance the Load
Distribute the weight evenly by placing the tripod on one side and balancing the other side with a water bottle or other gear. This helps maintain your balance and reduces the strain on your back and shoulders.
Balanced weight distribution is crucial for preventing fatigue and discomfort during long hikes, allowing you to enjoy the hike and focus on your photography.
4. Use a Protective Case
A protective case shields your tripod from dust, moisture, and physical damage.
Choose a case with padding and weather-resistant materials to ensure your tripod remains safe in various hiking conditions.
The case also prevents the tripod from poking you or snagging on branches. Investing in a good protective case can extend the lifespan of your tripod and provide peace of mind as you navigate rough terrains.
5. Ensure Easy Access
Attach the tripod in a way that allows quick and easy access. Side attachments or quick-release systems enable you to set up the tripod swiftly when you need to capture a shot.
Easy access is essential for not missing spontaneous photo opportunities, ensuring you’re always ready to take a picture without lengthy setup times.
Practice setting up and packing away your tripod to make this process as efficient as possible.
6. Adjust Your Backpack Straps
Ensure your backpack is properly adjusted to accommodate the added weight of the tripod. Tighten shoulder straps, hip belts, and sternum straps to distribute the load evenly.
Regularly check and adjust the straps during your hike to maintain comfort.
Here, what do you use as a bike camera bag?
A well-adjusted backpack reduces strain on your shoulders and back, making it easier to carry your gear over long distances and varied terrains.
7. Be Mindful of Your Environment
Stay aware of your surroundings to avoid damaging your tripod or causing accidents. Watch out for narrow paths, low branches, and uneven terrain.
When setting up your tripod, choose stable, flat surfaces to prevent it from tipping over.
Being mindful of the environment also includes respecting local wildlife and natural features, ensuring you leave no trace and preserve the beauty of the hiking trail for others.
5 Methods to carry tripod while hiking
1. Backpack Side Straps
Using the side straps of your backpack is a common and effective method for carrying a tripod while hiking.
Most hiking backpacks have adjustable straps on the sides designed to secure items like tripods or trekking poles.
Attach the tripod by tightening these straps around it, ensuring it is firmly in place and won’t shift during your hike.
This method keeps the tripod accessible and balanced, reducing strain on your back.
Additionally, side straps allow for quick setup and pack-away, making it convenient to stop and take photos without needing to remove your backpack.
2. Dedicated Tripod Holder
Some backpacks come with dedicated tripod holders, which provide a secure and balanced way to carry your tripod.
These holders are usually located at the back or bottom of the backpack and come with straps or pockets designed specifically to hold a tripod.
Using a dedicated tripod holder ensures that your tripod is securely fastened and easy to access. It also helps in evenly distributing the weight of your gear, minimizing discomfort during long hikes.
This method is particularly useful for photographers who frequently use their tripod and need quick access.
3. Tripod Holster
A tripod holster is a specialized accessory that attaches to your backpack or belt, allowing you to carry your tripod securely and comfortably.
The holster typically consists of a loop or pouch that holds the tripod legs, with an additional strap to secure the tripod in place.
This method keeps the tripod accessible and evenly distributes the weight across your body.
Here, how to make a bean bag for camera support?
Tripod holsters are convenient for those who need to frequently set up and pack away their tripod, as they provide quick access and easy handling while keeping your hands free for hiking.
4. Inside the Backpack
For added protection, you can carry your tripod inside your backpack.
This method shields the tripod from the elements and potential damage. Place the tripod in the main compartment or a dedicated sleeve, ensuring it is secured to prevent movement.
Using padding or wrapping the tripod in clothing can provide extra protection. Carrying the tripod inside your backpack is ideal for rough terrains or adverse weather conditions, as it keeps the tripod safe and dry.
However, it may not be as accessible as other methods, requiring you to stop and unpack when you need it.
5. Using a Tripod Bag
A tripod bag is a specialized carrying case designed to hold and protect your tripod.
These bags usually come with a shoulder strap, making it easy to carry the tripod separately or attach it to your backpack.
A tripod bag provides added protection from dust, moisture, and physical damage. It also makes transporting the tripod more comfortable by distributing the weight evenly.
This method is ideal for photographers who want extra protection for their tripod and prefer a dedicated carrying solution that can be easily detached when needed.
5 Benefits to carry tripod while hiking
1. Improved Stability for Photography
One of the primary benefits of carrying a tripod while hiking is the improved stability it offers for photography.
A tripod allows you to secure your camera in a fixed position, reducing camera shake and resulting in sharper images. This is especially beneficial when shooting in low-light conditions, where longer exposure times are required.
With a stable base, you can capture high-quality images of landscapes, wildlife, and other subjects without the worry of blur caused by hand movement.
A tripod also enables you to experiment with different angles and compositions, providing creative flexibility during your hike.
Overall, having a tripod enhances your ability to capture stunning photographs, making it an essential tool for any serious outdoor photographer.
2. Versatility in Shooting Angles
Carrying a tripod while hiking significantly enhances your ability to experiment with various shooting angles and perspectives.
With a tripod, you can easily adjust the height and orientation of your camera, allowing for creative compositions that may be challenging to achieve handheld.
Whether you want to shoot from a low angle to capture foreground elements or set the camera at eye level for portraits, a tripod provides the necessary stability to do so.
Additionally, using a tripod enables you to take long-exposure shots of waterfalls or night skies without the risk of camera shake.
This versatility allows you to explore your creativity and capture unique images that showcase the beauty of the natural environment.
3. Enhanced Long-Exposure Capabilities
Carrying a tripod is essential for photographers who wish to take advantage of long-exposure techniques while hiking.
Long-exposure photography involves using slower shutter speeds to capture movement, such as flowing water, clouds, or light trails.
Without a tripod, achieving sharp and clear long-exposure images is nearly impossible due to camera shake.
A tripod provides the stability needed to keep the camera steady over extended periods, allowing you to create stunning effects like silky-smooth waterfalls or star trails in the night sky.
Additionally, using a tripod allows you to explore various exposure times and experiment with creative techniques, enhancing your overall photography skills and producing breathtaking results.
4. Consistent Composition
A tripod helps maintain consistent composition when photographing the same scene multiple times.
This is particularly beneficial when working on projects that require a series of images, such as time-lapse photography or capturing seasonal changes in a specific location.
By securing your camera on a tripod, you can ensure that the framing and angle remain identical across shots, resulting in a cohesive final product. This consistency is vital for storytelling through your images, as it helps convey a clear narrative.
Additionally, it eliminates the guesswork involved in repositioning the camera, allowing you to focus more on adjusting settings and capturing the perfect moment.
5. Reducing Physical Strain
Carrying a tripod can help reduce physical strain during long hikes, especially when using heavier camera equipment.
Instead of holding your camera for extended periods, a tripod allows you to rest your arms and hands while still capturing images.
This can be particularly beneficial when hiking on uneven terrain or during extended outings, where fatigue can set in quickly.
By placing your camera on a tripod, you can maintain better posture and reduce the risk of discomfort or injury.
Additionally, using a tripod can help you take breaks to enjoy the scenery without sacrificing your photography, enhancing the overall hiking experience by balancing exploration and creativity.
Ideas on best way to carry a tripod while hiking?
The best way to carry a tripod while hiking involves a combination of secure attachment, ease of access, and comfort.
One effective method is to use the side straps or tripod holders on your backpack, which are designed to keep your gear stable and balanced.
This method allows for quick access while maintaining a hands-free experience.
For added protection, consider using a padded tripod bag that can be slung over your shoulder or attached to your backpack. A tripod holster is another great option, providing secure storage while allowing easy access.
If you prefer to carry the tripod inside your backpack, ensure it is secured with padding to prevent movement and damage.
Regardless of the method you choose, ensure the tripod is not too heavy and is well-balanced to prevent strain on your back and shoulders, allowing for a comfortable hiking experience while you capture stunning landscapes.
Related faq’s
Attaching tripod to backpack…your solutions?
To attach a tripod to your backpack, utilize the built-in side straps or daisy chains if available. Secure the tripod by threading the straps through the legs and tightening them to prevent movement.
If your backpack lacks these features, consider using a tripod holster that clips onto your pack or belt for easy access.
A dedicated tripod bag can also be slung over your shoulder or attached to the backpack for protection.
Ensure the tripod is well-balanced to avoid discomfort and maintain stability during your hike, allowing for a hands-free experience while keeping your gear secure.
Mounting a tripod to a backpack?
Mounting a tripod to a backpack can be easily achieved using built-in side straps or external attachment points.
To do this, collapse the tripod to its shortest length and secure the legs tightly with the straps, ensuring they fit snugly to prevent movement.
If your backpack lacks dedicated straps, consider using a tripod holster that clips onto the side or back.
Alternatively, a padded tripod bag can be used for added protection while being slung over your shoulder or attached to the pack. This method keeps your hands free and allows for quick access during hikes.
Hiking Tripod That Doesn’t Seem like Three Toothpicks
When searching for a hiking tripod that offers stability without resembling flimsy toothpicks, consider options made from sturdy materials like aluminum or carbon fiber.
Look for tripods with wider leg bases and thicker tubing, as these provide enhanced support and stability on uneven terrain.
Models featuring adjustable leg angles and a solid center column can further improve versatility and strength.
Additionally, choose tripods with rubber or spiked feet for better grip on various surfaces.
By prioritizing stability and durability, you can find a hiking tripod that performs well in the field while avoiding a fragile, toothpick-like appearance.
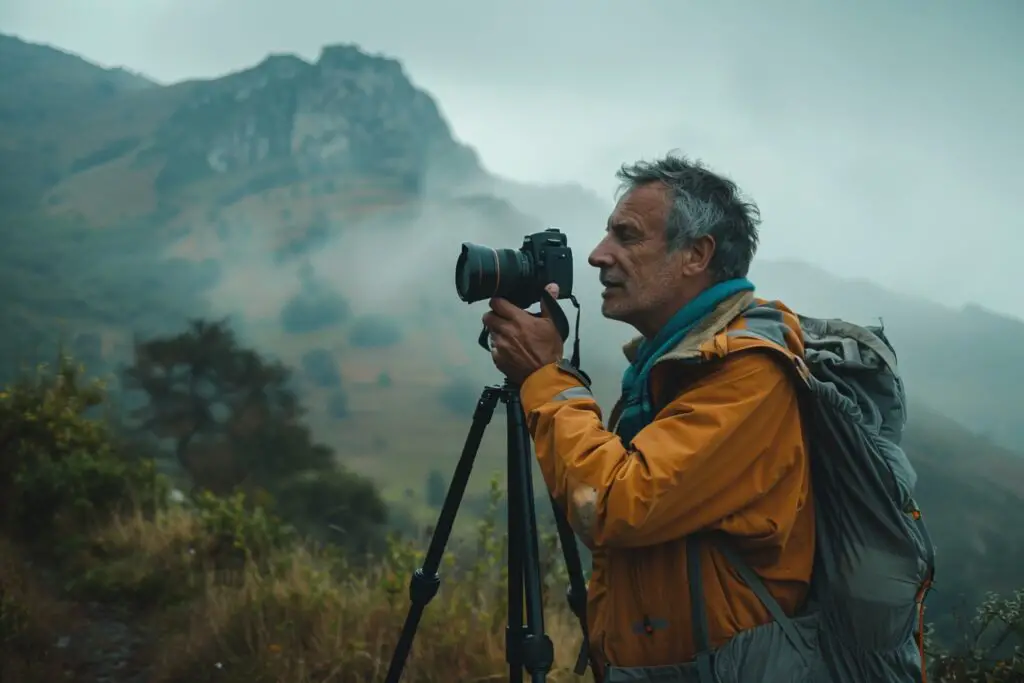
Hiking w. a full-size tripod?
Hiking with a full-size tripod can enhance your photography experience, providing stability and flexibility for capturing high-quality images in various settings.
To manage the extra weight, choose a lightweight model made of carbon fiber or aluminum that collapses to a compact size for easier transport.
Secure the tripod to your backpack using side straps or a dedicated holster for hands-free hiking. Plan your hike around the tripod’s weight, ensuring it won’t slow you down too much.
With proper planning and the right gear, a full-size tripod can elevate your outdoor photography while maintaining comfort during your hike.
How do you carry the tripod during a photowalk?
During a photowalk, carrying a tripod effectively involves ensuring easy access and comfort.
Use a lightweight, compact tripod that can be easily attached to your backpack or sling over your shoulder with a padded strap. If your backpack has side straps or daisy chains, secure the tripod there for quick retrieval.
Alternatively, a tripod holster can be clipped to your belt or pack, allowing for hands-free movement.
Keep the tripod legs collapsed for a more streamlined profile while walking. This setup ensures you can quickly set up for shots without disrupting your flow during the photowalk.
How do you guys carry a camera and Tripod around city or hiking in 2023?
In 2023, carrying a camera and tripod around the city or while hiking involves using versatile and efficient methods.
Many photographers opt for camera backpacks with dedicated compartments for gear, allowing easy access and protection.
Tripods can be securely attached to the side of the backpack using built-in straps or a tripod holster for quick retrieval.
Lightweight, compact tripods are favored for portability, making them easier to manage on the go.
For urban settings, crossbody camera straps or slings provide comfort and quick access, enabling photographers to capture spontaneous moments without hassle. Balancing comfort and accessibility is key.
Do you bring a tripod with you on your hikes, and how often do?
I don’t hike or carry equipment myself, but many photographers bring a tripod on their hikes to enhance their photography.
The frequency of carrying a tripod often depends on the type of shots desired; for example, those aiming for landscape, night, or long-exposure photography are more likely to bring one.
Some may carry it on every hike for convenience, while others may only take it on specific outings where stable shots are essential.
Ultimately, the decision to bring a tripod is influenced by individual photography goals and the weight considerations for the hike.
Best way to carry a full size tripod on 30L travel backpack?
To carry a full-size tripod on a 30L travel backpack, use the side straps or dedicated tripod holders if available.
Collapse the tripod to its shortest length, and secure it vertically against the side of the backpack, ensuring the legs are tightly fastened to prevent shifting.
If your backpack lacks these features, consider using a tripod holster that can be attached to the side or back for easy access.
Alternatively, you can place the tripod inside the backpack, wrapping it in clothing for protection. This method balances weight while keeping the tripod accessible during your travels.
How do you guys carry around your heavy gear while hiking?
Carrying heavy gear while hiking requires careful planning and the right equipment.
Many hikers use specialized backpacks designed for camera gear, featuring padded compartments and adjustable straps for comfort.
Distributing weight evenly is crucial, so heavier items should be packed close to the back and centered. Using a hip belt helps transfer some weight to the hips, reducing strain on the shoulders. For added comfort, consider using trekking poles to assist with balance and stability.
Regular breaks are essential to avoid fatigue, allowing hikers to enjoy the journey while managing their heavy gear effectively.
Tripod while hiking – what do you use?
When hiking with a tripod, it’s best to use a lightweight, compact model that balances portability with stability.
Carbon fiber tripods are popular due to their durability and low weight, making them easier to carry over long distances. Look for a tripod with adjustable legs and a quick-release plate for easy setup and versatility.
Some hikers prefer tripods with a low profile for low-angle shots or a built-in ball head for flexible positioning.
Additionally, using side straps or a tripod holster attached to a backpack can facilitate hands-free movement, ensuring the tripod is accessible without hindering the hiking experience.
Conclusion
Carrying a tripod while hiking can significantly enhance your photography experience, but it requires careful consideration of comfort and accessibility.
Utilizing the side straps or dedicated holders on your backpack ensures secure transport and easy access. Choosing a lightweight and compact tripod is essential for minimizing fatigue during long hikes.
Whether you opt for a holster, carry it inside your backpack, or use a padded case, the key is to find a method that balances stability with convenience.
By planning your setup and being mindful of weight distribution, you can enjoy capturing stunning images without compromising your hiking experience.


