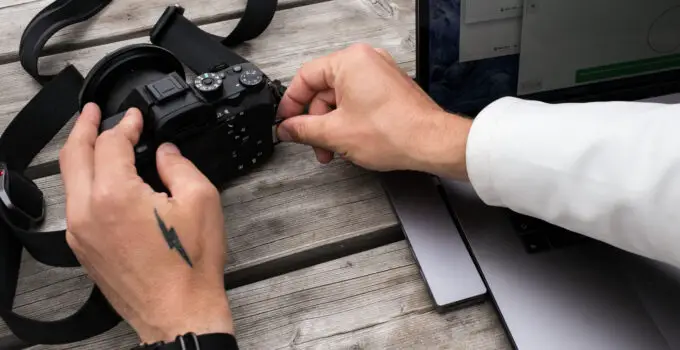
Ever wondered how to restore the shine to a vintage camera marred by rust? Over time, moisture and neglect can leave cherished photographic gear with unsightly corrosion.
Fortunately, cleaning rust from a vintage camera is possible with careful steps and attention to detail.
Whether it’s a classic Leica or a beloved Kodak from decades past, proper restoration techniques can revive not just the appearance but also the functionality of these historical artifacts.
By following specific methods that respect the camera’s delicate mechanisms and materials, enthusiasts can preserve their beauty and usability for generations to come.
Can rust can spoil your vintage camera?
Yes, rust can definitely spoil a vintage camera.
Rust forms when metal components of the camera, such as screws, springs, or the body itself, are exposed to moisture and oxygen over time.
Vintage cameras, often made with metal parts, are particularly susceptible to rust if not stored properly or if exposed to humid conditions.
Rust can cause irreversible damage by corroding metal surfaces, affecting the camera’s functionality and appearance. It can seize moving parts, degrade electronic contacts, and even compromise structural integrity, leading to leaks or breaks in the camera body.
Preventative measures like storing cameras in dry, controlled environments with moderate humidity levels, regular cleaning and maintenance, and using protective cases can help mitigate the risk of rust and preserve the condition of vintage cameras for longer periods.
Regular inspection and immediate treatment of any signs of rust are crucial to avoid irreparable harm to these valuable and historically significant devices.
When to clean rust from vintage camera
It’s important to clean rust from a vintage camera as soon as it’s noticed to prevent further damage.
Rust, formed by the oxidation of metal parts due to moisture and oxygen exposure, can rapidly spread and compromise the camera’s functionality and appearance.
Signs of rust include reddish-brown discoloration, rough textures on metal surfaces, and stiffness or difficulty in moving parts. Regular inspection during maintenance routines is key to catching rust early.
Cleaning should be done promptly using appropriate tools and techniques to remove rust without causing additional harm to delicate camera components.
Use soft brushes, cotton swabs, and gentle solvents suitable for camera metals.
It’s crucial to disassemble the camera carefully if needed, following manuals or guides to avoid mishandling or damaging intricate parts. After cleaning, applying a light coat of rust inhibitor or protective oil can help prevent future oxidation.
Regularly storing the camera in a dry, controlled environment and using silica gel packs or dehumidifiers can also minimize rust formation and preserve the camera’s condition over time.
Things to know before cleaning rust from vintage camera
Before cleaning rust from a vintage camera, several important considerations should be kept in mind:
Assessment: Evaluate the extent of rust and its impact on the camera’s functionality and aesthetics. Determine if professional restoration might be necessary.
Materials and Tools: Use appropriate tools such as soft brushes, cotton swabs, and mild solvents specifically recommended for camera metals to avoid damaging delicate parts.
Disassembly: Some cleaning tasks may require partial disassembly of the camera. Refer to manuals or guides to ensure proper handling and reassembly.
Gentle Approach: Adopt a gentle cleaning approach to avoid scratching or further damaging the camera’s surface.
Rust Prevention: After cleaning, apply a rust inhibitor or protective oil to prevent future oxidation. Store the camera in a dry, humidity-controlled environment to minimize rust formation.
Professional Help: If uncertain or if the rust is extensive, consider consulting a professional camera technician or restorer.
Documentation: Document the cleaning process and take photos if needed, especially for complex disassembly and reassembly steps.
By considering these factors, you can effectively and safely clean rust from a vintage camera while preserving its integrity and value.
How to clean rust from vintage camera?
To clean rust from a vintage camera, follow these steps:
Assessment: Evaluate the rust severity and affected areas. Decide if partial disassembly is necessary.
Gather Supplies: Use soft brushes, cotton swabs, microfiber cloths, and mild solvents like isopropyl alcohol or a specialized camera cleaner.
Cleaning Process:
Surface Rust: Gently brush off loose rust with a soft brush.
Stubborn Rust: Dampen a cotton swab with solvent and gently rub affected areas.
Disassembly: If needed, carefully disassemble parts following manuals or guides.
Soaking: For heavily rusted small parts, soak in solvent briefly and scrub gently with a soft brush.
Rinse and Dry: Wipe clean with a dry cloth or swab to remove residue. Ensure all parts are completely dry before reassembly.
Protection: Apply a thin coat of rust inhibitor or protective oil to prevent future rust formation.
Reassembly: Carefully reassemble the camera, following guides to avoid damaging parts.
Storage: Store in a dry, controlled environment to maintain cleanliness and prevent rust recurrence.
7 steps to clean rust from vintage camera
Sure, here are the 7 steps to clean rust from a vintage camera, along with the benefits of each step:
Step 1: Assessment
Assessing the extent of rust on your vintage camera is crucial before beginning any cleaning process.
By carefully inspecting the camera, you can determine the severity of the rust and identify which areas require immediate attention.
This step helps in planning the cleaning approach and prevents unnecessary handling of delicate parts, minimizing the risk of accidental damage.
Benefits:
Early Detection: Identifying rust early allows for timely intervention, preventing further deterioration of the camera’s metal components.
Focused Approach: It helps in prioritizing areas needing cleaning, ensuring efficient use of cleaning resources and time.
Preventive Measures: Early assessment enables you to implement preventive measures to halt rust progression and preserve the camera’s structural integrity.
Step 2: Gather Supplies
Before starting the cleaning process, gather all necessary supplies. This includes soft brushes, cotton swabs, microfiber cloths, mild solvents like isopropyl alcohol or a specialized camera cleaner, rust inhibitors, and protective oils.
Having the right tools and materials ensures that you can effectively remove rust without causing damage to the vintage camera’s delicate surfaces.
Benefits:
Efficiency: Having all supplies ready streamlines the cleaning process, reducing interruptions and ensuring thorough rust removal.
Safety: Using appropriate tools and solvents minimizes the risk of inadvertently damaging the camera’s metal parts.
Comprehensive Cleaning: Different tools cater to various types of rust and surface areas, allowing for a thorough cleaning approach.
Step 3: Surface Rust Removal
Begin by gently removing surface rust from the vintage camera.
Use a soft brush to loosen and brush away loose rust particles. This initial step prepares the surface for deeper cleaning and helps in assessing the depth of rust penetration.
Benefits:
Preservation: Removing surface rust prevents it from spreading deeper into the metal components, preserving the camera’s functionality and appearance.
Visual Improvement: Immediate removal of surface rust enhances the camera’s aesthetics, restoring its vintage charm.
Preparation: Clean surfaces facilitate better application of solvents in subsequent cleaning steps, ensuring effective rust removal.
Step 4: Stubborn Rust Treatment
For areas with stubborn rust, dampen a cotton swab with a mild solvent or rust remover.
Gently rub the affected areas to dissolve and remove persistent rust stains. This step requires careful handling to avoid excessive rubbing that could damage the camera’s delicate surfaces.
Restoration: Effective treatment revitalizes the affected areas, restoring the camera’s original appearance and functionality.
Prevention: Removing stubborn rust prevents further deterioration, prolonging the camera’s lifespan and value.
Step 5: Disassembly (if necessary)
In cases of severe rust or for thorough cleaning, consider partial disassembly of the vintage camera.
Follow manufacturer manuals or guides to safely dismantle components, ensuring each part is carefully labeled and organized for reassembly.
Benefits:
Access: Disassembly provides better access to hidden or intricate rusted areas, facilitating more thorough cleaning.
Inspection: Disassembling allows for a comprehensive inspection of internal components, identifying hidden rust and potential damage.
Maintenance: Cleaning individual parts separately ensures meticulous rust removal, improving overall camera performance and longevity.
Step 6: Rinse and Dry
After cleaning, use a clean, dry cloth or cotton swab to wipe away any remaining solvent or residue from the vintage camera’s metal surfaces.
Ensure all parts are thoroughly dry before proceeding to the next step or reassembly.
Benefits:
Residue Removal: Rinsing eliminates leftover solvent or cleaner, preventing potential chemical damage to the camera’s metal parts.
Surface Protection: Thorough drying prevents water or solvent residue from causing rust or corrosion over time.
Preparation for Protection: Dry surfaces are ready for the application of rust inhibitors or protective oils, enhancing long-term preservation.
Step 7: Protection and Reassembly
Apply a thin coat of rust inhibitor or protective oil to the cleaned and dried metal surfaces of the vintage camera.
This final step helps prevent future rust formation and corrosion, ensuring the camera remains in optimal condition for years to come.
Carefully reassemble all components following manuals or guides, ensuring proper alignment and functionality.
Benefits:
Longevity: Protective coatings extend the camera’s lifespan by shielding metal surfaces from environmental factors that cause rust.
Preservation: Proper reassembly preserves the camera’s structural integrity and ensures smooth operation of moving parts.
Value Retention: Maintaining a rust-free vintage camera enhances its collectible value and aesthetic appeal, attracting enthusiasts and collectors.
Following these steps systematically ensures effective rust removal and preservation of your vintage camera, maintaining its historical significance and functional integrity over time.
5 Methods to clean rust from vintage camera
Certainly! Here are five methods to clean rust from a vintage camera, along with detailed explanations for each:
Method 1: Mechanical Removal with Abrasive Tools
Mechanical removal involves using abrasive tools such as steel wool, sandpaper, or abrasive pads to physically scrub away rust from the camera’s metal surfaces.
Begin by gently rubbing the affected areas with the abrasive tool, applying light pressure to avoid damaging the underlying metal.
This method is effective for surface rust and can be followed by finer abrasives or polishing compounds to restore a smooth finish.
Explanation: Abrasive tools work by mechanically wearing away the rusted surface layer, exposing clean metal underneath. They are suitable for light to moderate rust and can restore the appearance of metal components.
However, care must be taken to avoid over-zealous scrubbing, which can scratch or gouge the metal. After mechanical removal, thorough cleaning with a soft cloth and solvent is recommended to remove any residual particles.
Method 2: Chemical Rust Removers
Chemical rust removers are acidic or alkaline solutions designed to dissolve rust without damaging the underlying metal. Popular options include phosphoric acid-based rust converters or commercial rust removers.
Apply the solution to the rusted areas using a brush or cloth, allowing it to penetrate and dissolve the rust.
After the recommended dwell time, scrub lightly with a soft brush or abrasive pad, then rinse thoroughly with water.
Explanation: Chemical rust removers work by chemically reacting with the iron oxide (rust), converting it into a soluble compound that can be washed away. They are effective for moderate to heavy rust and can reach into crevices and hard-to-reach areas.
However, prolonged exposure or improper use can damage non-metallic components or finishes, so it’s crucial to follow manufacturer instructions carefully. After treatment, neutralize the surface with water or a neutralizing solution to prevent further chemical reactions.
Method 3: Electrolysis
Electrolysis is a method that uses an electrical current to remove rust from metal surfaces.
It involves immersing the rusted parts in an electrolyte solution (typically water mixed with washing soda or bicarbonate of soda) and using a direct current (DC) power source to create a chemical reaction that loosens and lifts the rust.
Electrolysis is effective for heavily rusted parts and can clean intricate details without damaging the metal.
Explanation: During electrolysis, the electrical current causes the rust to migrate from the metal surface to a sacrificial electrode (typically made of steel or iron), leaving the vintage camera’s metal components clean and rust-free. This method is gentle and precise, suitable for delicate or complex shapes.
However, it requires careful setup to ensure safe electrical connections and proper control of the electrolyte solution’s pH level. Post-treatment, thoroughly rinse and dry the parts to prevent new rust formation.
Method 4: Vinegar Soaking
Vinegar, particularly white vinegar or apple cider vinegar, can effectively remove rust due to its acidic nature.
Submerge the rusted parts of the vintage camera in vinegar for several hours or overnight, ensuring they are fully covered.
After soaking, scrub the rusted areas with a soft brush or cloth to remove loosened rust particles. Rinse thoroughly with water and dry completely.
Explanation: The acidity of vinegar breaks down the rust, making it easier to remove mechanically. Vinegar is non-toxic and readily available, making it a popular choice for household rust removal.
However, prolonged soaking can dull metal finishes or corrode non-metallic parts, so monitor the process and adjust soaking times accordingly. After treatment, apply a rust inhibitor or protective oil to prevent future rusting.
Method 5: Mechanical Polishing with Polishing Compounds
Mechanical polishing involves using polishing compounds and tools such as rotary buffers, polishing wheels, or hand polishing pads to remove surface rust and restore shine to metal surfaces.
Apply a small amount of polishing compound to the rusted area and buff with a clean, soft cloth or appropriate polishing tool until the rust is removed and the metal shines.
Explanation: Polishing compounds contain fine abrasive particles suspended in a paste or liquid form, designed to smooth out imperfections and restore luster to metal surfaces.
They are effective for light surface rust and can enhance the appearance of vintage camera parts.
However, excessive polishing can remove protective coatings or alter surface textures, so use gentle pressure and monitor progress to avoid over-polishing. After polishing, clean the surface thoroughly to remove any residue and apply a protective coating to prevent future rusting.
Each of these methods offers a unique approach to cleaning rust from a vintage camera, catering to different levels of rust severity and types of metal surfaces.
Choosing the right method depends on the condition of the camera and desired outcome, ensuring effective rust removal while preserving the camera’s aesthetic and functional integrity.
5 Benefits to clean rust from vintage camera
Certainly! Here are five benefits of cleaning rust from a vintage camera, along with detailed explanations for each:
Benefit 1: Preservation of Functionality and Performance
Cleaning rust from a vintage camera helps maintain its functionality and performance. Rust can impair moving parts, such as shutter mechanisms or focus rings, leading to stiffness or malfunction.
By removing rust, these components can operate smoothly again, ensuring the camera functions as intended.
This preservation of functionality not only enhances usability but also retains the camera’s value for collectors and photographers who appreciate vintage equipment.
Benefit 2: Prevention of Further Damage
Rust is corrosive and can spread if left untreated, causing irreparable damage to metal components of the vintage camera.
By cleaning rust promptly, you prevent its progression and minimize the risk of structural integrity compromised by rust-induced weakening or fractures.
This proactive approach protects the camera from more extensive damage, preserving its overall condition and longevity.
Benefit 3: Restoration of Aesthetic Appeal
Vintage cameras are often prized for their aesthetic appeal, showcasing craftsmanship and design from bygone eras. Rust detracts from this visual charm, creating unsightly stains and blemishes on metal surfaces.
Cleaning rust restores the camera’s original appearance, enhancing its visual appeal and maintaining its historical and collectible value. A rust-free camera looks more attractive and appealing both as a functional tool and as a display piece.
Benefit 4: Long-term Preservation and Value Retention
Regular maintenance, including rust removal, contributes to the long-term preservation of a vintage camera.
Proper care prevents rust from compromising internal mechanisms and external surfaces, ensuring the camera remains in excellent condition over time.
This preservation not only extends the camera’s lifespan but also retains or enhances its value for collectors and enthusiasts interested in well-maintained vintage equipment.
Benefit 5: Enhanced Operational Reliability
A rust-free vintage camera operates more reliably and predictably. Smoothly functioning parts, free from rust-induced friction or blockages, ensure consistent performance in capturing images.
Whether used for photography or display, an operational vintage camera offers a satisfying experience, allowing photographers to explore and appreciate its historical and technical merits without concerns about rust-related issues affecting usability.
By cleaning rust from a vintage camera, you not only address immediate aesthetic and functional concerns but also invest in its long-term preservation and value appreciation.
Each benefit underscores the importance of regular maintenance and careful restoration practices in maintaining the integrity and allure of vintage photographic equipment.
Green Rust on my Camera?
Green rust on a camera typically indicates the presence of copper corrosion rather than iron oxide rust.
This greenish patina often forms on brass or copper components of vintage cameras, such as lens mounts, dials, or fittings.
It occurs when copper reacts with moisture, air, and pollutants over time, forming copper carbonate or copper chloride compounds.
While green rust doesn’t usually affect the functionality of the camera, it can alter its appearance and potentially degrade metal surfaces if left untreated.
Cleaning green rust involves gentle methods to remove the patina without damaging the underlying metal, followed by protective measures like applying a thin coat of wax or oil to prevent further oxidation.
Regular maintenance and storage in controlled environments can help minimize the formation of green rust on vintage camera.
Rolleiflex Rusted Film Guides – How to Repair
To repair rusted film guides on a Rolleiflex camera, start by carefully disassembling the affected parts using appropriate tools.
Clean the rusted areas with a mild solvent and soft brushes to remove corrosion without damaging the guides. If necessary, gently polish the metal surfaces to restore smoothness.
Apply a rust inhibitor or protective oil to prevent future rusting. Ensure thorough drying before reassembling the camera, following manufacturer guidelines for alignment and functionality.
Regular maintenance and storage in a dry environment can help prevent rust recurrence on the film guides.
Cleaning film rails
Cleaning film rails on a camera involves removing dirt, dust, and debris that accumulate over time.
Use a soft, lint-free cloth or a microfiber cloth lightly dampened with a mild cleaning solution to wipe along the film rails. Gently scrub to dislodge any stubborn particles, taking care not to damage delicate components.
Ensure the rails are completely dry before loading film to prevent contamination.
Regular cleaning of film rails helps ensure smooth film transport, reduces the risk of scratches on film, and maintains the camera’s operational efficiency.
Any tips for cleaning film guide rails?
When cleaning film guide rails, it’s crucial to use gentle methods to avoid damaging delicate components.
Start by using a soft, lint-free cloth or a microfiber cloth lightly dampened with a mild cleaning solution to wipe along the rails. Ensure thorough cleaning by gently scrubbing to remove any dirt or debris.
Avoid using excessive force or abrasive materials that could scratch or misalign the rails. After cleaning, allow the rails to dry completely before inserting film to prevent contamination.
Regular maintenance of film guide rails ensures smooth film transport and preserves the integrity of your camera’s mechanisms over time.
Can you do anything about rust/corrosion on a camera’s surface
To address rust or corrosion on a camera’s surface, start by gently cleaning the affected areas with a soft cloth or brush to remove loose rust particles.
Use a mild solvent or rust remover if necessary, following product instructions carefully to avoid damaging the camera’s finish.
Once cleaned, apply a rust inhibitor or protective wax to prevent further oxidation. Regular maintenance and storing the camera in a dry, controlled environment help mitigate rust formation.
For extensive damage, consider consulting a professional camera technician for restoration options to preserve the camera’s aesthetic and functional integrity.
Related faq’s
How to clean rust from vintage camera at home?
To clean rust from a vintage camera at home, start by assessing the extent of rust and gathering necessary supplies: soft brushes, cotton swabs, mild solvents like isopropyl alcohol, and rust inhibitors.
Gently brush off loose rust with a soft brush, then apply solvent to remove stubborn rust using cotton swabs.
For delicate parts, consider a mild abrasive paste. Rinse with clean water, dry thoroughly, and apply a rust inhibitor.
Carefully reassemble and store the camera in a dry place to prevent future rust. If unsure, consult camera manuals or seek professional advice for complex rust issues.
How to clean rust from vintage camera?
To clean rust from a vintage camera, follow these steps: First, assess the rust severity and gather needed supplies: soft brushes, cotton swabs, mild solvents like isopropyl alcohol, and rust inhibitors.
Gently brush off loose rust, then apply solvent to stubborn areas using cotton swabs.
For tougher rust, consider using a mild abrasive paste. Rinse with clean water, dry thoroughly, and apply a rust inhibitor to prevent recurrence.
Carefully reassemble the camera and store it in a dry environment to avoid future rust. For complex rust issues, consult camera manuals or seek professional assistance.
How to clean rust from vintage camera nikon rust neutralize?
To clean rust from a vintage Nikon camera and neutralize it effectively, follow these steps:
Assessment: Evaluate the extent of rust on the camera’s metal surfaces, including screws, dials, and body parts.
Preparation: Gather soft brushes, cotton swabs, mild solvents like isopropyl alcohol, rust-neutralizing solution (such as phosphoric acid-based rust converter), and protective gear.
Cleaning: Gently brush off loose rust using soft brushes. Apply the rust-neutralizing solution to rusted areas using cotton swabs or a brush, following the product’s instructions for application and dwell time.
Neutralization: Allow the solution to work on the rust, typically converting it into a stable compound that can be wiped away. Rinse the treated areas with clean water and dry thoroughly.
Protection: Apply a rust inhibitor or protective oil to prevent future oxidation. Ensure all parts are completely dry before reassembling the camera.
Reassembly and Storage: Carefully reassemble the camera, following manufacturer guidelines. Store in a dry, controlled environment to maintain the camera’s condition and prevent rust recurrence.
Using a rust-neutralizing solution specifically designed for camera metals helps effectively treat rust while preserving the vintage Nikon camera’s functionality and appearance.
Conclusion
Cleaning rust from a vintage camera is essential to preserve its functionality, aesthetic appeal, and long-term value.
By carefully assessing the rust severity and using appropriate tools like soft brushes, cotton swabs, and mild solvents, you can effectively remove rust without causing further damage.
Applying rust inhibitors or protective coatings after cleaning helps prevent future oxidation. Regular maintenance and storing the camera in a dry environment are key to maintaining its condition.
Whether for personal use or preservation as a collector’s item, regular rust cleaning ensures that vintage cameras remain operational and visually appealing for years to come.


