Table of Contents
ToggleHave you ever struggled to find stable support for your camera during outdoor shoots?
Fear not, as we delve into the ingenious world of creating a bean bag specifically tailored for camera support.
Crafting your own bean bag for camera stabilization is simpler than you think.
By using easily accessible materials and following straightforward steps, you can enhance your photography experience significantly.
Ready to revolutionize your photography setup?
Here how to remove mold from camera bag.
Our comprehensive guide, endorsed by seasoned photographers, will walk you through every step, ensuring your homemade bean bag becomes an indispensable tool in your photography arsenal.
How to make a camera bean bag?
To make a camera bean bag, you’ll need durable fabric (like canvas or upholstery fabric), sewing supplies (needle, thread, scissors), and filling material (like beans, rice, or plastic pellets).
Start by cutting two identical rectangles of fabric, ensuring they’re large enough to hold your camera securely.
Next, sew three sides of the rectangles together, leaving one side open.
Turn the fabric inside out to hide the seams. Fill the bag with your chosen material, leaving enough space for the bag to be flexible but supportive.
After filling, carefully hand-sew the open side shut. You can reinforce the seams for extra durability.
Finally, attach a strap or handle to the bag if desired, for easier carrying.
Here, how to clean lowepro camera bag.
Test the bean bag with your camera to ensure it provides stable support.
Adjust the filling amount if needed. This DIY solution offers a customizable and inexpensive option for stabilizing your camera during photography.
What do you fill a camera bean bag with?
Camera bean bags are typically filled with materials that provide both stability and flexibility. Some common options include:
- Polypropylene Pellets: These small plastic pellets are lightweight, durable, and moldable, making them an excellent choice for bean bags. They provide stability while allowing you to adjust the shape of the bag as needed.
- Rice or Beans: Dried rice or beans can also be used as filling. They are inexpensive and readily available, but keep in mind that they may be heavier than other options. However, they still offer good stability.
- Buckwheat Hulls: Buckwheat hulls are lightweight and moldable, similar to polypropylene pellets. They can conform well to the shape of your camera, providing stable support.
- Polyester Fiberfill: This fluffy polyester material is commonly used in pillows and stuffed toys. While it provides soft support, it may not offer as much stability as denser fillings.
Ultimately, the choice of filling depends on your preferences for weight, stability, and moldability.
How to make a bean bag for camera support? (7 steps revealed)
Step 1: Gather Materials and Tools
Before starting, gather all the materials and tools you’ll need. You’ll require durable fabric (like canvas or upholstery fabric), sewing supplies (needle, thread, scissors), and filling material (such as polypropylene pellets, rice, or beans). Ensure your fabric is large enough to accommodate your camera comfortably.
Here, does a camera bag count as a carry on?
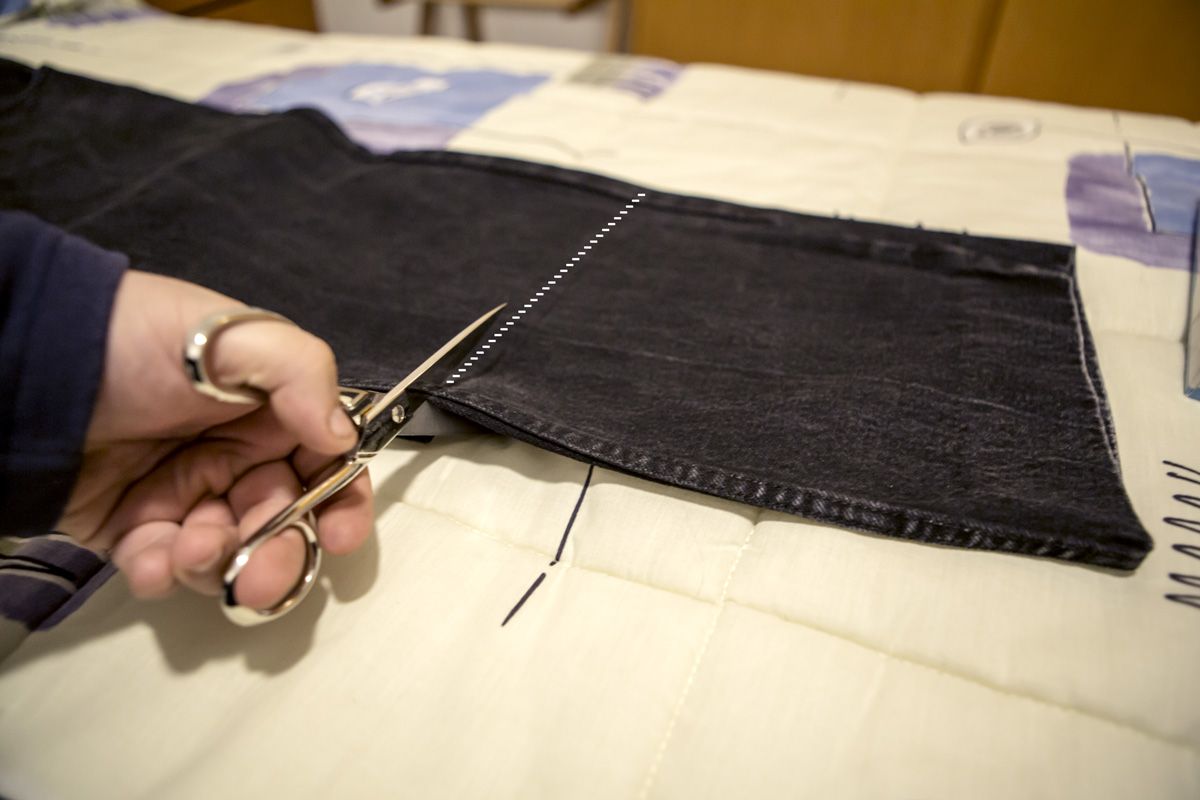
Step 2: Cut Fabric
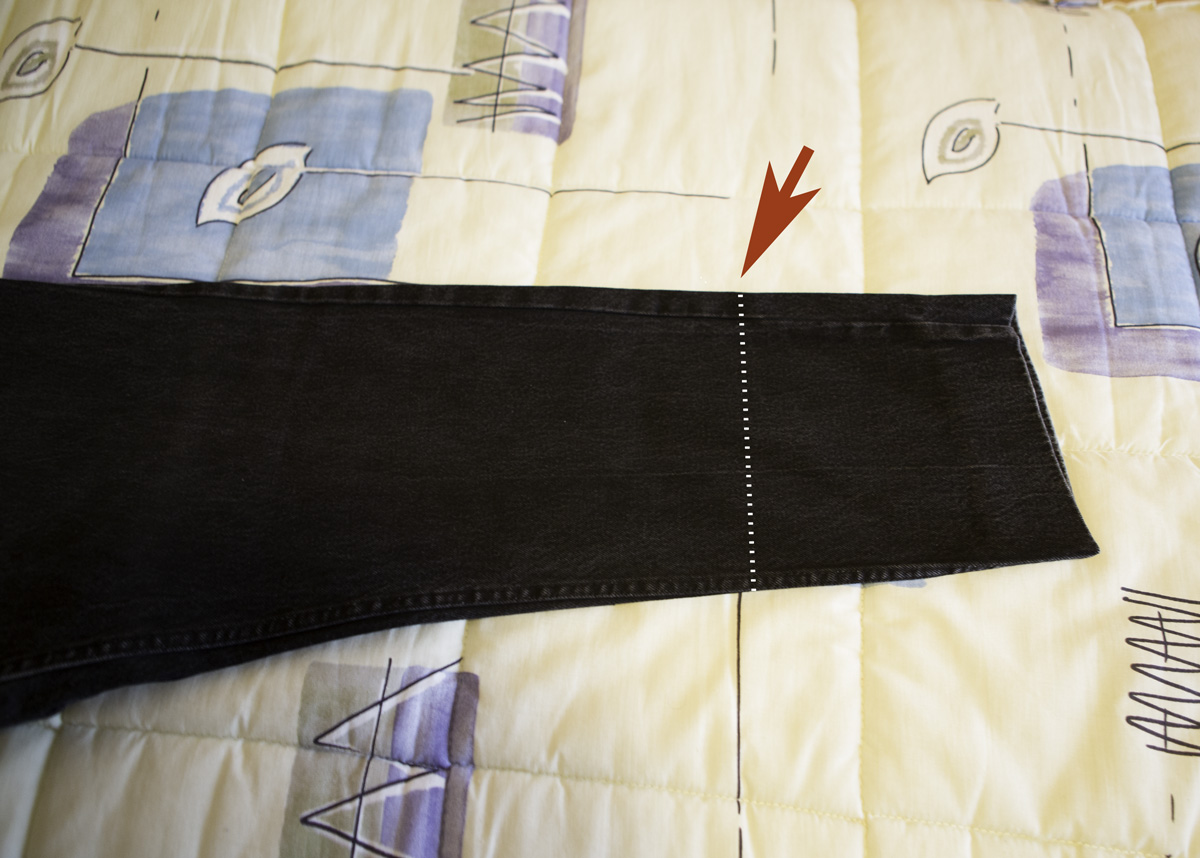
Start by cutting two identical rectangles of fabric. These will be the front and back panels of your bean bag. The size of these rectangles will depend on the size of your camera and how much support you want to provide. Leave extra fabric for seam allowances.
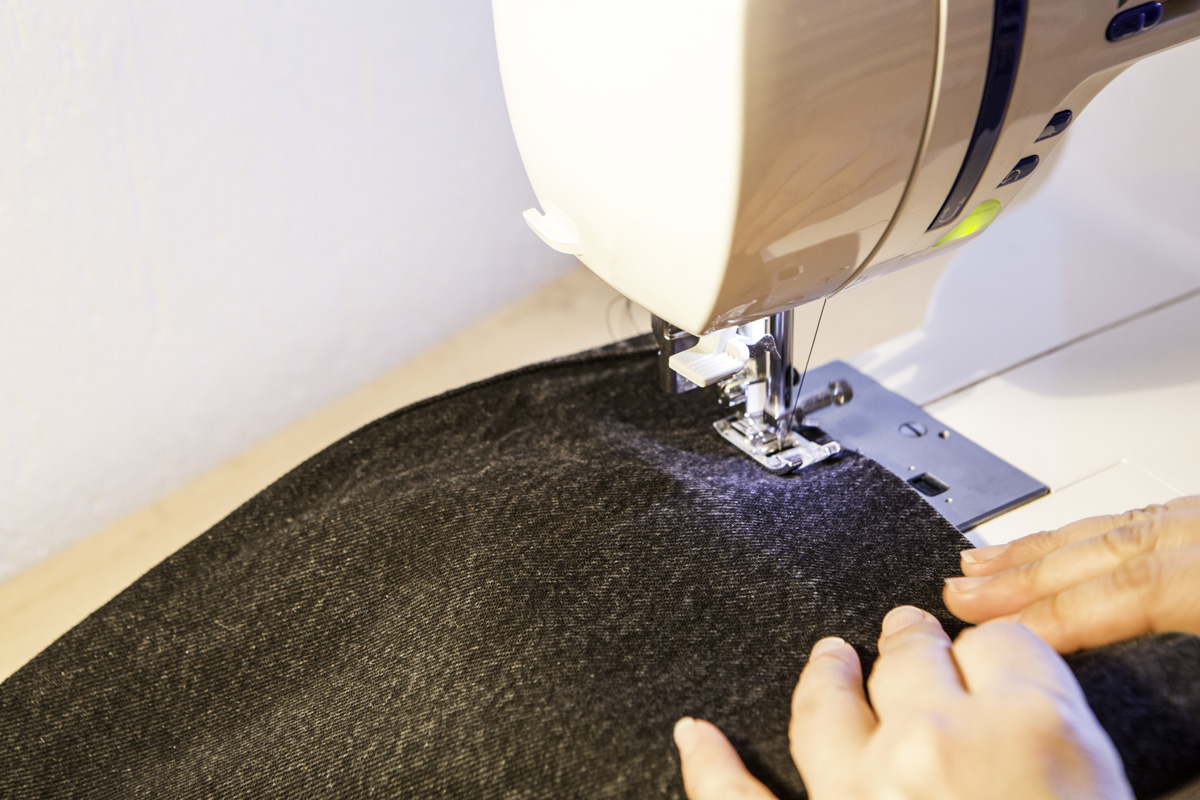
Step 3: Sew Three Sides Together
Place the two fabric rectangles together with their right sides facing each other. Sew along three sides of the rectangles, leaving one of the shorter sides open.
You can use a sewing machine for this step, but hand-sewing works well too. Reinforce the seams for added durability.
Here, are lowpro camera bag waterproof.
Step 4: Turn Inside Out
Once you’ve sewn three sides together, carefully turn the fabric inside out.
This will hide the seams inside the bean bag, giving it a neater appearance. Take your time with this step to ensure the fabric doesn’t tear or fray.
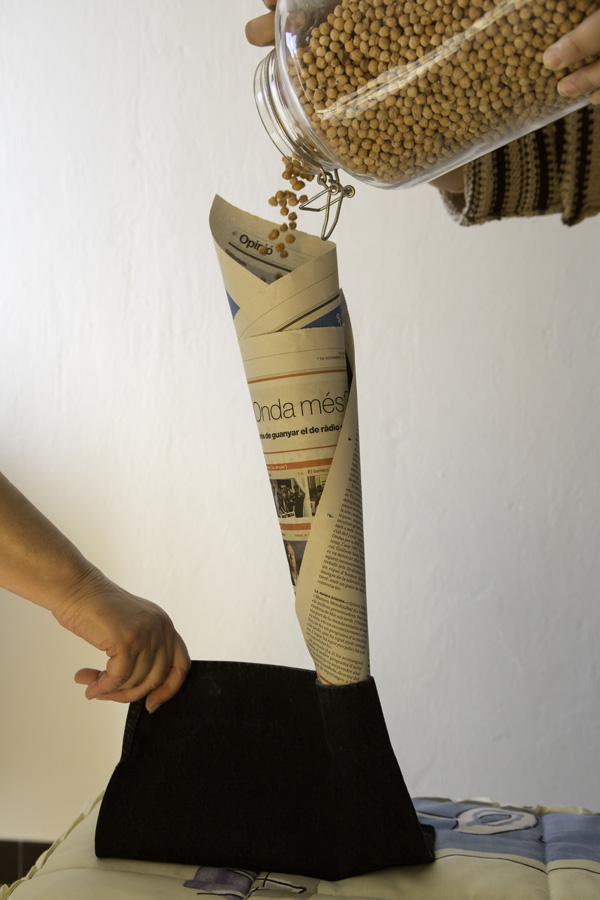
Step 5: Fill the Bag
Now it’s time to fill the bean bag with your chosen material. If you’re using polypropylene pellets, rice, or beans, pour them into the bag through the open side.
Fill the bag to your desired level of firmness, keeping in mind that you want enough support for your camera but also some flexibility.
Step 6: Hand-Sew the Open Side
After filling the bag, carefully hand-sew the open side shut.
Use strong thread and a tight stitch to ensure the filling doesn’t spill out. You can reinforce this seam by sewing over it multiple times or using a backstitch.
Step 7: Add a Handle or Strap (Optional)
If you want to make your camera bean bag easier to carry, consider adding a handle or strap.
You can sew a fabric loop onto one end of the bean bag or attach a detachable strap with clips. This step adds convenience when using the bean bag in different shooting situations.
By following these seven steps, you’ll create a custom camera bean bag that provides stable support for your camera during photography sessions.
Adjust the size, filling, and handle options according to your specific needs and preferences.
Best beanbag design-and-make tips?
Design Tip 1: Double-Layered Fabric
Using double-layered fabric for your bean bag design adds durability and stability.
This design involves sewing two identical fabric rectangles together, creating a pocket to hold the filling securely.
The double layers prevent the filling from shifting around too much, providing better support for your camera.
To implement this design, cut two rectangles of fabric and sew them together along three sides, leaving one side open for filling.
Turn the fabric inside out after sewing to hide the seams. Fill the bag with your chosen material, such as polypropylene pellets or rice, and then hand-sew the open side shut.
Here, how to clean nikon camera bag.
Design Tip 2: Reinforced Seams
Reinforcing the seams of your bean bag enhances its strength and longevity.
This design tip involves using a strong thread and sewing technique to create sturdy seams that can withstand the weight of your camera and the pressure of regular use.
When sewing the fabric pieces together, use a backstitch or double stitching for added reinforcement.
You can also sew over the seams multiple times to ensure they are securely closed. Pay special attention to the corners and edges, as these areas experience more stress.
Design Tip 3: Adjustable Filling
Creating a bean bag with adjustable filling allows you to customize the level of support for your camera.
This design involves adding a zipper or Velcro opening to the bean bag, allowing you to add or remove filling as needed.
To implement this design, sew the bean bag as usual but leave a section of one side open. Attach a zipper or Velcro closure to this opening, making sure it is secure and can withstand frequent opening and closing.
Fill the bag initially with a moderate amount of filling, and then adjust it based on your camera’s weight and stability requirements.
Design Tip 4: Water-Resistant Fabric
Using water-resistant fabric for your bean bag design adds protection against moisture, making it suitable for outdoor photography sessions or unpredictable weather conditions.
This design tip involves choosing a fabric that repels water or adding a waterproof lining to the bean bag.
When selecting water-resistant fabric, look for materials like polyester with a waterproof coating or outdoor fabrics designed for durability and weather resistance.
Ensure that the seams are also sealed or treated to prevent water from seeping inside the bean bag.
Design Tip 5: Customizable Shape
Creating a bean bag with a customizable shape allows you to mold it to different surfaces for stable camera support.
This design involves using flexible filling materials like polypropylene pellets or buckwheat hulls that can conform to uneven surfaces.
To implement this design, fill the bean bag with a flexible material that allows you to adjust its shape easily.
Avoid overfilling the bag, as you want it to be pliable enough to mold around objects or angles. Test the bean bag with your camera to ensure it provides stable support in various shooting scenarios.
By incorporating these design tips into your bean bag creation, you can enhance its functionality, durability, and versatility for supporting your camera during photography sessions.
Experiment with different materials and sewing techniques to achieve the best results based on your preferences and needs.
Benefits of Using a Beanbag
Stability and Support
Beanbags offer excellent stability and support for cameras, especially in situations where tripods or other stabilizing equipment may not be practical.
The beans or pellets inside the beanbag mold around the camera, providing a secure base for steady shots.
This stability is crucial for long exposures, telephoto lens usage, or shooting in low-light conditions where any camera movement can result in blurry images.
Versatility
One of the significant benefits of using a beanbag is its versatility.
Unlike tripods or monopods that require flat, even surfaces, beanbags can be placed on various terrains, including rocks, tree branches, or uneven ground.
This flexibility allows photographers to capture shots from unique angles and positions that may not be achievable with traditional camera supports.
Portability
Beanbags are lightweight and easy to transport, making them ideal for photographers who need to move quickly or travel to different locations.
Unlike bulky tripods that can be cumbersome to carry, beanbags can be stuffed into a camera bag or backpack without taking up much space.
This portability makes them a convenient choice for outdoor photography, wildlife photography, or on-the-go shooting situations.
Low Profile
Beanbags have a low profile, meaning they don’t attract much attention or interfere with the photographer’s visibility.
This is particularly beneficial for wildlife photographers or those capturing candid moments where blending into the surroundings is essential.
The discreet nature of beanbags allows photographers to remain inconspicuous while still getting stable shots.
Minimal Setup Time
Setting up a beanbag for camera support is quick and straightforward compared to setting up tripods or other complex support systems.
There are no adjustable legs or mounting plates to deal with—simply place the beanbag on a surface, adjust the camera’s position as needed, and start shooting.
This minimal setup time is advantageous in fast-paced shooting environments or spontaneous photo opportunities.
Cost-Effective
Beanbags are cost-effective camera support options compared to professional tripods or gimbal stabilizers. They can be made at home using inexpensive materials like fabric and filling materials such as beans or rice.
Additionally, beanbags require minimal maintenance and can last for a long time with proper care, making them a budget-friendly choice for photographers.
Customizable
Another benefit of using a beanbag is its customizable nature. Photographers can tailor the size, shape, and filling density of the beanbag to suit their specific camera and shooting preferences.
Whether it’s adding or removing filling for optimal support or sewing additional features like straps or handles for convenience, beanbags can be customized to enhance the shooting experience.
In conclusion, the benefits of using a beanbag for camera support include stability, versatility, portability, low profile, minimal setup time, cost-effectiveness, and customizability.
These advantages make beanbags a practical and reliable option for photographers seeking stable support in various shooting scenarios.
How to make homemade bean bags?
Sure, making homemade bean bags is a fun and straightforward craft project.
Here are the basic steps to create your own bean bags:
- Gather Materials: Collect the materials needed, including fabric (cotton, canvas, or upholstery fabric works well), sewing supplies (needle, thread, pins, scissors), and filling material (beans, rice, plastic pellets, or dried beans).
- Cut Fabric: Decide on the size of your bean bags and cut squares or rectangles of fabric accordingly. Remember to leave extra fabric for seam allowances.
- Sew Three Sides: Place two fabric pieces together with their right sides facing each other. Sew along three sides of the fabric, leaving one side open for filling. Use a sewing machine or hand-sew, ensuring the stitches are strong and secure.
- Turn Inside Out: Turn the fabric inside out through the open side. This will hide the seams inside the bean bag, giving it a neat appearance.
- Fill the Bags: Fill each bean bag with your chosen filling material. Use a funnel or a spoon to carefully pour the filling into the bag. Fill it to your desired level of firmness, leaving some space for the filling to move around.
- Hand-Sew the Open Side: Once filled, hand-sew the open side shut using a strong thread and tight stitches. Make sure the seam is secure to prevent any filling from spilling out.
- Optional: Decorate: If desired, you can decorate your homemade bean bags with fabric paint, appliques, or embroidery. This step adds a personal touch and makes the bean bags more visually appealing.
- Test and Adjust: Test the bean bags by tossing them gently or using them for games like bean bag toss. Adjust the filling amount if needed to achieve the right weight and feel.
By following these steps, you can create your own homemade bean bags for various purposes, such as games, decorations, or even as makeshift camera supports.
Experiment with different fabrics, fillings, and designs to customize your bean bags according to your preferences.
What are bean bags used for in photography?
Bean bags are commonly used in photography as a portable and versatile support system for cameras and lenses.
They offer stability and support in situations where tripods or other stabilizing equipment may not be practical or allowed.
Photographers use bean bags in various ways:
- Stable Support: Bean bags provide a stable base for cameras, especially in outdoor or uneven terrain where tripods may not be feasible.
- Low-Angle Shots: They enable photographers to capture low-angle shots by placing the bean bag on the ground or any flat surface.
- Telephoto Lens Support: Bean bags help support the weight of telephoto lenses, reducing hand fatigue and ensuring sharp images.
- Wildlife Photography: They are popular among wildlife photographers for steady shots when capturing fast-moving subjects or using long lenses.
- Long Exposures: Bean bags help eliminate camera shake during long exposures, resulting in sharper images.
Overall, bean bags offer photographers a lightweight, portable, and adaptable solution for achieving stable camera support in various shooting scenarios.
Conclusion:
To make a bean bag for camera support, fill a durable fabric bag with beans or rice, ensuring it’s tightly packed for stability. Sew it shut securely.
This DIY solution offers a cost-effective and customizable option for stabilizing your camera during photography or filming, providing versatility and comfort.

