
Ever wondered how to make a camera bag for your DSLR? Crafting your own camera bag can be a rewarding and practical project.
In this guide, we’ll explore materials, design tips, and step-by-step instructions to create a custom bag tailored to your needs. You’ll learn how to ensure your equipment stays safe and organized.
Ready to dive into the world of DIY camera bags? Let’s get started and create a perfect companion for your DSLR adventures!
Here is it safe buyig national geographic camera bag?
Do you need a seperate camera for DSLR?
A DSLR (Digital Single-Lens Reflex) camera already includes a built-in camera system, so you do not need a separate camera to use it.
The DSLR combines a digital imaging sensor with the mechanisms of a traditional SLR camera, enabling you to capture high-quality images directly.

The main components include the camera body, which houses the sensor and internal electronics, and interchangeable lenses that allow for versatile shooting options.
Additional equipment such as external flashes, tripods, and specialized lenses can enhance your photography experience, but they are not separate cameras.
Here, can you buy just camera bag pads?
These accessories complement the DSLR’s functionality, providing better lighting, stability, and varied focal lengths.
Essentially, the DSLR is a comprehensive tool for photography on its own, negating the need for an additional camera to achieve professional-quality photos.
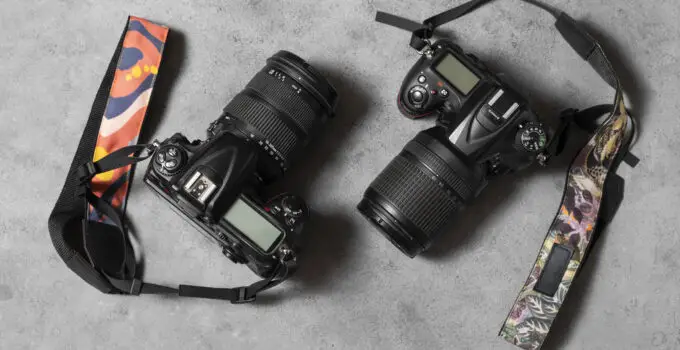
Do DSLR need a camera bag?
While a DSLR does not inherently need a camera bag to function, having one is highly recommended.
A camera bag provides essential protection for your DSLR, safeguarding it from dust, moisture, and physical damage.
It also offers organized storage for your camera body, lenses, memory cards, batteries, and other accessories, making it easier to carry and manage your equipment.
Moreover, a good camera bag enhances convenience and mobility, especially for photographers who travel or shoot on location.
It helps distribute weight evenly, reducing strain on your shoulders and back. Specialized compartments and padding ensure that your gear remains secure and accessible.
In summary, while not mandatory for the DSLR’s operation, a camera bag is a valuable investment for protecting and organizing your photography equipment, ultimately enhancing your overall shooting experience.
To make a camera bag for your DSLR, start with a sturdy, durable base such as a backpack or shoulder bag.
Ensure the bag has enough space and compartments for your camera and accessories.
Use foam padding or buy pre-made padded inserts to create protective compartments for the camera body, lenses, and other gear.
Cut the foam to fit the bag’s dimensions and secure it with fabric or Velcro.
Line the bag with soft, shock-absorbing material to prevent scratches and absorb impacts.
Add dividers using more foam or padded fabric to separate and organize your equipment. Ensure each compartment snugly fits your camera and lenses to minimize movement.
Here, how to clean lululemon camera bag?
For extra protection, consider sewing or attaching pockets for smaller items like memory cards and batteries.
Finally, if your bag is not water-resistant, add a rain cover or use waterproof materials. This DIY approach ensures a customized, protective camera bag tailored to your needs
9 steps to make a camera bag for DSLR?
1. Choose a Suitable Base Bag
Select a durable bag to serve as the base for your camera bag. Consider a backpack, messenger bag, or shoulder bag that suits your style and carrying preferences.
The bag should be spacious enough to accommodate your DSLR, lenses, and accessories.
Look for a bag made from sturdy materials like nylon, canvas, or leather, which provide durability and some degree of weather resistance.
2. Gather Materials and Tools
Collect the necessary materials and tools, including foam padding, fabric, Velcro strips, a sewing kit or fabric glue, a measuring tape, scissors, and a cutting tool.
The foam padding will protect your gear, while the fabric will cover the foam to create dividers and compartments. Velcro strips help in securing the dividers inside the bag.
3. Measure and Cut Foam Padding
Measure the interior dimensions of your chosen bag and cut the foam padding accordingly.
You’ll need foam pieces for the bottom, sides, and dividers. Use a cutting tool for precise edges.
The foam should fit snugly within the bag to provide adequate cushioning and prevent your camera and lenses from shifting.
4. Cover Foam with Fabric
Cut pieces of fabric to cover the foam padding. Leave some extra fabric on the edges to fold and secure.
Use a sewing machine or fabric glue to attach the fabric to the foam. This step ensures the foam is protected and adds a layer of softness, preventing scratches on your equipment.
5. Create Padded Dividers
Measure and cut additional foam pieces to create dividers for separating your camera, lenses, and accessories.
Cover these foam pieces with fabric as well. Attach Velcro strips to the edges of the dividers. This allows you to adjust and customize the layout inside the bag according to your needs.
Here, how to make a bean bag for camera support?
6. Secure Foam Inserts in the Bag
Place the foam inserts for the bottom and sides into the bag. Ensure they fit snugly and cover all interior surfaces.
Use Velcro strips or fabric glue to secure them in place. The inserts should be stable and not move when you place or remove your gear.
7. Arrange and Attach Dividers
Position the padded dividers inside the bag to create compartments for your DSLR, lenses, and accessories.
Use the Velcro strips to attach the dividers to the side inserts. Adjust the dividers to fit your gear snugly, ensuring each piece of equipment has its own secure space.
8. Add Extra Pockets and Features
Enhance your camera bag by adding extra pockets for smaller items like memory cards, batteries, and cables.
Sew or glue additional fabric pockets to the inside of the bag. Consider adding elastic straps or mesh pockets for organizing and securing smaller accessories.
9. Test and Adjust
Place your camera, lenses, and accessories inside the bag and check for fit and protection. Make any necessary adjustments to the dividers or padding to ensure everything is secure and well-protected.
Ensure that the bag is comfortable to carry and that the weight is evenly distributed. Once satisfied, your DIY camera bag is ready for use, providing customized protection for your DSLR equipment.
Conclusion:
In conclusion, creating a camera bag for a DSLR involves selecting durable materials, designing compartments for organization, and ensuring sufficient padding for protection.
Customizing the bag’s size and style to suit your needs adds a personal touch. With attention to detail, you can craft a functional and stylish camera bag.


