
Ever since cameras started becoming more and more popular, people have been looking for ways to carry their gear with them wherever they go.
Unfortunately, traditional camera bags can be bulky and difficult to carry around. That’s where camera bag inserts come in – they’re small, portable pieces of equipment that make carrying a camera much easier. In this article, we’ll show you how to make your own camera bag insert, so you can easily take your photos wherever you go!
What is a Camera Bag Insert?
A camera bag insert is a great way to organize and protect your camera gear when you’re travelling. It’s also a great way to keep your camera clean and free from dust and scratches.
There are a few different ways to make a camera bag insert, so choose the one that best suits your needs.
One popular method is to use a large zippered pouch as the main compartment of your camera bag insert. This pouch can be filled with everything from spare batteries to memory cards. You can then divide it into subsections using soft fabric dividers or elastic bands.
This method allows you to easily find what you need without having to rummage through layers of clothes and equipment.
Another option is to use small pouches lined with soft fabric or mesh for your camera gear. These pouches can be placed inside larger pockets in your backpack or suitcase, allowing them to remain protected while still remaining accessible.
They’re perfect for carrying just the essentials like batteries and memory cards without having to lug around an entire camera bag full of gear.
Also here take a look at how to put a strap on a film camera.
Materials Needed
To make a camera bag insert, you will need a piece of fabric that is at least 18 inches wide by 12 inches high, an iron, and a sewing machine.
First, measure the width of your camera bag opening and subtract 1 inch from that measurement. For example, if your camera bag opening is 20 inches wide, your fabric should be 19½ inches wide.
Then measure the height of your camera bag opening and subtract 1 inch from that measurement. For example, if your camera bag opening is 13 inches high, your fabric should be 12½ inches high.
Cut out the fabric pieces according to these measurements. You will then need to fold the fabric in half so that it measures 18 inches wide by 12 inches high.
Pin the folded fabric together along one long edge and then sew it together using a seam allowance of ¼ inch. Make sure to leave a small opening at the top of the insert so that you can easily fit your camera into the bag.
3 Quik steps How to Make a Camera Bag Insert?
Making a camera bag insert is simple, and it can add a level of organization to your photo gear. All you need is some fabric, a crafting knife, and some measurements.
1. Cut the fabric to the desired size. You’ll need enough fabric to cover the entire inside of your bag, plus an inch or two extra on each side for seam allowance.
2. Measure the circumference of your camera’s lens (or any other important parts), and subtract 1 inch from that measurement. This is the maximum width of your fabric strip.
3. Sew the fabric strip together along one long edge, making sure to leave a 1-inch border on all sides except for the one you just sewed together. Then turn it right-side out so that the raw edge is facing outwards.

4. Pin the border of the fabric strip down evenly all around, then sew it securely closed with a few stitches at either end. Make sure there are no big gaps or holes in your finished product!
Tips for Making a Camera Bag Insert
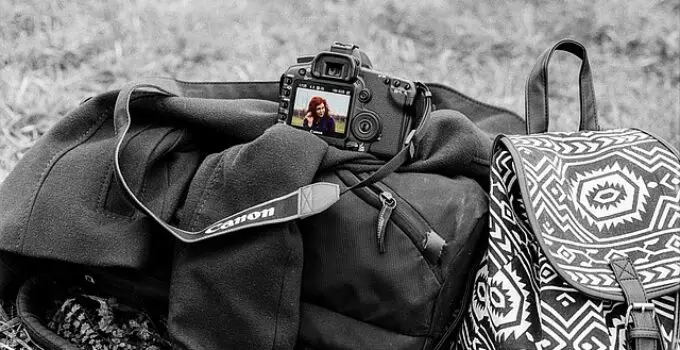
camera bag insert
Creating a camera bag insert is a great way to organize and protect your gear while travelling. Here are some tips for making a perfect insert:
1. Choose the right fabric. Camera inserts are usually made from either heavy-duty fabrics or water-resistant materials. Choose something that will hold up to wear and tear and resist snags and tears.
2. Cut the fabric to size. Use measurements are taken from your camera body and lens to cut the fabric to the correct size. Make sure there is enough space for your lenses, filters, cables, and other accessories.
3. Sew the fabric together. Sew the fabric together using a zigzag stitch or serged seam so it is durable and resistant to tears. If you’re using a non-water-resistant fabric, be sure to line the inside of the insert with waterproof material before sewing together so moisture doesn’t damage your gear over time.
4. Finish off the edges of the insert. Top off the edges of your insert with bias tape or hemming tape for extra protection against snagging or tearing in transit.
Conclusion:
Camera bags can be a lot of work to carry around, and having to search through everything every time you want to take a picture can become tiresome. Luckily, there is an easy solution: make a camera bag insert! As you have seen.
This simple tutorial will show you how to make one from scratch, and it’ll be perfect for keeping all your gear organized and within reach.
Whether you’re shooting photos or videos, making this handy addition to your gear will definitely come in handy.


