Ever wondered how to protect your precious camera gear from unpredictable weather?
What if there was a way to ensure your camera bag stays waterproof through rain or accidental spills?
In a nutshell, making your camera bag waterproof involves using specialized materials like waterproof fabrics, seam sealing techniques, and waterproof zippers.
These elements combine to safeguard your gear from moisture, ensuring it stays dry and functional.
Curious to learn the step-by-step process and expert tips from renowned photographers?
Dive into our comprehensive guide on how to make your camera bag completely waterproof and protect your equipment like a pro.
Here how to make a backpack camera bag?
Do you really need a waterproo camera bag?
Yes, a waterproof camera bag is crucial for protecting your camera gear in various situations.
Whether you’re a professional photographer or an enthusiast, water damage is a significant threat to your expensive equipment.

A waterproof camera bag provides a barrier against rain, splashes, or accidental immersion, ensuring your gear stays dry and functional.
Moreover, waterproof bags offer additional benefits beyond just moisture protection.
They often come with padded compartments and adjustable dividers, providing a secure and organized space for your camera, lenses, and accessories. This organization prevents items from knocking into each other, reducing the risk of damage during transit.
Furthermore, waterproof bags are durable and rugged, capable of withstanding rough handling and environmental challenges like dust, dirt, and sand.
They are designed to be versatile, making them suitable for outdoor adventures, travel, or even everyday use in unpredictable weather conditions.
Here, how to make a insulated camera bag?
In summary, investing in a waterproof camera bag is a wise decision to safeguard your valuable camera equipment and ensure its longevity and functionality.
Things to know before making a DIV waterproof camera bag
Before making a waterproof camera bag, consider these key factors:
- Material Quality: Use high-quality, waterproof materials like PVC, TPU, or nylon with water-resistant coatings to ensure durability and water protection.
- Seam Sealing: Ensure all seams are sealed using techniques like heat sealing or waterproof tape to prevent water leakage through stitching.
- Closure Mechanism: Choose a reliable closure system such as roll-top, zipper with a water-resistant flap, or waterproof buckles to secure the bag tightly.
- Internal Padding: Incorporate padded compartments and adjustable dividers to cushion and protect your camera gear from impacts and shocks.
- Accessibility: Design the bag with easy-access pockets and compartments for quick retrieval of essential items without compromising waterproofing.
- Ventilation: Include ventilation features like breathable mesh or air channels to prevent moisture buildup inside the bag.
- Durability: Ensure the bag is rugged and resistant to abrasions, punctures, and tearing for long-lasting use in challenging environments.
- Testing: Conduct thorough waterproof testing to validate the bag’s performance under various conditions before production.
Considering these factors will help create a reliable and functional waterproof camera bag that meets users’ needs and expectations.
How to make a camera bag waterproof?
9 steps to make a camera bag waterproof
Sure, here are the 9 steps to make a camera bag waterproof, each explained in detail:
Step 1: Select Waterproof Materials
Choosing the right materials is crucial for waterproofing. Opt for waterproof fabrics like PVC (Polyvinyl Chloride), TPU (Thermoplastic Polyurethane) coated nylon, or waterproof canvas.
These materials have high waterproof ratings and are durable enough to withstand various environmental conditions.
Step 2: Seal Seams
Sealing seams prevents water from entering through stitching holes. Use waterproof tape or seam sealer to seal all seams on the bag’s exterior and interior.
This step is essential to maintain the bag’s integrity and prevent leaks.
Step 3: Use Waterproof Zippers
Incorporate waterproof zippers with a rubberized coating or add a flap over regular zippers to enhance water resistance.
Properly functioning waterproof zippers are essential as they are a common entry point for water if not adequately protected.
Here, does ospery make a camera bag?
Step 4: Add a Rain Cover
Include a detachable or integrated rain cover for added protection during heavy rainfall or wet conditions.
The rain cover acts as an extra barrier against water, ensuring your camera gear remains dry even in extreme weather.
Step 5: Line with Waterproof Materials
Line the interior of the bag with waterproof materials such as PVC or TPU-coated fabric.
Alternatively, you can use waterproof inserts or pouches to create a waterproof barrier around your camera and accessories.
Step 6: Eliminate Gaps
Ensure there are no gaps or openings where water can enter.

Pay attention to gaps around zippers, seams, or between compartments. Use additional sealing techniques or waterproof materials to close off any potential entry points for water.
Step 7: Reinforce Stress Points
Reinforce stress points like handles, straps, and attachment points with extra layers of waterproof material or reinforced stitching.
These areas are prone to wear and tear, so reinforcing them enhances the bag’s durability and water resistance.
Step 8: Test for Waterproofing
Perform a waterproofing test before using the bag with camera equipment. Spray water or submerge the bag (without equipment) to check for leaks.
Pay attention to seams, zippers, and any potential weak points. Make adjustments as needed to ensure the bag is fully waterproof.
Step 9: Regular Maintenance
Regularly maintain and reapply waterproofing treatments as necessary.
Over time, waterproof coatings may wear off, so it’s essential to reapply coatings or treatments to maintain the bag’s waterproof properties and protect your camera gear.
By following these 9 steps, you can effectively make a camera bag waterproof and provide reliable protection for your valuable camera equipment.
Here, does vera bradley make a camera bag?
DIV camera bag waterproof
The DIV camera bag is designed to offer superior waterproofing capabilities, ensuring optimal protection for your valuable camera gear in various environmental conditions.
Here are the key features and methods used to make a DIV camera bag waterproof:
High-Quality Waterproof Materials
DIV camera bags are crafted from top-quality waterproof materials such as PVC (Polyvinyl Chloride), TPU (Thermoplastic Polyurethane) coated nylon, or waterproof canvas.
These materials have high waterproof ratings and are known for their durability and resistance to water penetration.
Seam Sealing Technology
The seams of DIV camera bags are sealed using advanced seam sealing technology.
This process involves using waterproof tape or seam sealer to close off stitching holes, preventing water from seeping through the seams and reaching the interior of the bag.
Waterproof Zippers
DIV camera bags feature waterproof zippers with a rubberized coating.
These specially designed zippers create a tight seal that prevents water from entering through the zipper teeth, ensuring maximum water resistance.
Integrated Rain Cover
Many DIV camera bags come with an integrated rain cover.
This detachable cover provides an extra layer of protection during heavy rainfall or wet conditions, further enhancing the bag’s waterproofing capabilities.
Reinforced Stress Points
DIV camera bags are reinforced at stress points such as handles, straps, and attachment points.
Extra layers of waterproof material and reinforced stitching are used to strengthen these areas, minimizing the risk of water penetration due to wear and tear.
Testing and Quality Assurance
Before being released to the market, DIV camera bags undergo rigorous testing to ensure their waterproofing effectiveness.
These tests include water submersion, water spray, and simulated weather conditions to validate the bags’ ability to keep your camera gear dry and secure.
Overall, the combination of high-quality waterproof materials, advanced seam sealing technology, waterproof zippers, integrated rain covers, reinforced stress points, and thorough testing makes DIV camera bags highly reliable and effective in protecting your camera equipment from water damage.
Related faq’s
What types of materials are best suited for making waterproof camera bags or travel cases?
The best materials for making waterproof camera bags or travel cases are those with high waterproof ratings and durability.
PVC (Polyvinyl Chloride) is commonly used due to its excellent waterproofing properties and resistance to abrasions.
TPU (Thermoplastic Polyurethane) coated nylon offers flexibility, strength, and waterproofing capabilities, making it another popular choice.
Waterproof canvas, treated with water-resistant coatings, provides a rugged and stylish option for camera bags.
Additionally, materials like neoprene and EVA foam are often used for padding and shock absorption within the bag while also offering water resistance.
When selecting materials for waterproof camera bags or travel cases, prioritize those that are waterproof, durable, and capable of protecting your gear from moisture, impacts, and environmental elements during travel or outdoor adventures.
What are the pros and cons of getting a waterproof housing for your cell phone versus getting a waterproof point and shoot camera instead, when you just want to take some underwater pictures at the ocean and rivers and lakes?
Getting a waterproof housing for your cell phone versus a waterproof point-and-shoot camera for underwater photography has its pros and cons:
Waterproof Housing for Cell Phone:
Pros:
- Cost-effective: Waterproof housings are generally less expensive than waterproof cameras.
- Versatility: You can use your existing cell phone, reducing the need for additional equipment.
- Familiarity: If you’re already comfortable with your phone’s camera settings, it’s convenient to use.
- Wide range of accessories: Cell phone housings often come with additional accessories like straps and mounts.
Cons:
- Limited depth rating: Most cell phone housings have shallower depth ratings compared to dedicated waterproof cameras.
- Compatibility issues: Not all phones are compatible with waterproof housings, and fitting can vary.
- Less rugged: Cell phones are generally more fragile than dedicated cameras, even with a housing.
- Image quality: While modern phones have good cameras, dedicated underwater cameras may offer better image quality and features.
Waterproof Point-and-Shoot Camera:
Pros:
- Higher depth ratings: Waterproof cameras can usually withstand deeper underwater depths compared to phone housings.
- Durability: Designed for underwater use, waterproof cameras are more rugged and resistant to water damage.
- Better image quality: Dedicated underwater cameras often have specialized lenses and settings for improved underwater photography.
- Ease of use: Waterproof cameras are designed specifically for underwater conditions, making them easier to handle underwater.
Cons:
- Cost: Waterproof cameras can be more expensive than phone housings.
- Limited versatility: Waterproof cameras are dedicated devices, so they may not have the same versatility as using your phone.
- Additional equipment: You may need to purchase extra accessories like straps or floats for your waterproof camera.
Ultimately, the choice depends on your budget, desired depth rating, image quality requirements, and preference for using existing equipment versus investing in dedicated gear for underwater photography.
How do I make a waterproof camera case?
How to make a waterproof pouch?
Making a waterproof pouch is straightforward. Here’s how:
- Gather Materials: You’ll need waterproof fabric (like PVC or TPU-coated nylon), waterproof zipper, scissors, sewing machine, thread, and a ruler.
- Cut Fabric: Decide on the size of your pouch and cut two identical pieces from the waterproof fabric.
- Attach Zipper: Place the zipper face-down on the edge of one fabric piece. Sew along the zipper tape using a zipper foot attachment on your sewing machine.
- Sew Sides: With the zipper partially open, place the other fabric piece on top (right sides facing each other). Sew around the three remaining sides, leaving a small opening for turning.
- Turn Inside Out: Turn the pouch inside out through the opening. Push out corners for a neat finish.
- Close Opening: Hand-stitch or use the sewing machine to close the opening neatly.
- Test Waterproofing: Test the pouch by putting a tissue inside and submerging it in water for a few minutes. Check for leaks and reinforce seams if necessary.
- Add Finishing Touches: Trim excess threads and reinforce seams for durability.
Following these steps will help you create a functional and waterproof pouch for protecting your belongings from water damage.
How to cover a camera when raining?
When covering a camera in rainy conditions, follow these steps to protect it effectively:
- Use a Rain Cover: Invest in a dedicated rain cover designed for your specific camera model. These covers provide full protection while allowing access to camera controls and viewfinders.
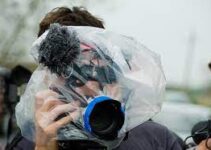
- DIY Plastic Bag Cover: If you don’t have a rain cover, use a large, clear plastic bag to cover the camera. Cut holes for the lens and viewfinder, then secure the bag tightly around the camera body with rubber bands or tape.
- Umbrella or Shelter: Position an umbrella or find shelter to minimize direct exposure of the camera to raindrops.
- Avoid Condensation: Ensure the camera doesn’t get too humid inside the cover. Use silica gel packs or a small towel to absorb moisture if needed.
- Be Mindful of Electronics: Keep the camera’s electronic components away from direct exposure to water. If using a DIY cover, ensure it doesn’t interfere with buttons or ports.
By following these steps, you can protect your camera from rain and ensure it continues functioning optimally in wet conditions.


