
Are you tired of lugging around your camera equipment in a heavy and cumbersome bag? How to make a diy rolling camera bag? Well, we have the perfect solution for you!
In this article, we will show you how to make your very own DIY rolling camera bag. Imagine having all your gear neatly organized and easily transportable, with wheels to effortlessly glide along.

Say goodbye to shoulder strain and hello to convenience. Are you ready to embark on this exciting camera bag transformation?
But before checking out, do you really want to take out your camera beg before checking security?
Let’s get started!
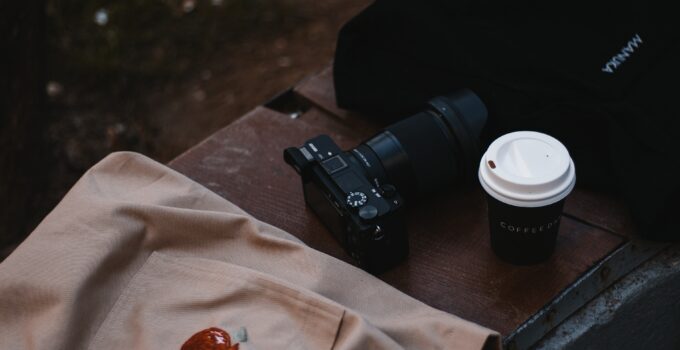
This first look at what material you need in order to make a rolling di camera bag.
Gathering Materials and Tools
List and describe the materials and tools required for this project. Include items like a
- Sturdy bag or suitcase
- Foam padding,
- Dividers,
- Fabric,
- Zippers,
- Straps and wheels.
6 proven Steps to Make a Rolling Div camera bag
1. Designing the Bag
- Measure the dimensions of your camera gear and assess how much space you’ll need in the bag.
- Sketch a rough layout of the compartments and dividers on paper or use digital design tools.
- Consider the weight distribution and accessibility of your gear when deciding on the layout.
- Take inspiration from commercially available camera bags and customize the design to suit your specific needs.
Here look up how to fix a camera bag with pilling vinyl.
2. Constructing the Bag
- Start by acquiring a sturdy bag or suitcase that will serve as the base for your DIY rolling camera bag.
- Carefully cut foam padding to fit the interior of the bag, creating separate compartments for different pieces of equipment.
- Attach the foam padding securely using adhesive or by sewing it into fabric pockets.
- Measure and cut fabric to cover the foam padding and sew or glue it in place, ensuring a snug fit.
- Install zippers on the fabric cover to provide easy access to the compartments.

3. Adding Protective Features
- Reinforce the corners of the bag with additional padding or hard shells to protect against impact.
- Consider using adjustable dividers or padded inserts to protect and prevent gear from shifting during transport.
- Create a separate padded compartment for your camera body and lenses to minimize the risk of damage.
- Incorporate a rain cover or water-resistant material to protect your equipment from moisture.
4. Enhancing Mobility
- Choose high-quality wheels that can withstand the weight of your gear and ensure smooth rolling.
- Attach the wheels to the bottom of the bag using screws or other appropriate fasteners.
- Install a retractable handle or attach a sturdy handle to the bag for easy maneuverability.
- Consider adding straps or handles on the sides of the bag to provide alternative carrying options.
Here look up which way to place the camera in a bag.
5. Personalizing the Bag
- Select a fabric that reflects your personal style or matches your branding as a photographer.
- Add decorative elements like patches, embroidery, or custom labels to make the bag unique.
- Include additional pockets or compartments to accommodate small accessories like filters or lens caps.
- Consider attaching a small pouch on the exterior to hold personal items such as a smartphone or wallet.
6. Testing and Final Adjustments
- Load your camera gear into the DIY rolling bag and test its functionality and stability.
- Ensure that the compartments provide adequate protection and keep the gear secure.
- Adjust the dividers or padding as necessary to optimize the fit and organization.
- Take the bag for a test run, rolling it over various surfaces and testing its durability and ease of use.
- Make any final adjustments based on your experience and preferences.
Here look up how to configure the Tamrax camera bag.

FAQs (Frequently Asked Questions)
Can I use any type of bag or suitcase for this project?
A: While you can choose the bag or suitcase for your DIY rolling camera bag, it’s important to consider a few factors. Opt for a sturdy and durable bag that can handle the weight of your camera gear.
Look for a bag with a solid structure and reinforced corners.
Additionally, ensure that the bag has enough space to accommodate your equipment and the necessary padding for protection.
Is it necessary to have sewing skills to construct the bag?
A: Sewing skills can be helpful but are not always necessary. You can explore alternative methods such as using adhesive or fabric glue to attach the foam padding and fabric cover.
If you prefer a more professional finish, basic sewing skills will come in handy for sewing fabric pockets and attaching zippers.
However, various no-sew options are available, allowing you to create a DIY rolling camera bag without extensive sewing knowledge.
How can I ensure the safety of my camera gear inside the DIY bag?
A: To ensure the safety of your camera gear, it’s important to incorporate protective features in your DIY rolling camera bag. Use high-quality foam padding to create secure compartments that fit your gear snugly.
Consider reinforced corners and additional padding for delicate equipment.
Adjustable dividers or padded inserts can prevent gear from shifting during transport. You can also opt for a bag with a hard shell or incorporate a rain cover to protect against impact and moisture.
Can I customize the bag further after completing the initial construction?
A: Yes, one of the advantages of a DIY rolling camera bag is its customization potential. After completing the initial construction, you can continue to personalize and modify the bag to meet your specific needs.
You can add extra pockets, compartments, or straps based on your preferences.
Consider incorporating additional features like hooks for attaching accessories or external pouches for easy access to frequently used items. The customization possibilities are endless!
Are there any specific tools or materials I should avoid using?
A: While there is flexibility in selecting tools and materials for your DIY rolling camera bag, there are a few things to keep in mind.
Avoid using materials that may scratch or damage your camera gear, such as rough or abrasive fabrics.
Ensure that the adhesives or glues you use are suitable for your working materials and won’t cause any damage. Additionally, choose wheels that are sturdy and capable of supporting the weight of your gear to prevent any potential accidents.
These frequently asked questions and their corresponding answers will provide additional information and address common concerns readers may have about making their own DIY rolling camera bag.
Conclusion:
In conclusion, creating a DIY rolling camera bag is a cost-effective and personalized solution for photographers who want a convenient way to transport their equipment.
Following the step-by-step instructions in this blog, you can customize a rolling camera bag that suits your specific needs.
To choose a sturdy and durable bag, incorporate padded dividers or inserts to protect your gear, and ensure smooth-rolling wheels for easy maneuverability.
Furthermore, consider adding extra compartments or pockets for accessories and organizing smaller items.
With a DIY rolling camera bag, you can enjoy the benefits of a portable and efficient storage solution while expressing your creativity.


