
What is padded camera bag insert?
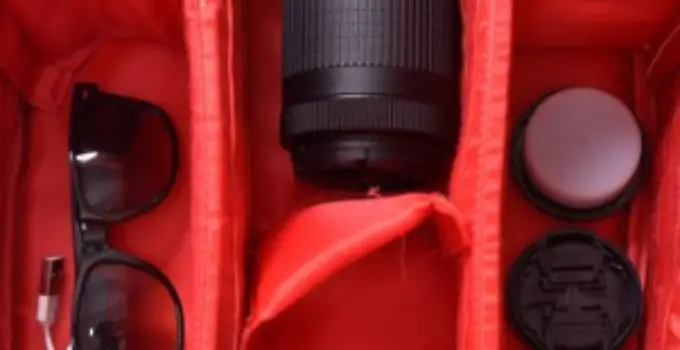
A padded camera bag insert is a protective accessory designed to organize and safeguard camera equipment within a larger bag or backpack.
Made from soft, padded materials like foam or cushioned fabric, these inserts feature adjustable dividers to accommodate various camera bodies, lenses, and accessories.
The padding absorbs shocks and prevents scratches, ensuring that the gear remains secure during transport.
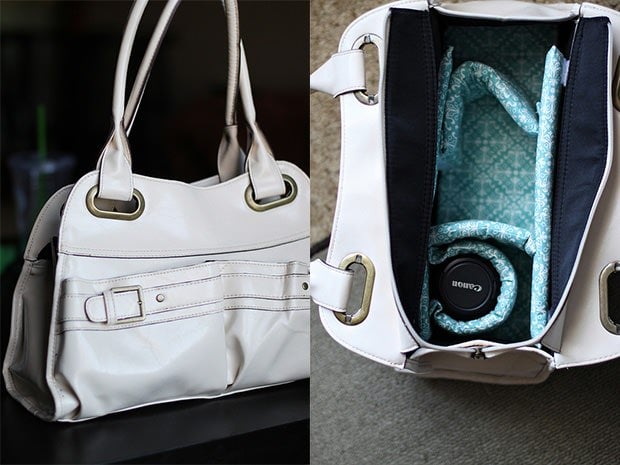
Padded inserts offer versatility as they can be easily moved between different bags, providing a customizable storage solution for photographers.
They are ideal for travel, outdoor photography, and any situation where carrying a full camera bag might be impractical.
By transforming a regular bag into a camera-friendly one, padded inserts offer both protection and convenience, catering to the needs of amateur and professional photographers alike.
Here, how to make a camera tripod bag.
Are padded camera bag insert worth it?
Benefits of padded camera bag insert
1. Protection Against Damage
A padded camera bag insert provides essential cushioning to protect your valuable camera equipment from bumps, knocks, and impacts during transportation.
The soft padding absorbs shocks, preventing damage to sensitive components like lenses, camera bodies, and accessories.
This protection is crucial for maintaining the functionality and appearance of your gear over time.
2. Customizable Organization
With adjustable dividers, padded inserts offer customizable organization for your camera gear. You can create compartments tailored to the size and shape of each item, ensuring a snug and secure fit.
This level of organization makes it easy to access specific equipment quickly, saving time and reducing the risk of accidental damage while rummaging through a cluttered bag.
Here, how to make a camera lens bag?
3. Versatility Across Bags
One of the significant benefits of padded inserts is their versatility.
You can use them in various bags, such as backpacks, messenger bags, or duffel bags, transforming any suitable bag into a camera bag.
This flexibility allows you to choose the most comfortable or stylish bag for your needs without sacrificing protection for your gear.
4. Space Optimization
By efficiently utilizing the available space within a bag, padded inserts help optimize storage capacity.
They prevent equipment from shifting or moving around during transit, maximizing the use of every inch of space.
This is particularly beneficial for photographers who carry multiple lenses, camera bodies, and accessories, ensuring everything stays organized and protected.
5. Ease of Transport
The lightweight nature of padded camera bag inserts adds minimal bulk to your bag while providing significant protection.

This makes it easier to carry your camera gear comfortably, whether you’re traveling long distances or navigating through crowded environments.
The reduced weight also contributes to less strain on your shoulders and back.
6. Cost-Effective Solution
Investing in a padded insert is often more cost-effective than purchasing a dedicated camera bag.
It allows you to repurpose existing bags, saving money while still enjoying the benefits of organized and protected storage for your camera equipment.
7. Preservation of Resale Value
Properly protecting your camera gear with a padded insert can help preserve its resale value. Maintaining equipment in excellent condition, free from scratches or damage, ensures that it retains its value over time.
This can be beneficial if you decide to upgrade or sell your gear in the future, maximizing its worth.
Here, how to make a camera bag waterproof.
9 steps to make a camera bag insert
1. Gather Materials and Tools
Before you start making a camera bag insert, gather all the necessary materials and tools.
You’ll need foam padding (preferably closed-cell foam for durability), fabric for the outer covering, scissors or a utility knife, a ruler or measuring tape, fabric glue or adhesive, and optionally, a sewing machine if you prefer sewing.
2. Measure Bag Interior
Measure the interior dimensions of your camera bag where you plan to place the insert.
Take precise measurements of the length, width, and depth to ensure a snug fit for your camera equipment.
Add a little extra to accommodate the thickness of the padding and allow for easy insertion and removal.
3. Cut Foam Padding
Using your measurements, cut the foam padding to fit the interior of your camera bag.
You’ll need pieces for the bottom, sides, and any dividers you want to create.
A utility knife or sharp scissors work well for cutting foam. Ensure the pieces fit together snugly but can be easily inserted and removed from the bag.
4. Cut Fabric
Cut the fabric for the outer covering of the insert.
You’ll need pieces that correspond to the foam padding pieces you’ve cut. Leave some extra fabric around the edges to account for folding and securing the covering over the foam.
5. Assemble Padding Layers
Layer the foam padding pieces together to create the desired layout for your camera gear.
You may want to stack pieces to create compartments for lenses, camera bodies, and accessories. Use fabric glue or adhesive to secure the layers together, ensuring they form a cohesive unit.
6. Cover with Fabric
Wrap the assembled foam padding with the cut fabric, folding and securing it neatly around the edges.
If you’re using fabric glue, apply it along the edges of the foam and press the fabric firmly to create a tight seal. If you prefer sewing, stitch the fabric together around the edges for a secure fit.
7. Add Dividers (Optional)
If you want dividers within the insert to further organize your camera gear, cut additional foam pieces to size and cover them with fabric.
Attach these dividers inside the insert using fabric glue or by sewing them into place, creating separate compartments for different items.
8. Test Fit in Bag
Once the insert is fully assembled, test fit it inside your camera bag.
Ensure it fits snugly without being too tight or too loose. Adjustments may be necessary to achieve the perfect fit and ensure that your gear will be well-protected and organized.
9. Finalize and Secure
After testing the fit, make any final adjustments and secure the fabric covering and dividers in place.
Trim any excess fabric for a clean finish. Your homemade camera bag insert is now ready to protect and organize your camera gear effectively!
Here, how to make a waterproof camera bag?
How to use padded camera bag insert (7 ways)
1. Customized Gear Organization
Utilize the padded camera bag insert for customized gear organization. Arrange the adjustable dividers to create compartments tailored to your specific camera equipment.
Separate sections for camera bodies, lenses, batteries, and accessories ensure easy access and prevent items from shifting during transport.
This level of organization streamlines your workflow, saving time and reducing the risk of damage to delicate gear.
2. Travel-Friendly Protection
When traveling, use the padded insert to safeguard your camera gear. Place the insert inside a sturdy backpack or carry-on bag to protect equipment from bumps and jostling.
The padded compartments absorb shocks and prevent scratches, ensuring your gear remains in optimal condition throughout your journey.
This travel-friendly protection is essential for photographers who need to transport their gear safely.
3. Quick Access Setup
Employ the padded insert for quick access setup during photo shoots.
Arrange your gear within the insert according to your shooting preferences, such as having lenses and accessories readily available.
When you reach your shooting location, simply unzip your bag, lift out the insert, and have everything you need conveniently organized and protected for efficient photography.
4. Multi-Bag Compatibility
Take advantage of the insert’s versatility for multi-bag compatibility.
Transfer the padded insert between different bags, such as a backpack, messenger bag, or tote, based on your needs and style preferences.
This flexibility allows you to use your favorite bags for different occasions while ensuring consistent protection and organization for your camera gear.
5. Studio Organization
Utilize the padded insert for studio organization. If you have a dedicated photography studio, place the insert in a storage cabinet or drawer.
Arrange your gear within the insert to keep everything organized and easily accessible when working on studio projects.
The insert’s protective padding ensures that your equipment remains safe from damage, even in a studio setting.
6. Event Photography Efficiency
Increase efficiency during event photography by using the padded insert.
Customize the compartments to hold essential gear like multiple lenses, camera bodies, flash units, and batteries.
The organized layout allows you to switch equipment quickly between shots, capturing moments seamlessly without fumbling through a cluttered bag.
7. Outdoor Adventure Protection
When embarking on outdoor photography adventures, rely on the padded insert for enhanced protection.
Insert it into a durable backpack designed for rugged terrain.
The padded compartments shield your gear from the elements, including dust, moisture, and accidental impacts, allowing you to focus on capturing stunning outdoor images with peace of mind.
Related faq’s
What materials do I need to make a padded camera bag insert?
You’ll need foam padding (preferably closed-cell foam), fabric for the outer covering, scissors or a utility knife, a ruler or measuring tape, fabric glue or adhesive, and optionally, a sewing machine if you prefer sewing.
How do I measure the interior of my camera bag for the insert?
Measure the length, width, and depth of the bag’s interior. Add a little extra to accommodate padding thickness and ease of insertion.
What’s the process for cutting and assembling the foam padding?
Cut the foam to fit the interior dimensions of your bag. Layer pieces to create compartments if desired. Secure layers with fabric glue or sewing.
How do I cover the foam padding with fabric?
Cut fabric pieces matching the foam shapes, leaving extra for folding. Wrap the foam tightly, securing the fabric with glue or sewing.
How can I test and finalize the insert?
Test the insert’s fit in your bag, making adjustments as needed. Trim excess fabric and ensure dividers (if used) are secure.
Conclusion:
Creating a padded camera bag insert involves measuring, cutting, and assembling foam padding with fabric to protect and organize camera gear.
It’s a customizable and cost-effective solution for photographers, offering versatility across bags and ensuring gear remains secure during transport, whether for travel, studio work, or outdoor adventures.


