
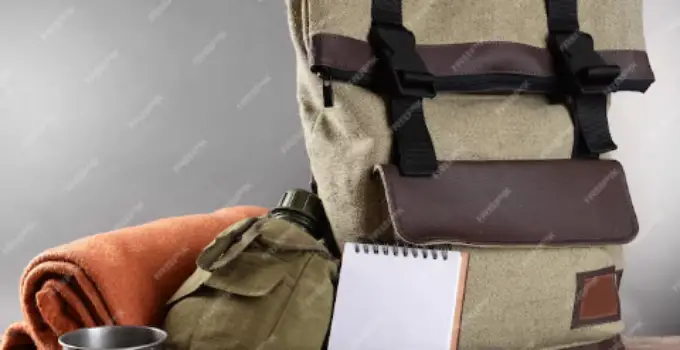
Are you tired of bulky camera bags that weigh you down?
What if you could create a small, lightweight camera bag that perfectly fits your gear and style? In this guide, we’ll explore the art of making a compact camera bag that’s as functional as it is fashionable.
In just a few steps, you’ll learn how to craft a small camera bag that suits your needs.
From selecting the right materials to customizing the design to match your personality, we’ve got you covered.
Say goodbye to lugging around oversized bags and hello to a sleek, portable solution for your photography adventures.
Ready to dive into the world of DIY camera bags? Follow along as we unveil the secrets to creating a small yet practical bag that ticks all the boxes.
Whether you’re a professional photographer or a hobbyist, this guide will elevate your carrying experience and keep your gear safe and accessible on the go.
Can you make your own small camera bag?
Why you need a small camera bag?
A small camera bag is essential for photographers for several reasons.
First, it provides protection, safeguarding the camera and lenses from physical damage, dust, and moisture. The padded compartments reduce the risk of impact damage during transport.
Second, it offers convenience and organization.
A well-designed bag keeps all your gear, including memory cards, batteries, and lenses, organized and easily accessible, ensuring you don’t miss a shot due to misplaced equipment.

Third, it enhances mobility. A compact camera bag is lightweight and easy to carry, making it ideal for travel, street photography, and quick shoots where carrying a larger bag would be cumbersome.
Lastly, it offers discretion. A smaller bag is less conspicuous, reducing the risk of theft and allowing photographers to blend in more easily in crowds or sensitive environments.
Overall, a small camera bag balances protection, convenience, and mobility, making it a crucial accessory for photographers.
How much does it cost to make your own small camera bag?
Things to know before making a small camera bag?
How to make a small camera bag?
To make a small camera bag, follow these steps:
- Gather Materials: Obtain durable fabric (canvas or nylon), soft lining fabric, foam padding, a zipper or Velcro, and straps.
- Cut Fabric: Cut two large rectangles for the front and back, two smaller rectangles for the sides, and a long strip for the bottom and sides, ensuring dimensions fit your camera and accessories.
- Add Padding: Place foam padding between the outer fabric and lining fabric for protection. Secure the padding with temporary stitching or adhesive.
- Assemble the Bag: Sew the pieces together. Start by sewing the sides to the bottom strip, then attach the front and back panels. Reinforce the seams for durability.
- Install Closure: Sew a zipper or Velcro strip along the top edges for secure closure.
- Attach Straps: Sew sturdy straps or handles to the bag. Reinforce the attachment points for extra strength.
- Finishing Touches: Add interior dividers or pockets for organization and ensure all seams are finished to prevent fraying.
This method ensures a custom, protective, and functional camera bag.
9 steps to make small camera bag
1. Gather Materials
Start by gathering all the necessary materials.
You’ll need durable fabric like canvas or nylon for the exterior, soft fabric for the lining to protect your camera, foam or batting for padding, a zipper or Velcro for closure, and sturdy webbing or fabric for the straps.
Having the right materials ensures your camera bag will be durable, protective, and comfortable to carry.
Here, how to make a camera tripod stand.
2. Measure and Cut Fabric
Measure your camera and accessories to determine the size of the bag.
Cut two rectangles for the front and back, two smaller rectangles for the sides, and a long strip for the bottom and sides.
Ensure the dimensions allow extra space for seams and padding. Precise measurements and cuts are crucial for a well-fitting bag.
3. Prepare Padding
Cut foam sheets or batting to fit between the exterior fabric and lining.
The padding should cover all sides, bottom, and top to protect the camera from impacts.
Attach the padding to the lining fabric using temporary stitches or fabric adhesive. Proper padding is essential for protecting your equipment from bumps and drops.
4. Assemble the Main Body
Start assembling the bag by sewing the side panels to the bottom strip. Then attach the front and back panels to this assembly. Use a sewing machine for strong, even seams.
Reinforce corners and stress points for added durability. This step forms the main structure of your camera bag.
5. Install the Closure
Attach a zipper or Velcro to the top edges of the bag. If using a zipper, ensure it’s robust and runs smoothly. For Velcro, ensure it’s aligned properly for a secure closure.
A reliable closure is important to keep your camera and accessories safely inside the bag.
6. Attach Lining
Sew the lining to the interior of the bag, covering the padding. This step protects your camera from scratches and adds a finished look to the interior.
Ensure the lining is smooth and securely attached to prevent it from shifting or bunching up.
Here, how to make a camera lens bag?
7. Add Straps and Handles
Attach the straps or handles to the bag. Sew them securely, reinforcing the stitching at the attachment points to handle the weight of the camera.

Adjustable straps are ideal for customizing the fit. Properly attached straps ensure comfortable and safe carrying.
8. Create Interior Dividers
Cut and sew additional pieces of fabric to create interior dividers or pockets. These will help organize your camera, lenses, and accessories.
Attach these dividers securely to the inside of the bag. Interior organization helps prevent items from shifting and protects delicate equipment.
9. Finishing Touches
Inspect the entire bag for any loose threads or unfinished seams and fix them. Consider adding a waterproof lining or exterior coating for added protection against the elements.
Ensure all parts of the bag are securely sewn and check the functionality of the zipper or Velcro. Adding finishing touches ensures the bag is both functional and aesthetically pleasing.
By following these detailed steps, you can create a small camera bag that is customized to your needs, providing both protection and convenience for your camera gear.
Here, how to make a waterproof camera bag.
Related faq’s
What materials are needed to make a small camera bag?
To make a small camera bag, you need:
- Durable fabric like canvas, nylon, or polyester for the exterior.
- Soft lining fabric to protect the camera from scratches.
- Foam or batting for padding to cushion the camera and accessories.
- Zipper or Velcro for closure.
- Webbing or strong fabric for straps or handles.
- Basic sewing supplies like thread, needles, scissors, and a sewing machine.
How do you determine the size of the camera bag?
To determine the size of your camera bag:
- Measure your camera: Length, width, and height.
- Add space for padding and seams: Typically, add 1-2 inches to each measurement.
- Consider extra compartments: Include additional space if you need pockets or dividers for lenses and accessories.
- Sketch the dimensions: Draw a rough layout of the bag to visualize and adjust as needed.
How do you prepare and cut the fabric for the camera bag?
To prepare and cut the fabric:
- Measure and mark: Use a ruler and fabric chalk to mark the dimensions on the fabric.
- Cut out pieces: Cut two rectangles for the front and back, two smaller rectangles for the sides, and a long strip for the bottom and sides.
- Cut padding: Cut foam or batting pieces to match the fabric pieces for added protection.
- Ensure accuracy: Double-check measurements before cutting to avoid mistakes.
How do you assemble the main body of the camera bag?
To assemble the main body:
- Sew sides to the bottom strip: Start by attaching the side panels to the long bottom strip.
- Attach front and back panels: Sew the front and back rectangles to the assembled sides and bottom.
- Reinforce seams: Use strong, even stitches and reinforce corners and stress points.
- Add padding: Insert foam or batting between the exterior fabric and lining before stitching completely closed.
How do you install the closure for the camera bag?
To install the closure:
- Zipper: Pin and sew a sturdy zipper along the top edge of the bag. Ensure it runs smoothly and is securely attached.
- Velcro: If using Velcro, sew the hook and loop strips along the top edges. Make sure they align perfectly for a secure closure.
- Test: Open and close the bag multiple times to ensure the closure works properly and is easy to use.
How do you add straps and finalize the camera bag?
To add straps and finalize:
- Attach straps: Sew straps or handles to the top sides of the bag. Reinforce the stitching at the attachment points.
- Add interior dividers: Sew additional fabric pieces to create pockets or compartments inside the bag for organization.
- Finish edges: Ensure all seams are finished to prevent fraying. Check the entire bag for loose threads or weak points.
- Test the bag: Place your camera and accessories inside to ensure everything fits and the bag is comfortable to carry. Make any necessary adjustments.
By addressing these key questions and steps, you can successfully create a functional and protective small camera bag tailored to your needs.
How to make a small camera bag?
To make a small camera bag, gather durable fabric, soft lining, foam padding, a zipper or Velcro, and straps.
Measure and cut two rectangles for the front and back, two smaller rectangles for the sides, and a long strip for the bottom and sides.
Sew these pieces together, inserting foam padding for protection.
Attach a zipper or Velcro for closure. Sew the lining inside the bag, ensuring it’s smooth. Attach sturdy straps, reinforcing the stitching. Add any interior dividers or pockets for organization.
Finish by checking all seams and making any necessary adjustments for a secure, protective bag.
Can I use any bag as a camera bag?
You can use any bag as a camera bag, but it might not provide adequate protection.
Camera bags are designed with padding to protect delicate equipment from impacts and scratches.
If using a regular bag, add custom padding using foam inserts or padded dividers to create compartments for the camera and lenses.
Ensure the bag has a secure closure, such as a zipper, to prevent items from falling out.
While a regular bag can work in a pinch, a dedicated camera bag offers better protection, organization, and ease of access for your photography gear.
Conclusion:
Creating a small camera bag involves careful planning and the right materials.
By selecting durable fabric, adding foam padding, and incorporating secure closures like zippers or Velcro, you ensure your camera and accessories are well-protected.
Precise measurements and sturdy construction are crucial for a functional design.
Adding interior dividers helps with organization, while strong, reinforced straps provide comfort and durability.
Personal touches, such as waterproof lining or additional pockets, enhance usability.
With attention to detail and quality craftsmanship, you can create a custom camera bag that meets your specific needs, offering both protection and convenience for your photography gear.


