
Looking to transform your photography gear game?
Ever wondered how to craft the ultimate wheeled rolling camera bag, blending convenience and protection seamlessly?
In a nutshell, crafting a wheeled rolling camera bag entails marrying sturdy materials, ergonomic design, and ample storage.
Think durable wheels, customizable compartments, and reinforced padding for your prized equipment.
Ready to delve deeper into the art of crafting the perfect wheeled rolling camera bag?
Let’s unravel the secrets to safeguarding your gear while maintaining unmatched portability and functionality.
Here does tumi make a camera bag?
What is Wheeled rolling camera bag?
A wheeled rolling camera bag is a specialized piece of equipment designed to safely transport camera gear and accessories while offering the convenience of easy mobility.
These bags typically feature durable wheels and a retractable handle, allowing photographers and videographers to navigate airports, studios, or outdoor locations with ease.
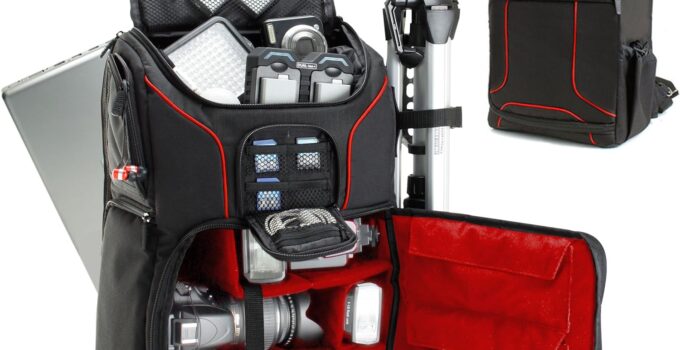
The interior of a wheeled rolling camera bag is usually padded and compartmentalized to protect delicate equipment such as cameras, lenses, flashes, and other accessories from damage during transport.
Some bags also come with customizable dividers or inserts to accommodate various gear configurations.
These bags are popular among professionals and enthusiasts who need to transport their camera equipment efficiently without compromising on protection.
They come in different sizes and designs to suit different needs, from compact bags for small setups to larger ones capable of carrying multiple cameras and accessories for extensive shoots.
Here, does northface make a camera bag?
Why you need wheeled rolling camera bag?
A wheeled rolling camera bag is essential for several reasons:
- Ease of Transport: Camera equipment can be heavy and cumbersome, especially when you have multiple pieces to carry. A wheeled rolling bag makes it easier to transport your gear, especially in airports, on location shoots, or during events where you need to move quickly.
- Protection: Camera gear is expensive and delicate. A rolling camera bag typically comes with padded compartments and dividers that protect your equipment from shocks, bumps, and other potential damage during transportation.
- Organization: These bags often have multiple compartments and pockets, allowing you to organize your gear efficiently. This makes it easier to access specific equipment when you need it, saving you time and frustration.
- Versatility: Wheeled rolling camera bags come in various sizes and designs, catering to different types of gear and shooting requirements. Whether you’re a professional photographer or a hobbyist, there’s a bag that suits your needs.
Overall, a wheeled rolling camera bag offers convenience, protection, and organization, making it an indispensable accessory for anyone serious about photography or videography.
Here, how to make a camera padded camera bag?
Are wheeled rolling camera bag worth it?
Whether a wheeled rolling camera bag is worth it depends on your specific needs and preferences:
- Mobility: If you frequently travel or move between locations with your camera gear, a wheeled rolling bag can be highly beneficial. It reduces physical strain and makes transporting equipment more manageable, especially in busy or challenging environments.
- Protection: Camera gear is expensive and fragile. A quality rolling bag offers padded compartments and sturdy construction, ensuring that your equipment remains safe from damage during transit.
- Organization: These bags often come with customizable dividers and multiple compartments, allowing you to keep your gear neatly organized and easily accessible. This can improve workflow and efficiency during shoots.
- Versatility: Wheeled rolling camera bags come in various sizes and designs, catering to different gear setups and shooting styles. Whether you have a small mirrorless setup or a large DSLR kit, there’s a bag that fits your needs.
Considering these factors, if you value convenience, protection, organization, and versatility, investing in a wheeled rolling camera bag is likely worth it.
It can enhance your photography or videography experience by making equipment transport and management more efficient and stress-free.
Here, how to make your own camera bag?
Can you make your own wheeled rolling camera bag?
Yes, you can create your own wheeled rolling camera bag with a bit of DIY effort and creativity. Here’s how:
- Select a Suitable Bag: Start with a durable bag that is large enough to accommodate your camera gear. It should have a sturdy handle and preferably some padding to provide protection.
- Add Wheels: Purchase a set of wheels designed for luggage or carts. Attach them securely to the bottom of the bag using screws, bolts, or strong adhesive, ensuring they are evenly spaced for stability.
- Include a Retractable Handle: If the bag doesn’t already have a retractable handle, you can attach one to the top or side for easy pulling.
- Customize the Interior: Use foam padding, dividers, or inserts to create compartments within the bag that fit your camera, lenses, accessories, and other gear snugly. This helps prevent items from shifting during transport.
- Test for Durability and Functionality: Before using your DIY wheeled rolling camera bag extensively, test it to ensure the wheels, handle, and interior organization can withstand the weight of your gear and provide adequate protection.
While making your own bag allows for customization and cost savings, keep in mind that commercial options often come with specialized features and higher levels of durability and protection.
How much does it cost you make your own wheeled rolling camera bag?
The cost of making your own wheeled rolling camera bag can vary depending on several factors:
Here, how to make a camera bag from scratch?
- Bag: The price of the bag itself is a significant factor. A durable bag suitable for camera gear can range from $30 to $100 or more, depending on the brand, size, and quality.
- Wheels and Handle: A set of wheels designed for luggage or carts can cost around $10 to $30, depending on the quality and brand. A retractable handle may cost an additional $10 to $20.
- Interior Customization: Foam padding, dividers, inserts, and other materials for customizing the interior of the bag can range from $10 to $50, depending on the quantity and quality of materials used.
- Tools and Supplies: You may need tools such as a screwdriver, drill, screws, bolts, adhesive, and other supplies, which can add another $10 to $30 to the overall cost.
In total, the cost of making your own wheeled rolling camera bag can range from approximately $60 to $230 or more, depending on the specific materials, tools, and customization options you choose.
Keep in mind that this estimate does not include the value of your time and labor spent on the DIY project.
How to make a wheeled rolling camera bag?
9 steps to make a wheeled rolling camera bag?
What type of bag should I use for making a wheeled rolling camera bag?
Opt for a durable bag made of sturdy materials like nylon or canvas, preferably with padding for added protection.
Look for a bag with enough space to accommodate your camera gear and compartments for organization.
Where can I find wheels suitable for a wheeled rolling camera bag?
You can purchase wheels designed for luggage or carts from hardware stores, online retailers, or specialty stores that sell luggage components.
Ensure the wheels are sturdy, have a smooth rolling action, and are compatible with the weight of your gear.
Do I need a specific type of handle for my DIY wheeled rolling camera bag?
A retractable handle designed for luggage or carts is ideal. You can find these handles at hardware stores or online.
Ensure the handle is strong enough to support the weight of the bag and gear, and that it extends and retracts smoothly.
How should I attach the wheels to the bag?
Use screws or bolts to attach the wheels securely to the bottom of the bag.
Drill holes in the bag’s bottom where you want to place the wheels, then align the wheels and fasten them tightly. Ensure the wheels are evenly spaced and aligned for stability.
Can I customize the interior of the bag for better organization?
Yes, you can customize the interior by adding foam padding, dividers, or inserts.
Use foam padding to cushion and protect your gear, and dividers to create compartments for different items such as cameras, lenses, and accessories.
How do I test the durability and functionality of my DIY wheeled rolling camera bag?
Load the bag with your camera gear and roll it around to test the wheels’ stability and smoothness. Extend and retract the handle to ensure it works properly.
Check the interior compartments to see if they securely hold your gear and prevent shifting.
Are there any tips for making my DIY wheeled rolling camera bag more durable?
Use high-quality materials for construction, ensure all components are securely fastened, reinforce weak spots with extra stitching or material, and periodically check for wear and tear. Avoid overloading the bag beyond its capacity to maintain durability.
Conclusion:
In conclusion, creating a wheeled rolling camera bag involves careful consideration of design, functionality, and durability.
The bag must be spacious enough to accommodate various camera equipment while also being compact and easy to maneuver.
Strong, quality wheels and a sturdy handle are essential for smooth transportation. Padding and compartments should protect delicate gear, ensuring its safety during travel.
Attention to materials, stitching, and overall construction guarantees longevity and reliability.
Ultimately, a well-designed wheeled rolling camera bag enhances convenience, organization, and peace of mind for photographers on the move, making it a valuable accessory in the world of photography.


