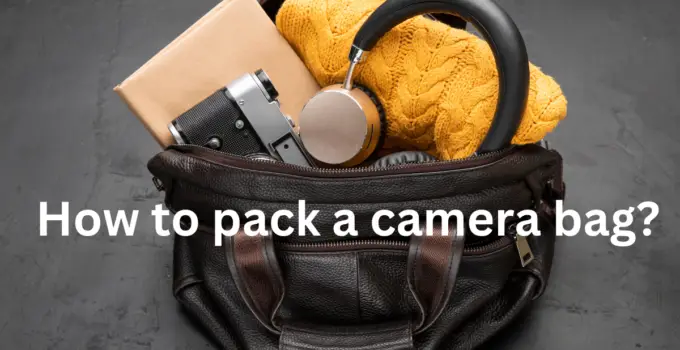
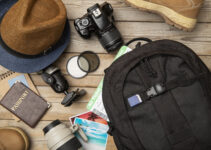
How to pack a camera bag? Such a confusing question. Isnt it?
You know, packing your camera bag can be a challenge. There are so many different types of cameras and lenses on the market, not to mention all the accessories you might want to bring with you.
Although but with a little bit of planning, you can create a packing list that will help ensure that your camera gear is well-protected and easy to access when you need it.
In this blog post, we’ll provide some tips on how to pack your camera bag for travel.
Also, we’ll also share our own packing list, which includes everything from camera gear to snacks! Keep reading to learn more.
Take a look now!
7 proven tips to pack a camera bag
Here you will see proven tips that help you pack a camera bag without feeling stressed.
So if you are in a hurry, take a quick view.
- Give Every Item Its Own Pocket
- Make Sure There’s Plenty of Padding
- Point Your Lenses Up (or Sideways)
- Move Around Dividers to Fit Your Current Setup
- Only Take What You Need
- Ensure Every Camera and Lens Has a Cap
- Throw in a couple of Silica Gel Packets
1. Give Every Item Its Own Pocket
Packing a camera bag may seem like a daunting task, but with this one simple tip, you’ll be a pro in no time. Give every item its own pocket.
This way, you can be sure that everything has a safe place, and nothing will get lost in the shuffle.
Start by lining up all of your equipment on a flat surface. Then, begin placing each item into its own dedicated pocket. Be sure to use cushioned padding around delicate items such as lenses to prevent damage.
Once everything is securely packed, close up the bag and voila! You’re ready to hit the road with all your gear safely stored away.
But let’s move to the second tip.
2. Make Sure There’s Plenty of Padding
When packing your camera bag, the most important thing to keep in mind is that your gear is fragile and needs to be protected. The best way to do this is to make sure there is plenty of padding.
The first step is to find a bag that has firm, padded walls. If you can, choose one with multiple compartments so you can further protect your camera by wrapping it in a soft cloth or sweater.
Once you have your bag, start by placing any larger items, such as lenses, in first. Then, fill in the empty spaces with smaller items, such as batteries and memory cards.
Finally, add a layer of padding on top before closing the bag. By following these simple steps, you can rest assured that your camera will arrive safe and sound – no matter where your travels take you.
3. Point Your Lenses Up (or Sideways)
If you’re a photographer, then you know the importance of packing your camera bag carefully. After all, your gear is delicate and expensive, so you want to make sure that everything stays safe during transport.
One simple tip that can help is to point your lenses up (or sideways) when you’re packing them into the bag. This will prevent the lenses from bumping into each other or getting scratched.
You can also use lens caps or padding to further protect your equipment.
By taking a few minutes to pack your camera bag properly, you can help ensure that your gear stays in good condition for years to come.
4. Move Around Dividers to Fit Your Current Setup
Having a well-organized camera bag purse can make all the difference when you’re out shooting. The last thing you want is to be fumbling around for batteries or lenses in the middle of a shoot.
Here’s a simple tip to help keep your camera bag organized: move around the dividers to fit your current setup. That way, you can quickly and easily access all of your gear.
This tip works especially well if you have a lot of different lens sizes. By customizing the dividers in your camera bag, you can ensure that everything has its own place and is easy to find.
So next time you’re packing your camera bag, take a few minutes to adjust the dividers. It’ll save you time and frustration in the long run.
5. Only Take What You Need
Packing a camera bag may seem like a no-brainer, but there is a right and wrong way to do it. The most important thing is to only take what you need.
There is no need to pack every lens and accessory you own – chances are you won’t use them all, and they will just add unnecessary weight to your bag.
Instead, take the time to decide which items you will need for the shoot and pack accordingly. For example, if you are shooting a landscape, you will likely need a wide-angle lens and a tripod.
On the other hand, if you are shooting portraits, you might want to bring along a telephoto lens and some off-camera flash.
By being selective about what goes in your bag, you can save yourself a lot of hassle – and back pain – in the long run.
6. Ensure Every Camera and Lens Has a Cap
If you’re a photography enthusiast, you know the importance of keeping your camera and lenses safe. After all, your gear is a significant investment.
The last thing you want is for something to happen to it while you’re on the go. That’s why it’s essential to know how to pack a camera bag correctly.
By following this simple tip, you can be sure that your equipment will be well-protected: always ensure that every camera and lens has a cap.
By keeping these delicate items covered, you’ll reduce the risk of them being scratched or damaged.
And in the event that something does happen to your gear, you’ll be glad you took the time to pack it properly.
7. Throw in a couple of Silica Gel Packets
If you’re a photographer, you know that one of the most important things you can do to protect your equipment is to keep it dry.
Moisture is the enemy of cameras, and even a small amount of moisture can cause corrosion and damage delicate electronic components.
That’s why it’s always a good idea to throw a couple of silica gel packets into your camera bag. Silica gel absorbs moisture from the air, creating a dry environment that will help to protect your camera gear.
Just make sure to replace the packets regularly, as they can only absorb so much moisture before they need to be replaced. With this simple tip, you can help to keep your camera gear in great condition for years to come.
You see 7 methods that help you pack your camera bag without feeling overwhelmed.
Related FAQ’S
How do I organize my camera bag?
Camera bags can be a bit of a personal preference. I prefer to have my camera bag set up with one section for my camera and lenses, and one section for all of my other photography gear (tripod, filters, etc).
This way, I can quickly grab my camera and all of my other accessories without having to search through multiple compartments.
Of course, your setup may be different depending on what type of photography you do and what gear you need to bring with you.
A good starting point is to think about the types of shots you typically take and what gear you need to have on hand to capture them.
From there, you can start organizing your bag based on those needs.
How do I pack my camera?
Here is the quick steps. Camera equipment can be bulky and heavy, so it’s important to pack it properly to avoid damage. Here are a few tips:
- Use a good camera backpack that can protect your equipment from falls and impact.
- Make sure your lenses are well-protected in soft cases or pouches.
- Pack your tripod separately, ensuring that the legs are closed and locked in place.
- If you’re bringing a laptop, make sure to pack it in a separate bag so it doesn’t get damaged by your camera equipment.
- Label all of your bags with your name and contact information in case they get misplaced during travel.
- Finally, always check with your airline about their specific
Where should I pack my camera when flying?
There is no one-size-fits-all answer to this question, as the best place to pack your camera will vary depending on the airline and the type of camera. However, here are a few general tips:
-If you have a small digital camera that you can fit in your carry-on bag, try to keep it with you at all times. That way you’ll have easy access to it and can avoid having to go through baggage check.
-If your camera is too large to fit in your carry-on bag, try putting it in a hard case or wrapping it in bubble wrap before packing it in your checked luggage.
-Make sure to include any cables or chargers that you need.
Conclusion:
Camera bags come in all shapes and sizes, but what’s inside is usually pretty similar. So, before you run out to buy the newest, fanciest camera bag on the market, take a look at what you really need to pack your camera gear.
As you have seen, We’ve put together a list of essentials for any camera bag – whether you’re hitting the streets or travelling the world. What would you add to this list? Share your tips in the comments below!

