How to pack camera bag ape case 1400?

How to pack camera bag ape case 1400?

How to pack camera bag ape case 1400?

How can you ensure your camera gear is safe and organized while on the move?

Packing your Ape Case 1400 camera bag effectively is crucial for protecting your valuable equipment and making it easily accessible.

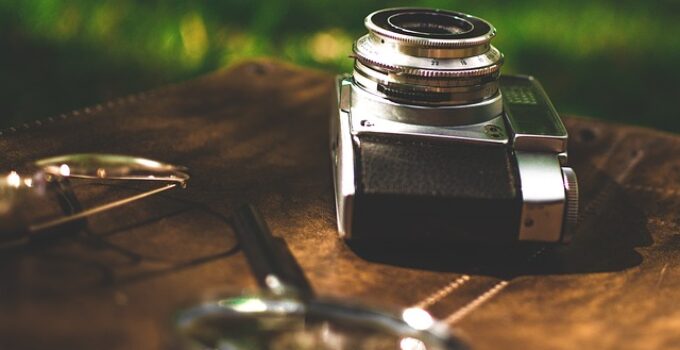
The Ape Case 1400 is a versatile, durable, and padded camera bag designed to accommodate various photography essentials, from DSLR bodies and lenses to accessories like batteries and memory cards.

With its customizable interior, you can configure the compartments to suit your specific needs, ensuring that each item is securely held in place.

Proper packing not only safeguards your gear but also enhances your efficiency during shoots.

Here how to use a sling camera bag?

Is there any ape case 1400 camera bag?

The Ape Case ACPRO1400 is a popular camera bag designed for photographers who need a durable and spacious carrying solution.

It features a customizable interior with padded, adjustable dividers to securely hold a DSLR camera, lenses, and other accessories.

The bag is made from water-resistant material, providing protection against the elements, and includes a rain cover for extra security.

It also has multiple pockets for organizing smaller items like memory cards, batteries, and filters.

The comfortable, padded shoulder strap and handles make it easy to carry.

The ACPRO1400 is known for its sturdy construction and practical design, making it a reliable choice for photographers on the go.

Is it worth to pack camera bag ape case 1400

The Ape Case ACPRO1400 is worth considering for photographers who prioritize protection, organization, and durability.

Its padded, adjustable dividers allow for a customizable interior, ensuring that your DSLR camera, lenses, and accessories are securely held.

The water-resistant material and included rain cover offer excellent protection against the elements, making it a reliable choice for outdoor shoots.

Here, how to store a77ii camera bag?

Its multiple pockets provide ample space for smaller items like memory cards, batteries, and filters, helping you stay organized.

The padded shoulder strap and handles enhance comfort during transportation, especially for extended periods.

The bag’s sturdy construction ensures long-lasting use, making it a valuable investment for both amateur and professional photographers.

Overall, the Ape Case ACPRO1400 stands out for its combination of protection, functionality, and comfort, making it a worthwhile addition to your photography gear.

Things to know before packing camera bag ape case 1400

Before packing your Ape Case ACPRO1400 camera bag, consider a few key points to maximize its functionality and ensure the safety of your gear. First, plan the layout of your equipment.

Use the padded, adjustable dividers to create compartments that securely hold your DSLR camera, lenses, and accessories. This prevents items from shifting and potentially causing damage.

Next, prioritize essential gear. Identify what you’ll need for your shoot and avoid overpacking, which can make the bag cumbersome and difficult to carry.

Utilize the various pockets for smaller items like memory cards, batteries, and filters, keeping them organized and easily accessible.

Ensure the bag is balanced. Distribute the weight evenly to maintain comfort, especially if you’ll be carrying it for extended periods.

Here, how to spot a fake gucci marmount camera bag?

Lastly, take advantage of the bag’s weather-resistant features. Use the included rain cover for additional protection in unpredictable conditions. These preparations will help you make the most of your Ape Case ACPRO1400.

How to pack camera bag ape case 1400?

How to pack camera bag ape case 1400?

How to pack camera bag ape case 1400?

To pack your Ape Case ACPRO1400 camera bag effectively, follow these steps:

  1. Plan Your Layout: Arrange your gear to optimize space and ensure protection. Place your DSLR camera in the main compartment, using the padded dividers to create a snug fit.
  2. Organize Lenses and Accessories: Use the adjustable dividers to create separate sections for your lenses, flash, and other accessories. Ensure each item is securely held to prevent shifting during transport.
  3. Utilize Pockets: Store smaller items like memory cards, batteries, and filters in the designated pockets. This keeps them organized and easily accessible.
  4. Balance the Weight: Distribute the weight evenly by placing heavier items in the center and lighter items around them. This helps maintain comfort when carrying the bag.
  5. Use the Rain Cover: In case of bad weather, cover the bag with the included rain cover for added protection.
  6. Final Check: Ensure all compartments are securely closed and the bag is comfortably packed for your shoot.

9 steps to pack camera bag ape case 1400

How to pack camera bag ape case 1400?

1. Plan Your Layout

Before you start packing, it’s crucial to plan the layout of your gear. Begin by listing all the equipment you need for your shoot.

This typically includes your DSLR camera, lenses, flash, batteries, memory cards, filters, and other accessories.

Consider the frequency of use for each item; gear that you will use frequently should be more accessible. Draw a rough sketch or mentally map out where each item will go.

This planning phase helps you visualize the final setup, ensuring you use the space efficiently and avoid unnecessary repacking.

Here, how to turn a suitcase into a camera bag?

2. Customize the Interior Dividers

The Ape Case ACPRO1400 comes with padded, adjustable dividers that can be customized to fit your specific gear.

Start by placing your camera body in the main compartment and adjust the dividers around it to ensure a snug fit.

Next, create compartments for your lenses, making sure they are well-padded to prevent any movement.

The goal is to create a tight, secure fit for each piece of equipment. This step is essential for protecting your gear from bumps and shocks during transport.

3. Secure Your Camera

Place your camera in the designated compartment, ensuring that it fits snugly with the lens either attached or stored separately.

If the lens is attached, use the dividers to support the camera body and lens, preventing any movement. Ensure the camera is not pressing against any hard surfaces that could cause damage.

This secure positioning helps to avoid any accidental damage to the camera body or lens during transit.

4. Organize Lenses and Accessories

Organize your lenses by size and frequency of use. Place the larger lenses in compartments that offer the most protection and the smaller ones in the remaining spaces.

Ensure each lens has its own compartment to prevent them from knocking against each other. For accessories like flashes, place them in compartments that provide easy access while ensuring they are well-protected.

Use additional dividers if necessary to create smaller sections for items like remote triggers and lens hoods.

5. Utilize External and Internal Pockets

Make full use of the various pockets in the bag for smaller items. Internal mesh pockets are ideal for memory cards, batteries, and cleaning cloths, keeping them organized and easily accessible.

External pockets can be used for items that you might need quickly, such as a lens cap or a small notebook.

Properly utilizing these pockets helps you keep small accessories organized, reducing the chance of losing them.

Here, how to tie camera bag straps?

6. Balance the Weight

Proper weight distribution is crucial for comfort and stability.

Place the heaviest items, such as the camera body and larger lenses, in the center of the bag. Distribute lighter items around these heavier items to maintain balance.

This balanced approach not only makes the bag easier to carry but also reduces the strain on your shoulders and back, making it more comfortable for long periods of use.

7. Protect Fragile Items

Fragile items such as filters and external hard drives require extra protection.

Use padded compartments or add extra padding around these items. You can use lens pouches or small protective cases to give these delicate items an additional layer of security.

This step ensures that even if your bag experiences a jolt, these fragile items remain safe.

8. Use the Rain Cover

The Ape Case ACPRO1400 includes a rain cover for additional protection. In inclement weather, cover your bag with the rain cover to protect your gear from moisture.

This cover is essential for maintaining the integrity of your equipment, especially in unpredictable weather conditions.

Keeping the rain cover accessible allows you to quickly protect your gear when needed.

Here, how to turn regualar bag into a camera bag?

9. Final Check and Adjustments

Before heading out, perform a final check to ensure all compartments are securely closed and your gear is well-protected. Check that zippers are fully closed, pockets are sealed, and nothing is loose.

Make any necessary adjustments to the layout or padding to ensure maximum protection.

This final check helps you ensure that your bag is packed securely and that your gear is safe, allowing you to focus on your photography without worrying about equipment safety.

5 Methods to pack camera bag ape case 1400

1. Layering Method

The layering method involves packing your camera gear in layers to optimize space and protection.

Start with the heaviest and largest items, such as your DSLR camera body and main lenses, at the bottom. Place these items in the main compartment, using the padded dividers to create a secure fit.

How to pack camera bag ape case 1400?

On top of this base layer, add lighter items like smaller lenses, flashes, and other accessories, ensuring each item is well-padded and secure.

Use the internal mesh pockets for memory cards, batteries, and other small accessories, layering them in an easily accessible manner.

This method ensures that heavier items are at the bottom, providing a stable base, while lighter items are layered on top, making the best use of the bag’s vertical space.

2. Modular Packing Method

Modular packing involves organizing your gear into separate, removable modules or cases.

Use individual pouches or smaller cases for specific items like lenses, flashes, and other accessories. Each module should fit snugly within the larger compartments of the Ape Case ACPRO1400.

This approach allows for quick and easy access to specific gear without disturbing the rest of your equipment. It also adds an extra layer of protection, as each module can padded independently.

The modular method is especially useful for photographers who frequently change their gear setup, as it allows for quick reconfiguration and easy access to individual items.

Here, how to update camera bag pro?

3. Compartmentalization Method

Compartmentalization focuses on creating distinct sections within the bag for different types of gear.

Use the padded dividers to form separate compartments for the camera body, lenses, flash units, and other accessories.

Each compartment should be designed to securely hold its contents, preventing any movement during transport.

Smaller items like memory cards, batteries, and filters can be stored in the bag’s internal pockets.

This method keeps your gear organized and easy to access, reducing the time spent searching for specific items.

Compartmentalization also helps protect your equipment by ensuring that each item has its own dedicated space, reducing the risk of damage from items knocking into each other.

4. Accessibility-Focused Method

The accessibility-focused method prioritizes easy and quick access to your most-used gear.

Place your camera body and primary lenses in the main compartment, ensuring they are easily reachable without having to unpack other items.

Arrange the dividers so that secondary lenses, flashes, and other accessories are stored in surrounding compartments but remain accessible.

Use the external pockets for items you need to grab quickly, such as lens caps, cleaning cloths, and memory cards.

This method is ideal for on-the-go photographers who need to change lenses or grab accessories quickly without disrupting the overall organization of the bag.

Here, how to turn your purse into a camera bag?

5. Protection-First Method

The protection-first method is all about ensuring maximum safety for your gear.

Use the bag’s padded dividers to create highly secure, snug compartments for each piece of equipment. Pay extra attention to fragile items like lenses and flashes, adding additional padding if necessary.

Store delicate accessories like filters and external hard drives in padded cases within the bag. The rain cover should be easily accessible to quickly protect your gear from inclement weather.

This method may involve slightly more effort in packing and unpacking, but it ensures that your gear remains in optimal condition, even in rough conditions or during long transports.

5 Benefits to pack camera bag ape case 1400

1. Enhanced Protection

Packing your camera bag properly using the Ape Case ACPRO1400 significantly enhances the protection of your gear.

The padded dividers create secure compartments for each item, preventing movement and reducing the risk of damage from bumps and shocks. The water-resistant material and included rain cover provide additional protection against the elements.

This ensures your camera, lenses, and accessories remain safe from physical damage and environmental factors, prolonging their lifespan and maintaining their functionality.

2. Improved Organization

Proper packing allows for improved organization of your gear.

By using the customizable dividers and various pockets, you can ensure that each item has its own designated place. This organization makes it easier to find and access your equipment quickly, saving you time during shoots.

Keeping your gear organized also helps prevent loss and reduces the likelihood of forgetting essential items, ensuring you are always prepared for any photography situation.

3. Optimal Space Utilization

The Ape Case ACPRO1400 is designed to maximize space utilization.

With its customizable interior, you can efficiently pack your gear to fit the available space perfectly. This means you can carry more equipment without making the bag bulky or difficult to manage.

Efficient space utilization allows you to bring along all the necessary gear, from multiple lenses to additional accessories, without compromising on convenience or accessibility.

Here, how to wear altura camera bag?

4. Increased Comfort

Proper packing of the Ape Case ACPRO1400 contributes to increased comfort, especially during long periods of carrying the bag.

By balancing the weight distribution and using the padded shoulder strap and handles, you can reduce the strain on your shoulders and back.

This balanced packing ensures that the bag remains comfortable to carry, allowing you to focus on your photography rather than the discomfort of a poorly packed bag.

5. Quick Access

A well-packed Ape Case ACPRO1400 offers quick access to your most-used gear.

By strategically placing frequently used items in easily accessible compartments, you can reduce the time spent searching for equipment.

This quick access is particularly beneficial during fast-paced shoots where every second counts.

Having your gear readily available allows you to capture important moments without delay, enhancing your overall efficiency and effectiveness as a photographer.

Related faq’s

How should I organize the compartments in my Ape Case ACPRO1400?

Organize the compartments by using the padded, adjustable dividers to create a secure fit for each piece of equipment.

Place the camera body in the main compartment, and arrange lenses, flashes, and other accessories in separate sections. Ensure each item is snug to prevent movement during transport.

What is the best way to pack lenses in the Ape Case ACPRO1400?

Pack lenses in individual compartments created by the dividers, making sure each lens has enough padding around it.

Store larger lenses at the bottom for stability and smaller ones on top. If possible, use lens pouches for added protection.

Here, how to wear a camel bag camera?

How can I maximize space in my Ape Case ACPRO1400?

To maximize space, plan your layout carefully. Use every available compartment and pocket efficiently.

Store smaller items like memory cards and batteries in the internal mesh pockets, and utilize the external pockets for quick-access items.

How do I ensure my gear is protected in the Ape Case ACPRO1400?

Ensure your gear is protected securely fastening the dividers around each item, adding extra padding if necessary.

Use the rain cover in wet conditions to protect against moisture. Make sure all zippers are fully closed and the bag is balanced to prevent shifting.

What should I pack in the external pockets of the Ape Case ACPRO1400?

Pack frequently used or smaller items in the external pockets for quick access.

This can include lens caps, cleaning cloths, memory cards, and other small accessories that you may need to grab quickly during a shoot.

How do I balance the weight in my Ape Case ACPRO1400 for comfortable carrying?

To balance the weight, place heavier items like the camera body and large lenses in the center of the bag. Distribute lighter items around these heavier items.

Ensure that the weight is evenly distributed to prevent strain on your shoulders and back.

What steps should I take before finalizing the packing of my Ape Case ACPRO1400?

Before finalizing the packing, do a final check to ensure all compartments are securely closed and items are well-protected.

Verify that the dividers are in place, zippers are closed, and the bag is balanced. Make any necessary adjustments to improve organization and protection.

Conclusion

How to pack camera bag ape case 1400?

Packing the Ape Case ACPRO1400 camera bag efficiently ensures your gear is protected, organized, and easily accessible.

Start by planning the layout and using the adjustable dividers to create secure compartments for your camera, lenses, and accessories.

Distribute the weight evenly to maintain comfort and utilize all pockets for smaller items.

Ensure fragile items are well-padded and use the rain cover in adverse weather conditions. A final check ensures everything is secure and ready for transport.

Properly packing your camera bag maximizes space, protects your equipment, and enhances your photography experience.


Leave a Reply