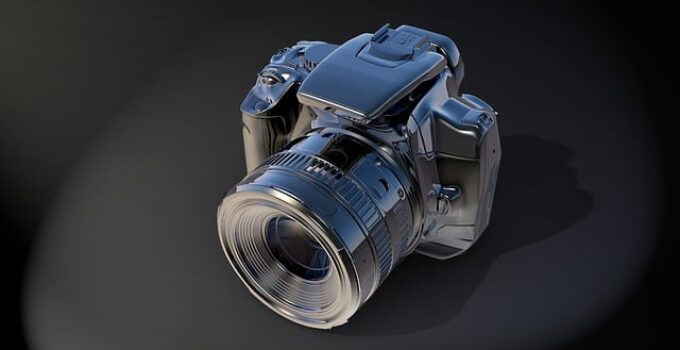
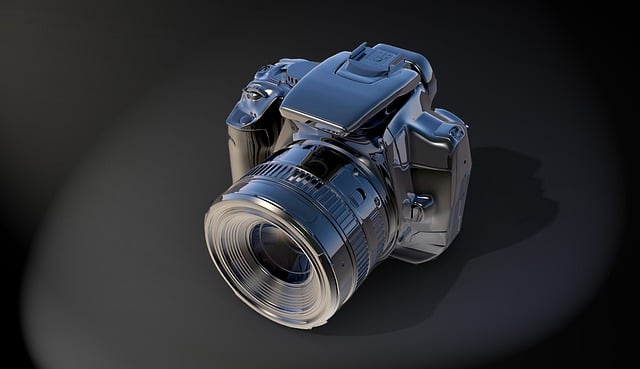
How can you ensure your camera gear stays safe during air travel? Traveling with a camera can be a daunting experience, especially when considering the potential for damage or mishandling.
Airplanes can expose your equipment to various risks, including temperature fluctuations, pressure changes, and rough handling.
To protect your valuable gear, it’s essential to plan ahead and take the necessary precautions.
From choosing the right bag to understanding airline regulations, being proactive can make all the difference.
This guide will explore effective strategies to safeguard your camera, so you can capture stunning moments wherever your journey takes you.
Protecting your camera while traveling by plane involves a few key steps.
First, use a sturdy, padded camera bag or a dedicated camera case that fits within airline carry-on restrictions.
Ensure the bag has customizable dividers to secure your camera body and lenses, preventing movement during transit. Always carry your camera with you in the cabin, avoiding checked luggage to reduce the risk of damage or theft.
When packing, wrap additional cushioning materials like soft clothing around the camera to provide extra protection.
If possible, remove the lens and store it separately to avoid lens damage. Use a lens cap and body cap to keep dust and debris out.
Finally, consider using a rain cover or waterproof bag if you’re traveling to a location with unpredictable weather. By following these precautions, you can help ensure your camera remains safe and functional throughout your journey.
How to protect a camera on a plane?- Things you should know before protecting a camera on a plane
To protect your camera while traveling by plane, consider the following essentials:
Padded Camera Bag: Invest in a high-quality padded camera bag or backpack specifically designed for camera gear. Look for adjustable dividers to keep your equipment secure.
Lens Caps and Body Caps: Always use lens caps and body caps when your camera is not in use. This prevents scratches and dust from damaging sensitive components.
Soft Cloths: Pack microfiber cloths to clean your camera and lenses without scratching surfaces.
Cushioning Materials: Utilize soft clothing or bubble wrap as additional cushioning around your camera, especially during transport.
Waterproof Cover: Carry a waterproof cover or bag to shield your gear from unexpected spills or rain during travel.
Travel Insurance: Consider insuring your camera gear for added peace of mind, covering potential loss or damage.
By utilizing these items, you can help ensure your camera remains safe during your flight.
How to protect a camera on a plane?- Here take a look at 9 steps now.
1. Use a Quality Camera Bag
Investing in a high-quality camera bag is crucial for protecting your gear during air travel. Look for a bag specifically designed for cameras, which offers ample padding and protection against impacts.
A good camera bag will have customizable dividers that allow you to secure each piece of equipment, preventing movement and potential damage.
Choose a bag that meets airline carry-on size restrictions to ensure you can keep your camera with you at all times. Some bags also come with weather-resistant materials, providing an extra layer of protection against the elements.
A well-organized bag will make it easy to access your camera quickly for those spontaneous shots while minimizing the risk of dropping or mishandling your gear. Additionally, consider a bag with secure closures and anti-theft features to further safeguard your camera during travel.
2. Remove and Store Lenses Separately
When packing your camera for a flight, it’s a good practice to remove the lens from the camera body and store them separately. This prevents strain on the lens mount, which can lead to damage during travel.
Additionally, separating the lens reduces the risk of scratches or impact damage, especially in a crowded or jostling bag.
Use a protective lens cap and body cap for each component. This helps keep dust and debris from entering the camera and lens, which could interfere with their operation.
Wrap each lens in a soft cloth or place it in a padded compartment within your camera bag to provide additional cushioning.
By taking this precaution, you’ll ensure that both your camera and lenses arrive safely at your destination, ready to capture stunning images without concern for damage.
In addition to your camera bag’s built-in padding, incorporating extra cushioning can significantly enhance protection for your gear during air travel. Soft clothing, such as sweaters or t-shirts, can be effective padding.
By wrapping your camera and lenses in these soft materials, you create a buffer that absorbs shocks and minimizes movement.
You can also use bubble wrap or foam inserts for added cushioning. Place these materials around the camera and lenses within your bag, especially if you’re traveling with multiple pieces of equipment. Avoid placing heavy items on top of your camera bag in the overhead compartment, as this could exert pressure on your gear.
By ensuring your camera is well-cushioned, you help protect it from potential drops, bumps, or jostles during the flight, ensuring it arrives in perfect condition.
4. Keep Your Camera with You
One of the most effective ways to protect your camera during air travel is to keep it with you at all times.
Always opt to carry your camera bag onto the plane rather than checking it in. Checked luggage can experience rough handling, leading to potential damage or loss of your gear.
By keeping your camera in the cabin, you also have immediate access to it for capturing moments during your journey. Store your camera bag under the seat in front of you or in the overhead compartment.
Make sure it’s secure and won’t slide around during the flight.
Additionally, keeping your camera with you allows you to maintain a watchful eye on it, reducing the risk of theft or loss. This simple step significantly enhances the chances of your camera arriving at your destination safely.
5. Protect Against Moisture
Moisture is a significant risk to camera equipment during air travel, especially in varying climates or during long layovers. To protect against this, consider investing in a waterproof camera bag or a rain cover.
These specialized bags offer additional protection against spills, humidity, or unexpected rain.
If you don’t have a waterproof bag, you can use a large resealable plastic bag or dry bag to store your camera and lenses. Ensure that the equipment is completely dry before sealing it inside. Additionally, consider using silica gel packets within your camera bag.
These packets absorb moisture and help maintain a dry environment for your gear. By taking these precautions, you can minimize the risk of water damage and ensure your camera remains in optimal working condition throughout your travels.
6. Use Lens and Body Caps
Using lens and body caps is a crucial step in protecting your camera gear during air travel. Lens caps prevent scratches, dust, and debris from accumulating on the lens surface when it’s not in use.
Similarly, a body cap protects the camera’s sensor and interior components from dust and contaminants, reducing the risk of internal damage.
Always ensure that both caps are securely fastened before packing your camera. If you’re removing the lens during your journey, quickly replace the caps to protect both the camera and lens.
This practice is especially important during transit, as vibrations and bumps can dislodge components, exposing them to potential damage.
By making lens and body caps a regular part of your packing routine, you enhance your camera’s protection and extend its lifespan, ensuring it remains in excellent condition for capturing beautiful images.
7. Carry Extra Batteries and Memory Cards
When traveling by plane, it’s wise to carry extra batteries and memory cards to ensure your camera is always ready to shoot. Air travel can be unpredictable, and having additional power sources and storage options can prevent missed photo opportunities.
Opt for high-quality, manufacturer-recommended batteries, as third-party batteries may not always perform reliably.
Store spare batteries in their original packaging or in a dedicated battery case to avoid contact with metal objects, which can cause short-circuiting. Similarly, keep memory cards in a protective case to prevent damage or loss.
Organizing your batteries and memory cards in an easily accessible compartment of your camera bag allows you to quickly swap them out when needed.
This preparation not only enhances your travel experience but also ensures you’re always ready to capture the perfect moment without interruption.
8. Consider Travel Insurance
Travel insurance is an essential step in protecting your camera gear, offering peace of mind during your travels. Accidents can happen, and coverage can provide financial protection against theft, loss, or damage to your equipment.
When choosing insurance, look for policies that specifically cover photography equipment.
Some policies include provisions for accidental damage, which can be beneficial if your gear sustains damage during travel. Read the fine print carefully to ensure you understand what is covered and any limitations that may apply.
Additionally, keep an inventory of your gear, including receipts and serial numbers, to facilitate any claims.
Having insurance means that you won’t have to bear the financial burden of replacing expensive equipment, allowing you to focus on capturing your travel experiences without worry.
9. Plan for Quick Access
Planning for quick access to your camera during a flight can enhance your travel experience and help you capture spontaneous moments. When packing your camera bag, organize it so that your camera and essential accessories are easily reachable.
Place your camera on top of other items in the bag or use a dedicated side pocket that allows for easy access without having to rummage through everything.
Keeping frequently used accessories, like extra batteries and memory cards, in organized compartments ensures that you can grab what you need without delay.
Consider using a bag with exterior pockets for quick access items, allowing you to retrieve your camera without fully unpacking your bag.
By ensuring that your camera is readily accessible, you can seize photographic opportunities that arise unexpectedly, enriching your travel experience.
5 Methods to protect a camera on a plane
How to protect a camera on a plane? Here take a look at 5 methods.
A padded camera bag is essential for protecting your gear while traveling by plane. Look for a bag specifically designed for camera equipment, which provides ample cushioning and compartments to keep each piece secure.
Many quality bags feature customizable dividers that allow you to arrange your camera, lenses, and accessories in a way that minimizes movement and potential damage during transit.
Opt for a bag that fits within airline carry-on size restrictions, ensuring that you can keep your camera with you rather than risking it in checked luggage.
Additionally, consider a bag with water-resistant materials to provide protection against moisture. Some bags also offer anti-theft features, such as lockable zippers, which can enhance security while traveling.
By using a well-padded camera bag, you significantly reduce the risk of damage to your camera and gear, allowing you to travel with peace of mind.
2. Remove Lenses and Use Caps
Removing lenses from your camera and using caps is a crucial method to protect your equipment during air travel.
When you take off the lens, you eliminate the risk of stress on the lens mount, which can occur if the camera is jostled during the flight.
Additionally, separating the lens prevents scratches and impact damage that may happen while packed.
Always use lens caps and body caps whenever your camera and lenses are not in use.
These caps keep dust, debris, and moisture away from sensitive components, reducing the likelihood of damage. When packing, wrap the lens in a soft cloth or place it in a padded compartment to provide extra cushioning.
By adopting this practice, you ensure both your camera and lenses are safeguarded during transit, ready for use when you arrive at your destination.
3. Carry Your Camera as a Carry-On
Carrying your camera as a carry-on is one of the best ways to protect it during air travel.
Checked luggage often experiences rough handling, which can lead to significant damage or loss of valuable equipment.
By keeping your camera bag with you in the cabin, you maintain control over your gear and can monitor its safety throughout the journey.
When boarding, place your camera bag under the seat in front of you or in the overhead compartment, ensuring it is secure and won’t shift during the flight. This not only protects your camera from potential bumps and drops but also allows for quick access to your gear for capturing spontaneous moments.
Moreover, keeping your camera with you reduces the risk of theft, providing additional peace of mind. This simple step can greatly enhance the overall safety of your camera equipment while traveling.
Moisture can pose a significant threat to camera equipment during air travel, particularly when moving between different climates or in humid environments.
To protect your camera from moisture, consider using a waterproof camera bag or a rain cover that fits over your existing bag. This additional layer of protection shields your gear from spills, humidity, and unexpected rain.
If a waterproof bag isn’t available, use large resealable plastic bags or dry bags to store your camera and lenses, ensuring they are completely dry before sealing.
Including silica gel packets inside your camera bag can help absorb excess moisture, creating a dry environment for your equipment.
By taking these moisture protection measures, you minimize the risk of water damage to your camera and lenses, ensuring they remain in optimal working condition for capturing beautiful images during your travels.
5. Plan for Quick Access
Planning for quick access to your camera during a flight can enhance your travel experience and help you capture spontaneous moments. When packing your camera bag, organize it so that your camera and essential accessories are easily reachable.
Place your camera on top of other items in the bag or use a dedicated side pocket that allows for easy access without having to rummage through everything.
Keeping frequently used accessories, like extra batteries and memory cards, in organized compartments ensures that you can grab what you need without delay.
Consider using a bag with exterior pockets for quick access items, allowing you to retrieve your camera without fully unpacking your bag.
By ensuring that your camera is readily accessible, you can seize photographic opportunities that arise unexpectedly, enriching your travel experience.
7 Tips to protect a camera on a plane
How to protect a camera on a plane?- Here take a look at 7 tips now
1. Use a Padded Camera Bag
A padded camera bag is essential for protecting your equipment during air travel.
Look for bags specifically designed for cameras, featuring ample cushioning and customizable dividers.
This ensures each component is securely held in place, minimizing movement and potential damage.
Opt for a bag that meets airline carry-on size restrictions to keep your camera with you.
Many padded bags also have weather-resistant materials for added protection against moisture.
By using a quality padded bag, you significantly reduce the risk of damage to your camera and accessories while traveling.
Removing lenses from your camera is a crucial step in protecting your gear.
This prevents stress on the lens mount during transit and reduces the risk of scratches or damage.
Always use lens caps and body caps when your camera is not in use, as they keep dust and debris away from sensitive components.
Store each lens in a padded compartment of your camera bag or wrap it in a soft cloth for extra protection. By adopting this practice, you ensure that both your camera and lenses remain safe during air travel.
3. Keep Your Camera as Carry-On
Carrying your camera as a carry-on item is one of the best ways to protect it during air travel.
Checked luggage often experiences rough handling, which can lead to damage or loss of valuable equipment. By keeping your camera bag with you in the cabin, you maintain control over your gear.
Place the bag under the seat in front of you or in the overhead compartment to prevent it from shifting during the flight.
This not only safeguards your camera from bumps and drops but also allows for quick access when you want to capture moments.
4. Use Moisture Protection
Moisture poses a significant threat to camera equipment, especially when traveling between different climates.
To protect against moisture, consider using a waterproof camera bag or rain cover. These options shield your gear from spills, humidity, and unexpected rain.
If a waterproof bag isn’t available, large resealable plastic bags can be used to encase your camera and lenses.
Including silica gel packets inside your camera bag can also absorb excess moisture. By taking these precautions, you minimize the risk of water damage, ensuring your equipment stays dry and functional during your travels.
5. Pack Extra Batteries and Memory Cards
Bringing extra batteries and memory cards is a smart strategy for protecting your camera during travel.
Air travel can be unpredictable, and having additional power sources and storage ensures you’re always ready to shoot.
Choose high-quality, manufacturer-recommended batteries and store them in a dedicated battery case to prevent contact with metal objects. Keep memory cards in a protective case to avoid damage.
Organizing these items in easily accessible compartments of your camera bag allows for quick swaps, ensuring you don’t miss capturing important moments while traveling.
Travel insurance is an essential consideration for protecting your camera gear while traveling. Accidents can happen, and having coverage can provide financial protection against theft, loss, or damage to your equipment.
When selecting a policy, look for those specifically covering photography equipment, including provisions for accidental damage.
Carefully review the terms and conditions to understand what is covered and any limitations that may apply.
Keeping an inventory of your gear, including receipts and serial numbers, can facilitate any claims. Insurance helps alleviate worries, allowing you to focus on enjoying your trip.
7. Plan for Quick Access
Planning for quick access to your camera can enhance your travel experience and help you capture spontaneous moments.
When packing your camera bag, organize it so your camera and essential accessories are easily reachable.
Place your camera on top of other items in the bag or use dedicated pockets for quick access.
Keeping frequently used items, like extra batteries and memory cards, in organized compartments allows you to grab what you need without delay.
A bag with exterior pockets for quick access makes it easy to retrieve your camera without fully unpacking, ensuring you’re ready to capture memories.
5 Benefits to protect a camera on a plane
How to protect a camera on a plane?- Here take a look at 5 benefits.
1. Prevents Damage
Protecting your camera while traveling by plane is crucial for preventing physical damage.
Air travel can be unpredictable, with luggage being tossed around or exposed to harsh conditions.
By using padded bags, moisture protection, and securing lenses, you minimize the risk of scratches, dents, and internal malfunctions.
This preservation of equipment integrity ensures that your camera remains functional and reliable, allowing you to capture high-quality images during your travels.
Investing in protection means that you can enjoy peace of mind knowing your gear is safe from potential harm throughout your journey.
2. Enhances Longevity
Taking steps to protect your camera during air travel significantly enhances its longevity.
Cameras are sensitive instruments, and consistent exposure to harsh conditions can lead to wear and tear over time. By safeguarding your gear from moisture, dust, and physical impacts, you extend its operational lifespan.
Proper maintenance and protection help avoid costly repairs or replacements, ensuring your camera continues to perform well for years.
A well-protected camera will also maintain its resale value, making it a worthwhile investment in your photography journey.
3. Ensures Readiness
When you take the necessary precautions to protect your camera while traveling, you ensure that it’s always ready for use.
Properly storing and organizing your gear allows for quick access, enabling you to capture spontaneous moments without hassle.
Having extra batteries and memory cards on hand further enhances this readiness, so you won’t miss out on any photographic opportunities.
This convenience allows you to immerse yourself in your travels while remaining prepared to document your experiences, creating lasting memories without the stress of managing your equipment.
4. Reduces Stress
Knowing your camera is well-protected during air travel reduces stress and anxiety. Traveling can be unpredictable, and concerns about equipment damage or loss can detract from your overall experience.
By taking steps to safeguard your gear—such as using padded bags, removing lenses, and keeping the camera as a carry-on—you can travel with peace of mind.
This sense of security allows you to focus on enjoying your journey and capturing beautiful moments, enhancing your overall travel experience and enjoyment of photography.
5. Provides Peace of Mind
Protecting your camera on a plane provides invaluable peace of mind, allowing you to enjoy your travels without constant worry about your gear.
Knowing that you have taken the necessary precautions—such as using moisture protection, packing extra batteries, and carrying your camera as a carry-on—means you can focus on the adventure ahead.
This reassurance enables you to engage fully with your surroundings, capture spontaneous moments, and enjoy the creative process of photography. With peace of mind, you can explore and document your travels more freely and joyfully.
TSA process. How do you travel with you camera?
Traveling with your camera through the TSA process requires careful preparation to ensure a smooth experience.
Begin by packing your camera and gear in a padded camera bag that meets carry-on size restrictions.
When you arrive at the security checkpoint, be prepared to remove your camera from the bag, as TSA agents often require separate screening for electronic devices.
Place your camera and lenses in a bin for x-ray screening, along with any additional batteries or accessories.
It’s helpful to have your camera easily accessible, as you may need to remove it quickly from your bag.
Consider using lens caps and body caps to protect your equipment while traveling. If you have spare batteries, ensure they are stored properly to comply with TSA regulations regarding lithium-ion batteries.
By being organized and proactive, you can navigate the TSA process smoothly and protect your camera gear during your travels.
How to travel with camera gear and protect it?
Traveling with camera gear while ensuring its protection involves several key steps. First, invest in a high-quality, padded camera bag specifically designed for your equipment.
This bag should have customizable dividers to secure each piece of gear and prevent movement during transit.
When packing, remove the lenses from the camera body and use lens and body caps to keep dust and damage at bay.
Always carry your camera bag as a carry-on to avoid the rough handling of checked luggage.
Use additional padding, such as soft clothing or bubble wrap, around your gear for extra cushioning. If traveling to humid climates, use a waterproof cover or resealable bags to protect against moisture.
Finally, keep extra batteries and memory cards handy in organized compartments for easy access. By following these tips, you can safely travel with your camera gear and capture amazing memories without worry.
How to carry a camera into the airport and plane?
Carrying your camera into the airport and onto the plane requires careful planning for convenience and security.
Start by packing your camera gear in a high-quality, padded camera bag that meets airline carry-on size restrictions.
Ensure that your camera and lenses are securely stored, using padded dividers to prevent movement.
When you arrive at the airport, keep your bag easily accessible for security screening.
At the TSA checkpoint, be prepared to remove your camera and lenses from the bag for separate screening. Place them in a bin, allowing for clear x-ray viewing.
If you have spare batteries, ensure they are properly stored to comply with TSA regulations regarding lithium-ion batteries.
After clearing security, keep your camera bag close, either under the seat in front of you or in the overhead compartment.
This way, you can easily access your camera during the flight and be ready to capture any spontaneous moments.
Does anyone check-in there camera gear when flying?
How to protect a camera on a plane?
Checking in camera gear when flying is generally not recommended due to the risk of damage and loss.
Airline staff often handle checked luggage roughly, which can lead to physical damage, especially to delicate camera equipment. Cameras, lenses, and accessories can be particularly vulnerable to impacts, moisture, and temperature changes in the cargo hold.
Many photographers prefer to carry their gear as carry-on luggage to maintain control and ensure it is handled with care.
By keeping your camera bag with you, you can also quickly access your equipment for spontaneous shots during your journey.
If you must check your gear, consider using a hard-shell case with ample padding and locks to minimize the risk of damage.
Label your case clearly and document the contents for insurance purposes. Overall, it’s best to travel with your camera gear in the cabin to protect it from potential mishandling.
How do you pack a camera for air travel?
Packing a camera for air travel requires careful organization to ensure its protection and accessibility. Start by using a high-quality, padded camera bag designed for your equipment.
Begin packing by removing the lens from the camera body to prevent stress on the mount. Use lens caps and body caps to protect both components from dust and damage.
Place the camera and lenses in padded compartments within the bag, ensuring they fit snugly. Utilize additional soft materials, like clothing or bubble wrap, for extra cushioning around sensitive gear.
Organize smaller items, such as batteries and memory cards, in designated pockets or cases for easy access at security checkpoints.
Ensure your camera bag meets airline carry-on size restrictions, allowing you to keep your gear with you.
When you arrive at the airport, be prepared to remove your camera for separate screening at the security checkpoint. This organized packing approach helps ensure your camera travels safely and efficiently.
Is it safe to pack a camera inside a camera bag in checked luggage for an international flight?
Packing a camera inside a camera bag in checked luggage for an international flight is generally not safe.
Checked luggage is often subjected to rough handling, which can lead to physical damage or loss of valuable equipment.
Even well-padded bags may not provide adequate protection against impacts, moisture, or temperature fluctuations in the cargo hold.
Additionally, theft can be a concern with checked bags. It’s advisable to carry your camera as a carry-on to maintain control over your gear and ensure it’s handled with care, allowing for easy access during your journey.
Are DSLR cameras allowed in a carry-on bag in a domestic flight?
How to protect a camera on a plane?- Did you see? Well Yes, DSLR cameras are allowed in a carry-on bag on domestic flights.
Most airlines and the TSA permit passengers to bring cameras as part of their carry-on luggage.
However, when going through security, you may be required to remove your DSLR from the bag for separate screening. It’s best to pack your camera in a padded camera bag to provide protection and organization.
Additionally, ensure that any spare batteries comply with TSA regulations regarding lithium-ion batteries.
Carrying your DSLR as a carry-on helps keep it safe from damage and allows for easy access during your travels.
How do photographers take their equipment on a plane? With all the restrictions on ‘hand carry,’ I’m not sure I would trust checking in my camera kit.
Photographers typically carry their equipment onto the plane rather than checking it in, given the risk of damage and loss with checked luggage.
They use padded camera bags designed to meet carry-on size restrictions, ensuring their gear is secure during transit.
At security checkpoints, they remove cameras and lenses for separate screening. To comply with airline regulations, they also pack spare batteries according to TSA guidelines.
By keeping their equipment in the cabin, photographers maintain control over their gear, ensuring it is handled with care and allowing for quick access during the flight.
Is it safe to take your camera on an airplane without a hard case or hardware bag, and just use a lightweight or compact travel-sized monopod or tripod instead?
How to protect a camera on a plane?- As you have seen so far.
Taking your camera on an airplane without a hard case or padded bag is not advisable, even with a lightweight or compact travel-sized monopod or tripod.
While these accessories can provide some stability, they do not offer adequate protection against impacts, moisture, or accidental drops during travel.
A lightweight bag or pouch may not sufficiently cushion your camera, increasing the risk of damage.
It’s best to use a padded camera bag that fits within airline carry-on restrictions, ensuring your equipment is secure and protected throughout the journey, allowing you to enjoy peace of mind while traveling.
Related faq’s
How to travel with a camera on a plane?
To travel with a camera on a plane, start by packing your camera and gear in a high-quality, padded camera bag that meets airline carry-on size restrictions.
Remove lenses from the camera body and use lens caps to protect them. At the security checkpoint, be prepared to remove your camera for separate screening.
Keep your bag easily accessible in the cabin, storing it under the seat or in the overhead compartment. Consider carrying extra batteries and memory cards for convenience.
By following these steps, you can ensure your camera travels safely and is ready for use during your trip.
How to pack a camera when traveling?
When packing a camera for travel, start by using a padded camera bag designed for protection and organization. Remove the lens from the camera body to prevent damage and use lens and body caps.
Place the camera and lenses in padded compartments, ensuring a snug fit.
Use additional cushioning, like clothing or bubble wrap, for extra protection. Organize smaller accessories, such as batteries and memory cards, in designated pockets for easy access.
Ensure your bag meets airline carry-on size restrictions, allowing you to keep your gear with you during transit. This careful packing approach keeps your camera safe and accessible.
Do cameras have to be taken out for TSA?
Yes, cameras typically need to be taken out of bags for TSA screening at security checkpoints.
When traveling with a DSLR or other larger cameras, you should place them in a separate bin for x-ray screening. This allows TSA agents to clearly view the camera and assess it for security purposes.
Smaller cameras, such as point-and-shoots or compact mirrorless models, may not require removal, but it’s best to check with the specific TSA guidelines or your airline’s policies.
Being prepared to remove your camera helps expedite the screening process and ensures compliance with security regulations.
Can you leave the battery in camera on a plane?
Yes, you can leave the battery in your camera when traveling on a plane, but there are some guidelines to follow.
According to TSA regulations, lithium-ion batteries, which are commonly used in cameras, must be carried in your carry-on luggage.
It’s generally safe to leave the battery in the camera while going through security, but you may need to remove the camera for separate screening.
Additionally, if you have spare batteries, they should be packed in their original packaging or in a dedicated battery case to prevent contact with metal objects, which can cause short-circuiting.
Conclusion
How to protect a camera on a plane?- You see?
Protecting your camera on a plane is essential for ensuring it remains safe and functional during travel. By using a padded camera bag, removing lenses, and utilizing caps, you minimize the risk of damage.
Carrying your gear as a carry-on allows for better control and reduces the chances of loss or theft.
Additionally, incorporating moisture protection and organizing extra batteries can enhance your preparedness for unexpected situations.
By following these protective measures, you can travel confidently, knowing your camera is well-protected, enabling you to capture stunning memories throughout your journey.


