Are you tired of carrying a separate camera bag every time you want to capture those special moments? What if you could transform your regular backpack into a convenient camera bag?
In this article, we will explore the art of retro fitting a backpack for a camera, allowing you to combine style and functionality in one go.
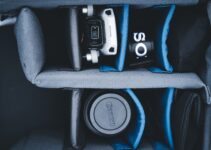
So, how can you retro fit your backpack for a camera? The process is surprisingly simple. By adding padded inserts and dividers, you can create compartments to securely store your camera and lenses.
Additionally, incorporating customizable straps and securing mechanisms will ensure that your gear stays in place, providing optimal protection while on the move.

But wait, there’s more to learn about transforming your backpack into a camera bag! In the main article, we will delve deeper into the step-by-step process of retro fitting, highlighting expert tips and tricks from renowned photographers who have mastered the art.
So, are you ready to unleash your creativity and capture stunning shots without compromising on convenience? Let’s embark on this exciting journey together!
Why Use a Retro Fit Backpack for a Camera Bag?
Using a retro fit backpack as a camera bag offers several advantages over purchasing a dedicated camera bag. Firstly, it allows you to repurpose a backpack you already own, saving you money.
Additionally, backpacks offer better weight distribution, making them more comfortable to carry for extended periods.
Furthermore, retrofitting a backpack provides greater customization options, allowing you to tailor the bag’s design to suit your specific needs.
Now, here take a look. Here you can look up what to look up in camera bag?
9 Proven steps to retro fit a backpack for a camera bag?
Retrofitting a backpack to convert it into a camera bag can be a practical and cost-effective solution for photographers. Here are a few steps to guide you through the process:
1. Select a suitable backpack:
Choose a backpack that suits your needs in terms of size, durability, and comfort. Consider the amount of camera equipment you plan to carry and ensure that the backpack has enough compartments and padding to protect your gear.
2. Assess the interior space:
Evaluate the interior of the backpack to determine how you can modify it to accommodate your camera gear. Look for areas where you can add padding or create compartments for better organization.
3. Gather the necessary materials:
To retrofit the backpack, you will need materials such as foam padding, Velcro strips, dividers, and a durable fabric or nylon for creating compartments.
You may also need a sewing kit or fabric glue depending on your preferred method of attachment.
4. Measure and cut foam padding:
Measure the dimensions of your camera gear and cut foam padding accordingly. Ensure that the foam is thick enough to provide adequate protection against impacts.

5. Create compartments:
Decide on the arrangement of your camera gear and mark the locations where you want to create compartments. Cut the fabric or nylon material into the appropriate sizes and sew or glue the edges to prevent fraying.
6. Attach dividers and padding:
Place the foam padding strategically within the compartments to create a cushioned environment for your camera equipment. Use Velcro strips or fabric loops to secure the dividers and padding in place.
7. Test the fit and adjust:
Insert your camera gear into the newly created compartments and assess how well it fits. Make any necessary adjustments by trimming or adding additional padding or dividers until you are satisfied with the fit and protection.
8. Consider additional features:
Depending on your needs, you may want to add extra pockets, straps, or fasteners to the backpack for carrying accessories such as batteries, memory cards, or a tripod. Attach these features securely to the backpack using suitable methods such as sewing or gluing.
Here you can also check out how to set up mirrorless camera bag?
9. Test the backpack:
Before using the retrofitted backpack in the field, give it a thorough test to ensure that your camera gear is secure, well-protected, and easily accessible.
Check the backpack’s comfort, weight distribution, and any additional features you have added.
Remember to consider your specific camera gear and personal preferences when retrofitting the backpack, as the steps and modifications required may vary.
Always prioritize the safety and protection of your camera equipment throughout the process.
Choosing the Right Backpack for Retrofitting
Before embarking on your camera bag retrofitting project, it’s essential to select the right backpack.
Look for a backpack that is sturdy, well-padded, and has enough room to accommodate your camera equipment and accessories.

Opt for a backpack with adjustable straps and multiple compartments to ensure flexibility and ease of use.
Preparing the Backpack for Retrofitting
Once you’ve chosen a suitable backpack, begin the retrofitting process by thoroughly cleaning and emptying it.
Remove any existing dividers or padding that may interfere with the camera gear arrangement. Ensure the backpack is free from dust, debris, and loose threads.
Selecting and Installing Padding and Dividers
To protect your camera gear from potential damage, it’s crucial to provide adequate padding and dividers within the backpack.
Measure the dimensions of your camera body, lenses, and other accessories to determine the required padding thickness.
Consider using foam inserts or padded dividers to create individual compartments for each item. Carefully arrange the padding and dividers within the backpack to ensure a snug and secure fit for your camera equipment.
Adding Compartments and Pockets
To organize your camera accessories effectively, it’s beneficial to create additional compartments and pockets within the backpack. You can use fabric, elastic bands, or adhesive strips to partition the bag’s interior.

Designate separate spaces for memory cards, batteries, cables, lens filters, and other small accessories. This way, you’ll have quick and easy access to each item without having to dig through a jumbled mess.
Securing the Camera Equipment
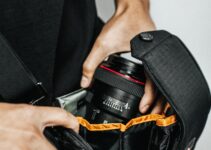
Ensuring the safety of your camera equipment during transit is of utmost importance. Use adjustable straps or bungee cords to secure the camera body and lenses within the backpack.
Double-check that everything is tightly fastened to prevent any potential movement or damage while on the move. Consider using lens caps or protective covers to shield delicate lenses from accidental scratches or impact.
Customizing the Backpack for Convenience
To enhance the functionality and convenience of your retrofitted camera bag, consider adding some customization features.
You can attach carabiners or D-rings to the exterior of the bag for hanging accessories or tripod attachment. Additionally, sew or attach a rain cover to protect your camera equipment from inclement weather conditions.
Here you can look up how to carry a bridge camera without a camera bag.
Testing and Adjusting the Retrofitted Camera Bag
After completing the retrofitting process, it’s essential to test the functionality and comfort of your camera bag. Load it with your camera gear and wear it for a trial run.
Pay attention to the weight distribution and adjust the straps accordingly for a balanced and comfortable fit. Walk around, move, and bend to ensure that the equipment remains secure and well-protected within the bag.
Make any necessary adjustments to the padding, dividers, or straps to optimize the bag’s performance.
Maintaining and Cleaning the Retro Fit Backpack
To prolong the lifespan of your retrofitted camera bag, proper maintenance and regular cleaning are crucial. Remove any dust, dirt, or debris from the bag’s exterior and interior using a soft brush or cloth.
If the bag is machine washable, follow the manufacturer’s instructions for cleaning. For non-washable backpacks, spot clean using a mild detergent and water.
Ensure the bag is completely dry before storing your camera equipment to prevent moisture-related damage.
Frequently Asked Questions (FAQs)
Can I use any type of backpack for retrofitting as a camera bag?
While you can use any backpack, it’s recommended to choose one that offers good padding, durability, and sufficient room for your camera gear.
Do I need any special tools or materials for retrofitting a backpack?
Basic tools such as scissors, adhesive strips, and measuring tape are typically sufficient. Additional materials like foam inserts or padded dividers can enhance protection.
Is retrofitting a backpack more affordable than buying a dedicated camera bag?
Yes, retrofitting a backpack is often more cost-effective since you can repurpose a backpack you already own instead of purchasing a new camera bag.
Can I still use the retrofitted backpack for other purposes besides carrying camera equipment?
Absolutely! The beauty of retrofitting is that the backpack remains versatile, allowing you to use it for other activities when you’re not using it as a camera bag.
How often should I check and adjust the straps and padding of my retrofitted camera bag?
It’s a good practice to check the straps and padding before each use, especially if you frequently change the camera gear setup. Regular adjustments ensure a secure fit and optimal comfort.
Conclusion
Retrofitting a backpack as a camera bag is a cost-effective and customizable solution for photographers seeking a practical way to carry their equipment.
By carefully selecting the right backpack, adding padding and dividers, creating compartments, and securing the camera gear, you can create a functional and personalized camera bag that meets your specific needs.
Regular maintenance and cleaning will ensure the bag’s longevity and protect your valuable camera equipment for years to come.


