Table of Contents
ToggleHow to sew a dslr camera bag?- Wondered?
Have you ever wanted a custom-made DSLR camera bag that perfectly suits your needs?
Sewing your own camera bag is a rewarding project that allows you to create a personalized, functional, and stylish accessory for your photography gear.
This guide will take you through the essential steps, from selecting durable fabrics and padding to adding compartments and securing closures.
By the end, you’ll have a unique bag that offers the perfect blend of protection and convenience, ensuring your camera and accessories are safe and easily accessible.
Here how to make a spy camera bag?
Let’s get started on crafting a DSLR camera bag that reflects your style and meets your practical needs.
Is it important to sew camera bag yourself?
Sewing a camera bag yourself can be beneficial but is not essential.
Doing it yourself allows for customization to fit your specific camera and accessory needs, providing tailored compartments and padding for optimal protection.
You can choose durable materials and designs that suit your style and functional preferences. Additionally, making your own bag can be cost-effective compared to purchasing high-end camera bags.
However, it requires sewing skills, time, and the right materials.
If you lack these, a DIY camera bag might not offer the same level of protection and durability as a professionally made one.
Commercial camera bags are designed with specialized features, tested for durability, and offer warranties.
Ultimately, the decision depends on your ability to sew, your need for customization, and whether you prioritize the unique personal touch of a handmade bag over the convenience and reliability of a store-bought option.
Here, how to clean a manfrotto camera bag?
Things to know before sewing a DSLR camera bag
You see, how to sew a dslr camera bag?
Before sewing a DSLR camera bag, several key considerations are essential:
- Design and Dimensions: Understand the dimensions of your camera, lenses, and accessories to create compartments that fit them snugly. Sketch a design that includes adequate padding and pockets.
- Materials: Choose durable, water-resistant fabrics like canvas or nylon for the outer layer and soft, padded materials like foam or felt for the interior to protect your equipment.
- Sewing Skills: Ensure you have the necessary sewing skills and tools, such as a heavy-duty sewing machine, strong threads, and appropriate needles for thick fabrics.
- Reinforcements: Reinforce stress points, such as strap attachments and corners, to enhance durability.
- Closures and Fastenings: Decide on secure closures like zippers, Velcro, or buckles to keep your gear safe and easily accessible.
- Comfort and Portability: Incorporate adjustable straps and ergonomic features for comfortable carrying.
- Safety Features: Consider adding anti-theft features like lockable zippers or hidden pockets.
Proper planning and understanding of these aspects will help you create a functional and protective camera bag.
How to sew a dslr camera bag?
Sewing a DSLR camera bag involves several steps:
- Materials: Gather durable outer fabric (canvas, nylon), padding (foam, quilt batting), lining fabric, zippers, Velcro, and webbing for straps.
- Design and Measurements: Measure your camera and accessories to create a pattern with compartments. Include dimensions for the main body, pockets, and straps.
- Cutting Fabric: Cut the outer fabric, padding, and lining according to your pattern. Cut extra pieces for pockets and dividers.
- Sewing Compartments: Sew the padding to the lining fabric. Attach pockets and dividers to the inner lining, ensuring they fit your gear securely.
- Assembling the Bag: Sew the outer fabric pieces together, leaving an opening for the zipper. Insert the lining with compartments into the outer shell and sew around the edges.
- Adding Closures: Attach zippers or Velcro for secure closures. Reinforce these areas to ensure durability.
- Straps and Finishing Touches: Sew webbing or fabric straps, adjusting for comfort. Attach the straps securely to the bag, and add any additional features like adjustable buckles or padding.
This process results in a customized, functional DSLR camera bag tailored to your specific needs.
7 Steps to sew a DSLR camera bag
1. Materials and Tools
To start, gather all necessary materials and tools. Essential items include durable outer fabric (canvas, nylon, or leather), padding (foam or quilt batting), soft lining fabric, sturdy zippers, Velcro, webbing for straps, and buckles.
You’ll need a heavy-duty sewing machine, strong thread, sewing needles suitable for thick fabrics, fabric scissors, a measuring tape, and pins or clips.
Having everything ready before you begin ensures a smooth sewing process without interruptions.
2. Design and Measurements
Design the layout of your camera bag by sketching a detailed plan. Measure your DSLR camera, lenses, and accessories to determine the dimensions of the main compartment and additional pockets.
Create a pattern with these measurements, including allowances for seams. Consider how you will arrange internal dividers and padding to protect your gear.
Ensure that your design includes practical features like exterior pockets for easy access to smaller items and a comfortable carrying strap system.
3. Cutting Fabric
Using your pattern, cut the outer fabric, padding, and lining fabric.
Precision is crucial to ensure all pieces fit together seamlessly. Cut additional pieces for internal dividers and pockets.
Label each piece to avoid confusion later. This step sets the foundation for the construction of your camera bag, so take your time to ensure accuracy and consistency across all pieces.
4. Sewing Compartments and Padding
Begin by sewing the padding to the lining fabric. This will provide protection for your camera and accessories. Attach pockets and dividers to the inner lining, following your design layout.
Ensure the pockets are securely sewn to withstand the weight of your gear. If using foam padding, consider quilting it to the lining fabric for added stability.
Properly constructed compartments are essential for organizing and protecting your equipment.
5. Assembling the Bag
With the inner compartments complete, start assembling the outer shell. Sew the outer fabric pieces together, leaving an opening for the zipper.
Insert the lining with attached compartments into the outer shell. Carefully sew around the edges, ensuring the lining is evenly distributed inside the bag.
Here, how to put a tripod strap on a camera bag?
This step brings together the inner and outer parts of your bag, creating a cohesive structure.
6. Adding Closures and Reinforcements
Attach zippers, Velcro, or buckles as closures. Reinforce these areas with extra stitching to ensure they can handle frequent use. Consider using double stitching or a zigzag stitch for added durability.
Closures should be easy to operate but secure enough to protect your gear. Properly reinforced closures prevent accidental openings and potential damage to your camera.
7. Straps and Finishing Touches
Sew the webbing or fabric straps, ensuring they are adjustable for comfort. Attach the straps securely to the bag, reinforcing these points to handle the bag’s weight.
Add any additional features, such as padding on the straps, adjustable buckles, or anti-theft elements like lockable zippers. Finally, inspect the bag for any loose threads or weak spots, making necessary adjustments.
The finishing touches ensure your bag is not only functional but also comfortable and durable for everyday use.
By following these seven detailed steps, you can create a custom DSLR camera bag that meets your specific needs and provides optimal protection and organization for your photography equipment.
5 Methdos to sew a DSLR camera bag
1. Traditional Sewing Machine Method
The traditional sewing machine method is the most common approach to sewing a DSLR camera bag.
It involves using a heavy-duty sewing machine capable of handling thick fabrics and multiple layers. Start by cutting all the pieces of fabric, padding, and lining according to your pattern.
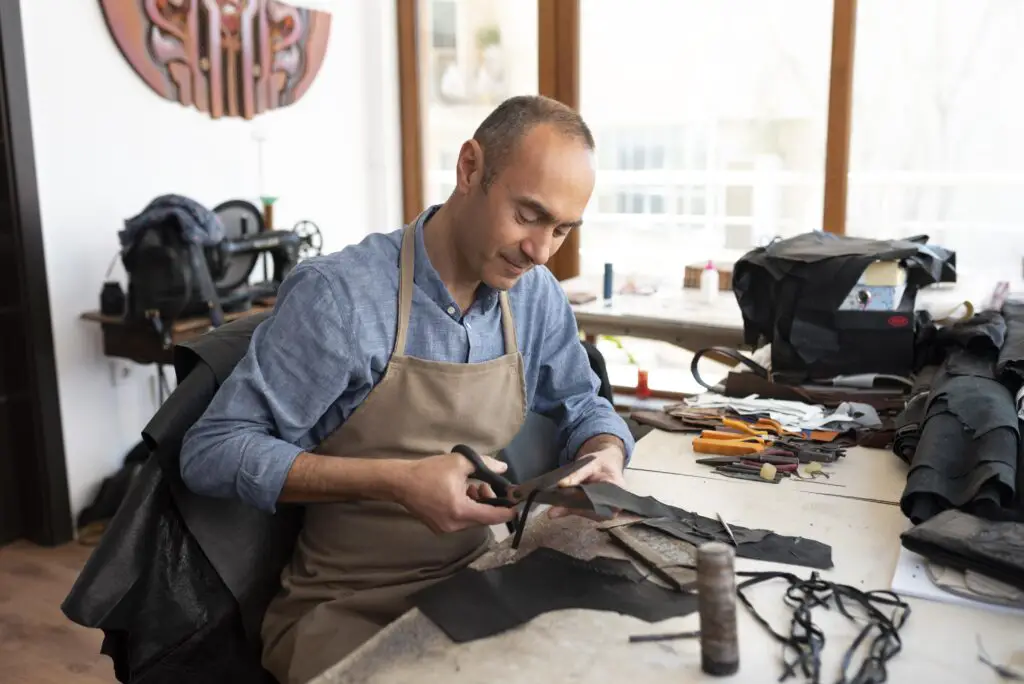
Assemble the inner compartments and padding first, attaching pockets and dividers to the lining fabric.
Then, sew the outer fabric pieces together, leaving an opening for the zipper. Insert the lining with the attached compartments into the outer shell, and carefully sew around the edges.
Finally, add closures like zippers or Velcro, and attach the straps securely.
Here what size dry bag for camera?
This method allows for precise stitching and strong seams, ensuring durability and a professional finish.
2. Hand Sewing Method
Hand sewing a DSLR camera bag is a time-consuming but rewarding method, ideal for those who enjoy detailed craftsmanship. This method requires strong needles, heavy-duty thread, and patience.
Begin by cutting all fabric and padding pieces.
Use a backstitch for strong seams, particularly around areas that will bear weight, such as pockets and strap attachments. Sew the inner compartments and padding to the lining fabric first.
Assemble the outer shell by stitching the fabric pieces together, leaving an opening for inserting the lining.
Carefully hand sew the lining into the outer shell. Attach closures and straps, ensuring all stitches are reinforced.
Hand sewing allows for greater control over each stitch, making it possible to achieve a high level of detail and customization.
3. Quilting Method
The quilting method involves adding an extra layer of padding to enhance protection for your camera gear.
This method is particularly useful for those who want additional cushioning in their camera bag. Start by cutting the outer fabric, padding, and lining fabric.
Quilt the padding to the lining fabric using a sewing machine or by hand, creating a grid or decorative pattern.
Assemble the inner compartments and pockets on the quilted lining. Sew the outer fabric pieces together, leaving an opening for the zipper.
Insert the quilted lining into the outer shell, sewing around the edges to secure it. Attach closures and straps, reinforcing all stress points.
Quilting adds an extra layer of protection and can also provide a unique aesthetic to your camera bag.
4. Upcycling Method
The upcycling method involves repurposing old materials, such as denim jeans, canvas bags, or old jackets, to create a DSLR camera bag.
This eco-friendly approach not only reduces waste but also results in a unique, personalized bag. Start by selecting durable, reusable materials and cutting them to the desired size and shape.
Reinforce the fabric with additional padding and lining. Assemble the inner compartments and pockets using the repurposed materials.
Sew the outer shell together, incorporating elements like pockets or zippers from the original items. Insert the lining with compartments into the outer shell and sew around the edges.
Add closures and straps, ensuring all seams are strong. Upcycling allows for creativity and sustainability while producing a functional camera bag.
5. Modular Method
The modular method involves creating separate, detachable compartments and components that can be assembled into a single camera bag. This approach is ideal for photographers who need flexibility and customization.
Begin by designing and cutting individual compartments for the camera, lenses, and accessories, using durable fabric and padding. Each compartment should have its own closures, such as zippers or Velcro.
Sew the compartments separately, ensuring they are well-padded and secure. Create an outer shell with attachment points, such as loops or Velcro strips, to hold the individual compartments.
Assemble the bag by attaching the compartments to the outer shell. Add straps and any additional features, such as anti-theft elements or rain covers.
Here, what does a camera and money bag emoji means on tinder?
The modular method provides versatility, allowing you to reconfigure the bag based on your specific needs for different photography sessions.
5 Benefits to sew a DSLR camera bag
1. Customization and Personalization
One of the primary benefits of sewing your own DSLR camera bag is the ability to customize it to your exact needs and preferences.
Store-bought camera bags often come with standard compartments and features that may not perfectly suit your gear or workflow.
By sewing your own bag, you can design specific compartments for your camera body, lenses, batteries, and other accessories. You can also choose the color, fabric, and overall style that reflects your personal taste.
This level of personalization ensures that your camera bag is uniquely yours and tailored to enhance your photography experience.
2. Cost-Effectiveness
Sewing your own DSLR camera bag can be more cost-effective than purchasing a high-quality, branded bag. Professional camera bags can be expensive due to the materials, brand name, and specialized design.
By making your own, you can save money on these costs.
Additionally, you can choose materials that fit within your budget without compromising on quality. If you have sewing skills and equipment, the primary expenses will be the fabric, padding, and closures.
This DIY approach allows you to create a durable and functional camera bag at a fraction of the cost of a commercial one.
3. Enhanced Durability and Quality
When you sew your own DSLR camera bag, you have control over the materials and construction techniques used, ensuring enhanced durability and quality.
Store-bought bags may not always meet your standards for robustness, especially if you frequently carry heavy or valuable equipment.
By selecting high-quality, durable fabrics and reinforcing stress points, you can create a camera bag that withstands the rigors of travel and frequent use.
Additionally, you can ensure that all seams are double-stitched and that closures and straps are securely attached, providing peace of mind that your gear is well-protected.
4. Environmental Sustainability
Sewing your own DSLR camera bag can contribute to environmental sustainability.
Here, what do you use a bike camera bag?
By choosing eco-friendly materials or upcycling old fabrics, you reduce the demand for new resources and minimize waste. Upcycling, in particular, gives new life to old items that might otherwise end up in landfills.
This sustainable approach not only benefits the environment but also promotes a sense of responsibility and creativity.
Creating your own camera bag allows you to be conscious of your environmental footprint and make choices that align with your values of sustainability and conservation.
5. Skill Development and Satisfaction
The process of sewing your own DSLR camera bag provides an opportunity to develop and refine your sewing skills.
This project involves various techniques, such as measuring, cutting, quilting, and sewing multiple layers, which can enhance your craftsmanship.
Successfully completing a complex project like this can be incredibly satisfying and boost your confidence in your abilities.
Moreover, every time you use your camera bag, you’ll experience a sense of pride and accomplishment, knowing that you created a functional and stylish accessory with your own hands.
This personal connection to your gear adds an extra layer of enjoyment to your photography endeavors.
Related faq’s
What materials are best for sewing a DSLR camera bag?
The best materials for sewing a DSLR camera bag include durable outer fabrics like canvas, nylon, or leather, which provide strength and protection.
For the interior, soft and padded materials such as foam, quilt batting, or felt are ideal to cushion the camera and lenses.
Lining fabric should be smooth to avoid scratching the equipment. Heavy-duty thread and sturdy zippers or Velcro are also essential for durability and secure closures.
What tools do I need to sew a DSLR camera bag?
To sew a DSLR camera bag, you’ll need a heavy-duty sewing machine capable of handling thick fabrics, strong needles suitable for heavy-duty materials, fabric scissors, a measuring tape, pins or clips, and a seam ripper for adjustments.
Additional tools may include a rotary cutter for precise cutting, a cutting mat, and an iron for pressing seams.
How do I design the layout and compartments for my camera bag?
Designing the layout involves measuring your camera, lenses, and accessories to determine the dimensions of the main compartment and additional pockets. Sketch a detailed plan, including specific compartments for each piece of equipment.
Consider the placement of internal dividers, pockets, and padding to ensure everything fits snugly and securely. Think about accessibility and ease of use when arranging compartments.
How can I ensure the bag is durable and can withstand heavy use?
To ensure durability, choose high-quality, durable fabrics and reinforce stress points with additional stitching or fabric layers.
Use double stitching or zigzag stitches for seams that will bear weight. Attach closures and straps securely, and consider using metal hardware for extra strength. Reinforcing the bottom of the bag with a sturdy material can also help it withstand heavy use and protect your gear.
What are some tips for sewing the padded lining?
When sewing the padded lining, quilt the padding to the lining fabric for added stability and protection. Ensure that the padding is evenly distributed and securely attached to avoid shifting.
Sew pockets and dividers onto the lining fabric before assembling the bag. Take care to align seams and edges accurately to achieve a professional finish. Using clips instead of pins can help manage the thickness of the layers.
How do I attach the straps and ensure they are comfortable?
To attach the straps, use strong webbing or fabric and reinforce the attachment points with multiple rows of stitching.
Ensure the straps are adjustable for comfort and proper fit. Adding padding to the straps can enhance comfort, especially for prolonged use.
Consider ergonomic design elements, such as wider straps or cross-body options, to distribute weight more evenly.
Can I add custom features to my camera bag?
Yes, adding custom features to your camera bag can enhance its functionality and personal appeal.
Consider including exterior pockets for quick access to small items, anti-theft elements like lockable zippers, or weather-resistant features such as a rain cover. You can also personalize the bag with decorative elements like embroidery or patches.
Custom features should be designed and added during the planning and construction phases to ensure they integrate seamlessly with the overall design.
Conclusion
Sewing a DSLR camera bag is a rewarding project that allows for complete customization to meet your specific needs.
By carefully selecting durable materials, designing a functional layout with padded compartments, and using precise sewing techniques, you can create a high-quality, protective, and stylish bag. The process involves planning, cutting, assembling, and reinforcing each part to ensure durability and comfort.
Whether for personal use or as a unique gift, a handmade DSLR camera bag combines practicality with personal expression, resulting in a tailor-made solution that stands out from commercial alternatives.

