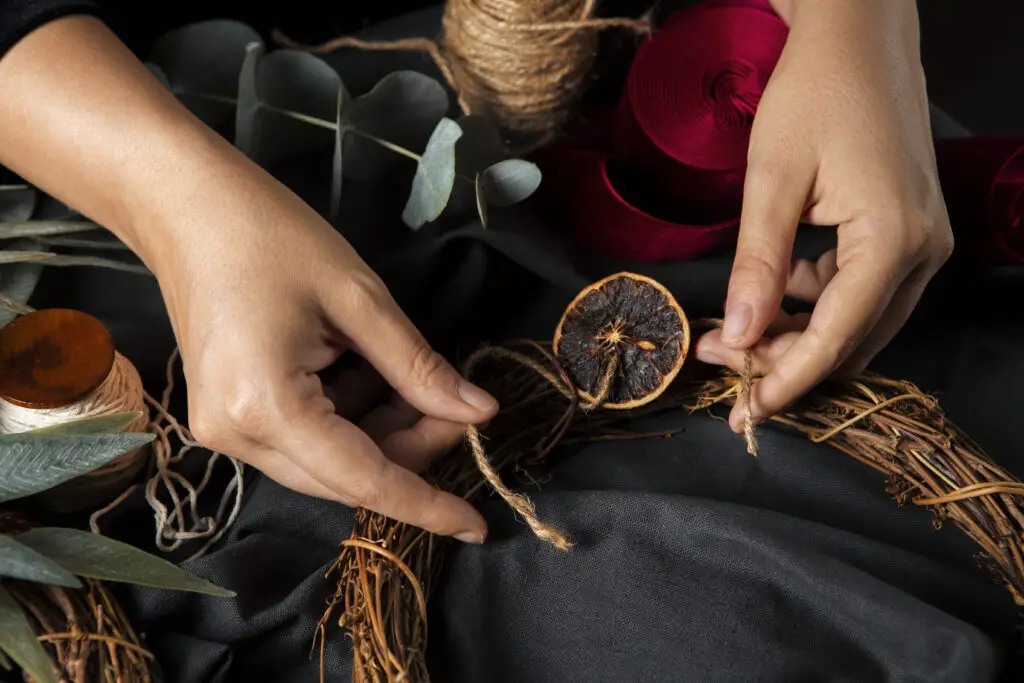
How to sew a simple camera bag?- Wondered
Ever wondered how to protect your camera while adding a personal touch?
Sewing a simple camera bag is the perfect solution! This DIY project not only ensures your gear is safe but also allows you to showcase your style.
With basic sewing skills and materials, you can create a functional and fashionable bag that meets your specific needs.
Whether you’re a seasoned photographer or just starting, this guide will walk you through each step, from selecting the right fabric to adding essential padding.
Ready to combine creativity and practicality? Let’s get started on making your very own custom camera bag.
Here 10 best shimoda camera bag?
Why you need to sew simple camera bag?
Sewing a simple camera bag is a rewarding project that enhances both your creativity and functionality.
First, it allows you to create a customized storage solution tailored specifically to your camera gear, ensuring a perfect fit for your equipment and accessories.
By sewing your own bag, you can select materials that provide the right balance of protection, durability, and style, allowing you to personalize the design to match your aesthetic preferences.
Additionally, making your own camera bag can be more cost-effective than purchasing a high-end commercial option. You can repurpose fabric or utilize budget-friendly materials while ensuring quality.
This DIY project also fosters a sense of accomplishment and skills in sewing, which can be beneficial for future projects.
Finally, a handcrafted bag often has a unique charm and character that mass-produced items lack, making it a meaningful accessory for any photographer.
Is it worth to sew a simple camera bag?
Sewing a simple camera bag can be worth the effort for several reasons.

First, it offers a unique opportunity to create a bag tailored specifically to your camera gear, ensuring that everything fits snugly and is well-protected. You can choose the materials, colors, and designs that best suit your style and needs, making it a truly personalized accessory.
Additionally, making your own bag can be more economical than buying a commercially made one, especially if you use repurposed materials.
Here, is it safe to pack a camera bag inside a luggage when going through airpot security?
This DIY project can also help you develop valuable sewing skills that can be applied to future endeavors.
Moreover, a handcrafted bag has a distinct charm and character that store-bought options often lack. It can be a conversation starter and a reflection of your personality as a photographer.
Overall, if you enjoy crafting and want a functional yet stylish camera bag, sewing your own can be a fulfilling and worthwhile endeavor.
Is it important to sew a simple camera bag?
Sewing a simple camera bag can be important for several reasons, particularly for photographers seeking personalized solutions.
First, it allows you to create a bag that precisely fits your gear, ensuring protection and easy access to your camera and accessories. This customization helps you avoid the common issue of ill-fitting, mass-produced bags that may not cater to specific needs.
Additionally, sewing your own camera bag promotes sustainability by enabling you to repurpose materials or use eco-friendly fabrics, reducing waste associated with commercial manufacturing.
The process also fosters creativity and self-expression, allowing you to design a bag that reflects your style.
Moreover, crafting a bag can instill a sense of pride and accomplishment, enhancing your overall experience as a photographer.
While it may not be essential for everyone, sewing a simple camera bag can be a meaningful project that combines practicality, creativity, and a personal touch to your photography journey.
Here, 10 best vera bradely camera bag?
Things to know before sewing simple camera bag
Before sewing a simple camera bag, several key factors should be considered to ensure a successful project.
First, understand your specific camera gear and its dimensions, including lenses and accessories, to design a bag that fits everything securely.
Choosing the right materials is crucial; opt for durable fabrics such as canvas or nylon that provide protection and are easy to clean.
Additionally, consider the bag’s style and functionality.
Decide whether you want a messenger bag, backpack, or tote, and think about features like padded dividers for organization, pockets for smaller items, and adjustable straps for comfort.
Familiarize yourself with basic sewing techniques and tools, as well as any patterns you may want to follow. Planning ahead for closures, such as zippers or magnetic snaps, is also important for securing your gear.
Finally, be prepared for some trial and error, as crafting a personalized camera bag can be a learning experience that enhances your sewing skills.
How to sew a simple camera bag?
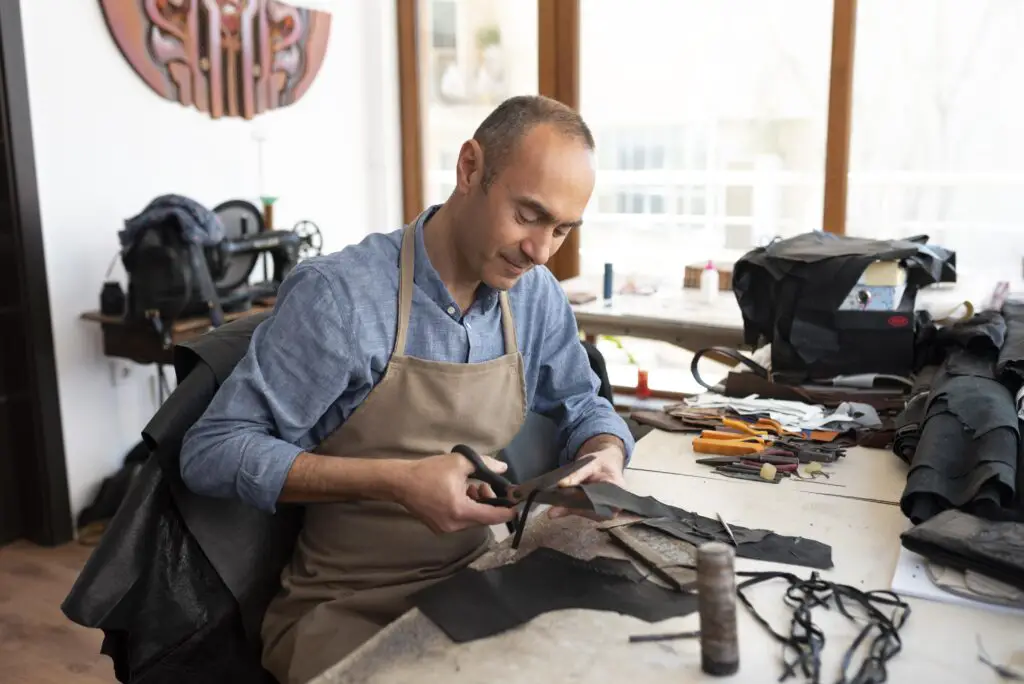
Sewing a simple camera bag involves several steps. First, gather your materials: durable fabric (like canvas or nylon), batting for padding, a lining fabric, thread, scissors, pins, and a sewing machine.
Start by measuring your camera and gear to determine the dimensions for the bag, including height, width, and depth.
Next, cut your main fabric, lining, and batting according to your measurements. For added structure, create side and bottom panels.
Here, shoulder pain what kind of camera bag?
Sew the main fabric pieces together, leaving openings for the bag’s top and any pockets. Attach batting to the lining fabric for extra protection.
After assembling the exterior, sew the lining, ensuring it fits snugly inside the main bag. Add closures like zippers or snaps as desired.
Finally, finish the bag by sewing in adjustable straps or handles. Turn the bag right-side out, check for any loose threads, and enjoy your custom camera bag, tailored to fit your gear perfectly!
9 steps to sew a simple camera bag
How to sew a simple camera bag?- Here 9 steps reavealed.
Sure! Here’s a detailed guide on sewing a simple camera bag, broken down into nine steps.
Step 1: Gather Your Materials
Before starting your project, gather all necessary materials and tools.
You will need durable fabric (like canvas or nylon) for the outer layer, soft fabric or lining material, batting or foam for padding, thread that matches your fabric, scissors, pins, a sewing machine, and a measuring tape.
Additionally, consider having a zipper or magnetic snap for closure, adjustable straps or webbing, and any embellishments you may want to add, such as patches or labels.
Taking the time to gather everything at the outset will streamline your workflow and help avoid interruptions during the sewing process.
This preparation also includes selecting a workspace with adequate lighting and space to lay out your materials comfortably.
Make sure your sewing machine is in good working condition, with a fresh needle and appropriate settings for your fabric type.
Having everything organized will set the tone for a successful project, making the sewing process smoother and more enjoyable.
Step 2: Measure Your Camera and Gear
To create a camera bag that meets your needs, accurately measure your camera and any accessories you intend to carry. This step is crucial for ensuring that your bag is both functional and protective.
Here, how do you support a heavy camera lens?
Use a measuring tape to determine the dimensions of your camera body, lenses, and any additional gear like batteries, chargers, or filters. Consider the space required for padding, as your camera needs protection from bumps and drops.
Take note of the height, width, and depth of each item to help you plan the bag’s overall dimensions. You should also think about whether you want extra compartments for organization.
Once you have all measurements, create a simple sketch or outline of your bag’s design, incorporating pockets and dividers based on your gear’s specific sizes.
This planning stage is essential for crafting a camera bag that is not only stylish but also functional and tailored to your photography needs.
Step 3: Design Your Bag
Once you have your measurements, it’s time to design your camera bag. Start by deciding on the bag style—common options include a messenger bag, tote, or backpack. Consider your personal style and how you plan to use the bag.
Create a rough sketch of the bag’s layout, including compartments for your camera and accessories.
Think about the overall dimensions, ensuring there’s enough room for your gear while keeping the bag compact and easy to carry.
Additionally, consider features like pockets for small items, adjustable straps for comfort, and closures to secure your belongings.
When designing, balance aesthetics with practicality; a well-thought-out design will enhance your bag’s functionality. Make sure to incorporate padding or dividers for protection.
If you’re using a pattern, check the instructions carefully to understand how the pieces fit together.
This step allows you to envision your finished product and make any necessary adjustments before cutting your fabric.
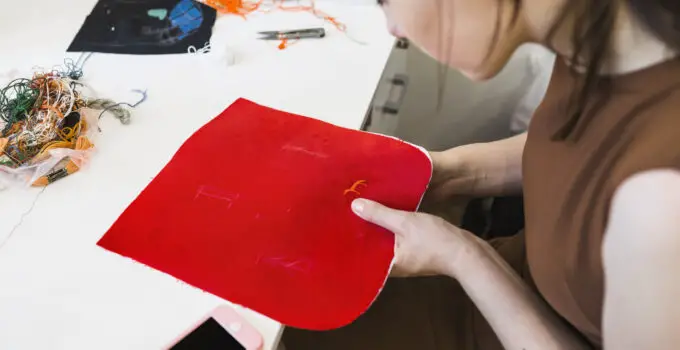
Step 4: Cut Your Fabric
With your design in hand, it’s time to cut your fabric pieces. Lay out your outer fabric, lining, and batting on a clean, flat surface. Use your measurements and design sketch to mark out the dimensions for each piece.
Carefully use fabric scissors to cut the pieces, ensuring you maintain clean and straight edges.
For added accuracy, use a rotary cutter and mat if you have them. Remember to include seam allowances, typically around ½ inch to 1 inch, depending on your sewing preferences and the thickness of your fabric.
It’s a good practice to label each piece (e.g., “main body,” “lining,” “pocket”) to keep track of your parts during assembly.
When cutting batting, ensure it matches the size of your outer fabric pieces to provide adequate padding.
Take your time with this step, as precise cutting is critical for a well-fitted and visually appealing camera bag. Keep your workspace organized to avoid confusion later on.
Here, how to clean a tenba polyethelene camera bag?
Step 5: Assemble the Outer Fabric
Now that your fabric pieces are cut, you can begin assembling the outer fabric of your camera bag. Start by laying out the main fabric pieces according to your design.
Pin the pieces together, ensuring the right sides are facing each other. For bags with pockets or additional compartments, attach those pieces first, following your design sketch. Once pinned, sew along the edges using a sewing machine, maintaining a consistent seam allowance.
If your design includes corners or curves, go slowly and adjust as necessary to maintain the shape.
After sewing, trim any excess fabric from the seams to reduce bulk and enhance the bag’s appearance. If desired, finish the seams with a zigzag stitch or serger to prevent fraying.
This step creates the outer shell of your camera bag, so take care to ensure that everything is aligned properly.
Once completed, turn the bag right-side out to check the shape and fit before moving on to the next steps.
Step 6: Create Padding and Lining
Creating the padding and lining is a vital step in making a functional camera bag. Begin by cutting your lining fabric according to the same dimensions as your outer fabric.
For padding, cut pieces of batting or foam to fit the dimensions of your bag’s main body and any compartments you’ve designed.
If you’re adding dividers for organization, cut additional pieces of batting and fabric to create padded sections that will hold your camera and lenses securely.
Next, attach the batting to the lining fabric using a basting stitch or fabric adhesive. This process will keep the padding in place during assembly.
If you desire additional compartments, sew small pockets or dividers into the lining, ensuring they are securely attached.
Once the lining is prepared, check that everything fits well with your outer fabric. This step enhances the bag’s protective qualities, ensuring your gear is safe from bumps and scratches.
With the padding and lining completed, you’re ready to combine them with the outer shell.
Step 7: Sew the Lining to the Outer Fabric
With both the outer fabric and lining prepared, it’s time to sew them together. Begin by placing the lining inside the outer bag, ensuring the right sides of both fabrics are facing each other.
This placement allows for a clean finish once the bag is turned right-side out. Align the top edges of the outer fabric and lining, pinning them securely in place.
Be sure to leave an opening in one side or the bottom of the lining for turning the bag later.
Using a sewing machine, sew around the top edge, maintaining a consistent seam allowance.
If your bag has a flap or any additional features, sew those components as well. After sewing, carefully trim any excess fabric from the seam allowance to reduce bulk. Turn the bag right-side out through the opening you left in the lining.
Gently push out the corners to ensure a clean shape. This step combines the structural integrity of the outer bag with the comfort and protection of the lining.
Step 8: Add Closure and Straps
The next step is to add closures and straps to your camera bag, enhancing its functionality and usability. Depending on your design, you can choose from various closure options, such as zippers, magnetic snaps, or Velcro.
If using a zipper, carefully pin it along the opening and sew it in place, ensuring it is aligned correctly for smooth operation.
For magnetic snaps, follow the manufacturer’s instructions to attach them securely to both the outer fabric and lining.
Once the closure is in place, it’s time to add straps. If you’re using adjustable webbing, cut it to your desired length and attach it securely to the bag’s sides or back, reinforcing it with additional stitching for durability.
If you’re creating fabric straps, cut fabric pieces and sew them together, leaving the ends open for adjustments.
Make sure the straps are comfortable and allow for easy carrying. This step is essential for creating a functional camera bag that can be carried effortlessly while keeping your gear secure.
Step 9: Finish the Bag
The final step in sewing your simple camera bag is to finish it off with some final touches.
Begin by carefully turning the bag right-side out through the opening you left in the lining. Gently push out the corners to ensure a neat shape.
Here, how to make a spy camera bag?
Once the bag is fully turned, fold the raw edges of the lining’s opening inward and pin them in place to create a clean finish. Sew this opening closed, either by hand or with a machine, to secure the lining.
Next, check the overall structure and appearance of the bag, making any necessary adjustments to seams or edges.
If desired, you can add decorative elements such as patches, labels, or embroidery to personalize your bag further.
Finally, inspect all closures, straps, and pockets to ensure they are securely attached and functioning correctly.
With everything in place, your simple camera bag is now complete and ready for use, offering you a stylish and practical solution for carrying your photography gear!
7 Methods to sew a simple camera bag
Here are seven methods for sewing a simple camera bag, each focusing on different techniques and styles.
Method 1: Basic Tote Bag Style
The basic tote bag style is one of the simplest methods for sewing a camera bag.
Start by cutting two rectangles for the outer fabric and two for the lining, ensuring they are large enough to fit your camera and accessories. For added structure, cut a piece of batting to match the dimensions of the outer fabric.
Begin by sewing the outer fabric pieces together, leaving the top open.
Repeat this process for the lining, but leave a small opening at the bottom for turning. Next, attach the batting to the outer fabric by basting it in place.
Once assembled, insert the lining into the outer fabric, aligning the top edges and pinning them together.
Sew around the top edge, then turn the bag right-side out through the opening in the lining. Finally, sew the lining closed, add straps or handles, and you have a simple tote-style camera bag.
Method 2: Messenger Bag Style
Creating a messenger bag style camera bag involves a few more steps but offers great functionality.
Begin by cutting out the main body, flap, and a long strap from your chosen fabric. Use batting for padding in the main compartment.
Start by assembling the main body by sewing the sides together, leaving the top open. Attach the batting to the inside of the main body to provide protection for your camera.
Next, sew the flap to the back of the bag, ensuring it fits securely and covers the top.
For the strap, cut a long strip of fabric, fold it in half, and sew along the length, then turn it right-side out. Attach the strap to the bag by sewing it securely to the sides.
Finish by adding a closure mechanism, such as a magnetic snap or buckle, to keep your gear safe. This messenger bag design is stylish and practical for photographers on the go.
Here, does tumi make a camera bag?
Method 3: Drawstring Closure Bag
A drawstring closure bag is a versatile and easy method for creating a camera bag. To start, cut two fabric pieces for the outer layer and two for the lining. Make sure the outer fabric is durable, while the lining can be softer for ease of use.
Sew the outer fabric pieces together along the sides and bottom, then repeat this process for the lining, leaving the top open.
To create the drawstring channel, fold down the top edge of the outer fabric and sew along the edge, leaving a gap for the drawstring. Cut a length of cord or ribbon to use as the drawstring, and thread it through the channel using a safety pin.
Next, insert the lining into the outer bag, ensuring the right sides are facing each other.
Pin the top edges together and sew them closed. Finally, turn the bag right-side out, adjust the drawstring, and you have a simple yet functional camera bag that allows for easy access to your gear.
Method 4: Padded Camera Bag with Dividers
For added protection and organization, creating a padded camera bag with dividers is an excellent choice.
Start by cutting out pieces for the main body of the bag, a padded bottom, and several divider panels. Use a thick fabric for the exterior and soft lining material, along with batting for padding.
Begin by sewing the outer fabric pieces together, leaving the top open.
Sew the padded bottom to the bag for added protection. Next, create the dividers by cutting smaller rectangles from the batting and covering them with fabric. Sew the dividers into the bag, positioning them according to your gear’s size and layout, and secure them in place.
Once the dividers are attached, add the lining by placing it inside the outer fabric.
Pin and sew around the top edge, ensuring everything is secure. Finally, turn the bag right-side out and check the organization of your gear.
This method provides a protective and organized space for your camera and accessories, making it ideal for photographers who carry multiple items.
Method 5: Quilted Camera Bag
A quilted camera bag adds a stylish touch while providing excellent protection for your gear.
To create this bag, start by cutting two outer fabric pieces and two lining pieces, as well as batting for the quilting layer. You can choose complementary fabrics for a unique look.
Layer the outer fabric, batting, and lining together, ensuring the right sides of the fabric are facing outwards.
Pin the layers in place and use a sewing machine to quilt the fabric, sewing in a grid pattern or any design you prefer. This step adds texture and stability to the bag.
After quilting, sew the outer pieces together, leaving the top open. Repeat the process with the lining fabric, leaving an opening at the bottom for turning.
Once the outer bag and lining are complete, insert the lining into the outer bag and sew around the top edge. Finally, turn the bag right-side out, sew the opening closed, and you’ll have a fashionable and functional quilted camera bag.
Method 6: Bucket Bag Style
The bucket bag style offers a chic and functional option for carrying camera gear.
Start by cutting a large circle for the base and a long rectangle for the body of the bag. The rectangle’s height will determine the bag’s depth, so adjust it based on your gear size.
Sew the long edges of the rectangle together to create a tube, then attach the circular base to the bottom.
To create a drawstring closure, fold down the top edge of the bag and sew a channel for the drawstring. Cut a length of cord to use for the drawstring and thread it through the channel.
For added structure, you can insert a stiffener or interfacing along the edges.
Once everything is assembled, turn the bag right-side out, and adjust the drawstring to secure your gear inside. This bucket bag style is not only fashionable but also provides a spacious and flexible option for photographers.
Method 7: Recycled Material Bag
Using recycled materials to sew a simple camera bag is a sustainable and creative option. Start by collecting old fabrics, such as worn-out jeans, canvas tote bags, or even curtains.
Cut out pieces for the main body and lining of the bag, ensuring the fabrics are durable enough to protect your camera gear.
Begin by sewing the outer fabric pieces together, leaving the top open. If you have any pockets from the recycled materials, consider incorporating them into the design for added functionality.
Next, sew the lining pieces together, leaving an opening for turning.
Once both the outer and lining sections are assembled, insert the lining into the outer bag and pin the top edges together. Sew around the top edge and then turn the bag right-side out through the opening in the lining.
Finally, close the lining’s opening and enjoy your eco-friendly camera bag. This method not only saves materials but also allows you to create a unique and personalized bag.
5 Benefits to sew a simple camera bag
Here are five benefits of sewing a simple camera bag, each elaborated in detail.
Benefit 1: Customization
One of the most significant benefits of sewing a simple camera bag is the ability to fully customize it to suit your specific needs and preferences.
When you make your own bag, you can choose the dimensions that perfectly accommodate your camera and accessories, ensuring a snug fit that protects your gear during transport.
Additionally, customization extends beyond size; you can select fabrics, colors, and patterns that reflect your personal style. This means you can create a bag that not only functions well but also looks great.
You might prefer a bright, eye-catching fabric for a stylish statement or a more muted tone for a classic, professional appearance.
Moreover, you can incorporate features tailored to your photography style, such as adjustable dividers for organizing multiple lenses, extra pockets for batteries and memory cards, or even a padded compartment for a laptop or tablet.
The options are endless, allowing you to create a unique bag that aligns perfectly with your lifestyle.
This level of personalization makes the bag feel more like a reflection of you, enhancing your overall experience as a photographer.
Customization empowers you to meet your practical needs while expressing your creativity, making the process of sewing your own camera bag both enjoyable and fulfilling.
Benefit 2: Cost-Effectiveness
Sewing a simple camera bag can be a cost-effective alternative to purchasing a commercial bag, particularly if you already have some materials on hand.
High-quality camera bags from reputable brands can be expensive, often costing significantly more than the cost of fabric and supplies needed for a DIY project. By making your own bag, you can save money while still achieving a high-quality, functional product.
Additionally, you have the option to repurpose materials, such as old clothing, linens, or other fabrics, which can further reduce costs.
This approach not only saves money but also promotes sustainability by giving new life to items that might otherwise go to waste.
Another advantage is that when you sew your own bag, you can prioritize the quality of materials based on your budget.
You can choose more affordable fabrics that still offer durability and protection for your camera gear, without compromising on style or function.
Overall, the cost-effectiveness of sewing your own camera bag makes it an attractive option for photographers who want a personalized solution without breaking the bank.
The savings can also free up funds for other photography-related purchases, such as lenses, tripods, or classes, enhancing your overall photography journey.
Benefit 3: Skill Development
Sewing a simple camera bag is an excellent way to develop and improve your sewing skills.
Whether you’re a beginner or someone with more experience, this project allows you to practice various techniques and learn new ones in a hands-on manner.
For beginners, sewing a camera bag can introduce you to essential skills such as measuring, cutting, and sewing straight seams. As you progress through the project, you’ll become more comfortable using a sewing machine and handling different types of fabric.
You may also learn about interfacing, padding, and various closure options, which can be applied to future sewing projects.
For those with more experience, this project can provide opportunities to explore advanced techniques such as quilting, adding pockets, or incorporating unique design elements.
You might experiment with decorative stitching or learn how to install zippers and snaps, broadening your skill set and boosting your confidence as a sewist.
Furthermore, completing a tangible project like a camera bag can be incredibly rewarding. It not only serves as a practical item for your photography needs but also acts as a testament to your growing skills.
As you sew, you’ll gain valuable experience that can lead to more ambitious projects, ultimately enhancing your overall sewing proficiency.
Benefit 4: Enhanced Protection for Gear
Sewing your own simple camera bag allows you to create a protective space specifically designed for your camera and accessories.
Commercial bags may not always provide the level of protection you desire or may not fit your gear perfectly. By crafting your own bag, you can ensure that your equipment is safeguarded against bumps, drops, and other potential damage.
When designing your camera bag, you can choose to incorporate padding using materials such as foam or batting, which helps cushion your gear during transport.
This added layer of protection is especially important for sensitive items like camera bodies and lenses, which can be easily scratched or damaged.
Furthermore, you can customize the interior layout with padded dividers that create separate compartments for different items.
This organization not only helps prevent your gear from shifting during movement but also makes it easy to access everything you need quickly.
You can decide the size and placement of each divider based on your specific gear, ensuring that everything has a designated spot.
By sewing a bag tailored to your camera equipment, you enhance its protection and prolong the life of your gear, ultimately contributing to a more enjoyable and worry-free photography experience.
Benefit 5: Creative Expression
Sewing a simple camera bag provides a fantastic opportunity for creative expression. As you embark on this DIY project, you have complete control over the design, materials, and features of your bag.
This creative freedom allows you to showcase your personality and style through your work.
Choosing fabrics, colors, and patterns that resonate with you enables you to create a bag that not only serves a practical purpose but also reflects your aesthetic preferences.
Whether you opt for bold prints, soft pastels, or classic neutrals, your camera bag can become a unique accessory that complements your overall style.
Additionally, you can experiment with various sewing techniques and embellishments, such as decorative stitching, embroidery, or even fabric painting. This experimentation allows you to add personal touches that make your bag one-of-a-kind.
Moreover, the process of creating something from scratch can be incredibly fulfilling, providing a sense of accomplishment that comes from transforming raw materials into a functional and beautiful item.
The artistic nature of sewing encourages self-expression and can be a therapeutic outlet, enhancing your overall enjoyment of photography and crafting.
In this way, sewing a camera bag becomes more than just a practical task; it evolves into a creative journey that reflects who you are as a photographer and as an individual.
Related faq’s
What materials do I need to sew a simple camera bag?
To sew a simple camera bag, you’ll need durable fabric for the outer layer, such as canvas or nylon, and a softer lining fabric.
Additionally, you’ll require batting or foam for padding, thread, scissors, pins, a sewing machine, and a measuring tape. Optional items include zippers, magnetic snaps, and adjustable straps or webbing for added functionality.
How do I determine the size of my camera bag?
To determine the size of your camera bag, start by measuring the dimensions of your camera body, lenses, and any additional accessories you plan to carry.
Use these measurements to create a design that accommodates your gear comfortably while allowing for padding. Ensure you include seam allowances when cutting your fabric pieces.
Can I use recycled materials to make a camera bag?
Yes, using recycled materials is a great way to create a camera bag! You can repurpose old clothing, tote bags, or other fabric items to make a unique and eco-friendly bag.
Just ensure that the materials are durable enough to protect your camera gear and that they fit your design.
How can I add padding to my camera bag?
To add padding to your camera bag, use materials like foam or batting.
Cut the padding pieces to fit the dimensions of your bag and attach them to the interior by basting or sewing them in place. You can also create padded dividers to keep your camera and accessories organized and protected.
What type of closure should I use for my camera bag?
There are several closure options you can use for your camera bag, including zippers, magnetic snaps, and Velcro.
Choose a closure that complements your design and provides easy access to your gear while keeping it secure during transport. Zippers offer the best protection against accidental openings, while snaps and Velcro can be quicker to open and close.
How do I make the straps for my camera bag?
To make straps for your camera bag, you can either use ready-made webbing or create fabric straps. If you’re making fabric straps, cut a long strip of fabric, fold it in half lengthwise, and sew along the edges, then turn it right-side out.
Attach the straps securely to the sides or back of the bag, reinforcing them with additional stitching for durability.
Can I sew a camera bag by hand, or do I need a sewing machine?
While a sewing machine makes the process faster and more efficient, you can sew a camera bag by hand if you prefer.
Hand sewing can be time-consuming, but it allows for more control over your stitching. Just ensure you use strong thread and appropriate stitches for durability, especially for areas that will hold weight, such as straps and closures.
Conclusion
Sewing a simple camera bag is a rewarding project that combines creativity, functionality, and personalization.
By following the steps of measuring, designing, cutting, and assembling your bag, you can create a unique accessory tailored to your specific photography needs.
The process not only allows you to protect your gear but also offers a chance to express your style and enhance your sewing skills.
Whether you opt for a basic tote or a padded design with dividers, crafting your own camera bag ensures you have a practical solution that reflects your individuality and enhances your photography experience. Happy sewing!


