How to turn a normal bag into a camera bag?

How to turn a normal bag into a camera bag?

Have you ever wished you could transform an ordinary bag into a practical camera bag without spending a fortune?

Repurposing a standard bag into a camera-friendly carrier is not only a budget-friendly solution but also a customizable one.

By adding thoughtful padding, compartments, and adjustments, you can create a tailored space for your camera gear that suits your specific needs.

Whether you’re a hobbyist photographer or a seasoned pro, this DIY project offers a way to protect your equipment while retaining the style and functionality of your favorite bag. In this guide, we’ll walk you through the steps to achieve this transformation.

Here how to waterproof a camera bag steve digicams?

What is a normal bag?

A normal bag, often referred to as a standard or everyday bag, is a versatile and functional accessory used for carrying personal items.

How to turn a normal bag into a camera bag?

Typically, it features a simple design and is made from durable materials like canvas, leather, or synthetic fabrics. A normal bag usually includes compartments or pockets to organize items such as wallets, phones, keys, and documents.

It can come in various styles, such as tote bags, shoulder bags, or backpacks, depending on the intended use.

The size and shape of a normal bag can vary to accommodate different needs, from carrying groceries to transporting work essentials.

Its primary function is to provide convenience and ease of transport while complementing everyday activities and personal style. The design is generally understated, focusing on practicality and comfort rather than high fashion.

Is it important to turn a normal bag into a camera bag?

Turning a normal bag can be important if you want to ensure the safety and organization of your camera equipment.

Normal bags often lack the specialized compartments and padding required to protect delicate gear like cameras, lenses, and accessories from impact and environmental factors.

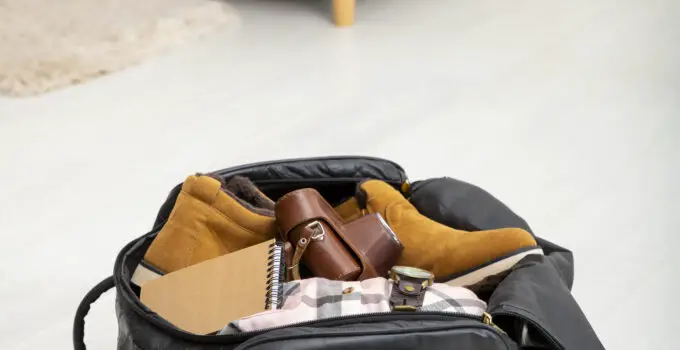
Converting a normal bag into a camera bag can be done by adding padded inserts or dividers, which help secure each component and prevent damage.

This adaptation can also make it easier to access your equipment quickly and efficiently. Additionally, customizing a normal bag for camera use allows you to maintain your personal style while meeting the specific needs of a photographer.

However, if you frequently transport high-value or fragile equipment, investing in a purpose-built camera bag with dedicated features might offer better protection and convenience.

Is it worth to turn a normal bag into a camera bag?

Turning a normal bag into a camera bag can be worthwhile depending on your needs and budget. If you already own a bag that you like and find comfortable, converting it can be a cost-effective solution to protect and organize your camera gear.

Adding padded inserts or dividers can help safeguard your equipment from bumps and scratches, while allowing you to retain the style and functionality of your original bag.

Here, how to use velcro camera bag dividers?

This DIY approach is particularly useful if you’re on a budget or have a specific bag that you prefer.

However, if you frequently carry high-value or sensitive equipment, a purpose-built camera bag might be a better investment.

These bags are designed with specialized compartments, superior padding, and weather-resistant materials to offer enhanced protection and convenience.

Ultimately, whether converting a normal bag is worth it depends on the level of protection you need and your personal preferences.

How to turn a normal bag into a camera bag?

To turn a normal bag into a camera bag, start by assessing your bag’s size and structure to ensure it can accommodate your camera and accessories.

Next, purchase or create padded inserts or dividers that fit inside the bag. These can be found at camera stores or made from foam and fabric.

Arrange the dividers to create custom compartments that securely hold your camera body, lenses, and other gear, preventing movement and impact.

You may also add extra padding by lining the bag’s interior with foam or soft fabric.

Secure your camera gear with adjustable straps or Velcro to keep everything in place. For added protection, consider using weather-resistant covers or pouches for additional gear.

Finally, organize smaller items like memory cards and batteries in separate pockets or pouches to keep them easily accessible. This DIY approach helps ensure your equipment is safe while still using your preferred bag.

5 Steps to turn a normal bag into a camera bag?

1. Assess Your Bag

Before transforming a normal bag into a camera bag, carefully evaluate its size, shape, and internal layout. Consider the dimensions of your camera equipment, including the camera body, lenses, and accessories.

Ensure the bag is spacious enough to fit your gear comfortably without overcrowding. A bag with a sturdy, structured design is ideal, as it provides better protection for your equipment.

Examine the interior of the bag to determine if it has any existing compartments or pockets that can be repurposed. If the bag is too basic or lacks organization, you might need to add dividers or padding.

Pay attention to the bag’s material; a bag made of durable, weather-resistant fabric is preferable, as it offers added protection against environmental elements.

Here, how to waterproof a canvas camera bag?

Also, consider how you carry the bag. Ensure the straps are adjustable and comfortable, as you’ll be carrying the bag with valuable equipment.

If the bag is a messenger bag, backpack, or tote, check how the shape and style will accommodate camera gear. Ultimately, choose a bag that meets your needs in terms of size, protection, and comfort.

2. Choose and Install Padding

To protect your camera gear, you need to add appropriate padding to your bag.

Start by purchasing foam or padded inserts designed for camera bags, or make your own using foam sheets and fabric. Ensure the padding is thick enough to absorb shock but flexible enough to fit the contours of your bag.

Measure the interior dimensions of your bag to cut the padding to the right size.

For custom inserts, use a ruler and fabric scissors to cut foam sheets to fit snugly inside your bag. You can also use Velcro or adhesive strips to attach the padding securely.

Arrange the padding in the bag to create compartments for each piece of equipment. Place the camera body in one compartment, lenses in another, and accessories in additional sections.

Secure the padding with Velcro strips or fabric tape to keep it in place. Make sure there are no gaps or loose areas where the equipment could shift during transport.

If you’re using pre-made inserts, follow the manufacturer’s instructions for installation. Arrange the dividers to suit your gear’s size and shape. Proper padding helps absorb impact, prevent scratches, and keep your equipment organized and protected.

3. Add Organizational Compartments

To keep your camera gear organized and accessible, add compartments and pockets to your bag.

You can use various organizational tools, such as small pouches, mesh bags, or accessory holders. These can be purchased from camera stores or repurposed from other items you have on hand.

Start by placing smaller pouches or mesh bags inside the bag’s existing compartments.

These are useful for storing memory cards, batteries, lens caps, and other small accessories. Use adhesive Velcro strips or elastic bands to attach these items securely within easy reach.

For larger items like lenses or camera bodies, use adjustable dividers or custom-made foam inserts to create separate sections. Ensure each compartment is large enough to accommodate your gear without forcing it, as this can cause damage. Arrange the compartments in a way that allows for easy access and quick retrieval of equipment.

If your bag lacks built-in pockets, consider adding external ones using Velcro or sew-on patches.

External pockets can be handy for items you need to access frequently. Proper organization helps streamline your workflow, making it easier to find and use your gear efficiently during shoots.

4. Secure Your Gear

Once you’ve added padding and organizational compartments, focus on securing your camera gear to prevent movement and damage. Use adjustable straps, Velcro closures, or elastic bands to keep your equipment firmly in place within the compartments.

For added security, use lens caps and camera body covers to protect sensitive parts from dust and scratches. Ensure that each piece of equipment is snugly fitted within its designated compartment. Avoid overloading the bag, as excessive weight can strain the bag’s seams and increase the risk of damage.

Here, how to turn your purse into a camera bag?

If your bag has a top closure or flap, make sure it fastens securely to prevent dust and debris from entering. For extra protection, consider using a rain cover or waterproof bag insert to shield your gear from the elements.

Regularly check the condition of your bag and its padding to ensure that everything remains secure and in good shape. Properly securing your gear helps prevent accidental damage and keeps everything organized and ready for use.

5. Test and Adjust

After converting your normal bag into a camera bag, it’s crucial to test it thoroughly to ensure it meets your needs. Load your camera gear into the bag and carry it as you would during actual use. Pay attention to how comfortable it feels and whether the gear remains secure and protected.

Take your bag on a few test outings or simulate a shoot to assess its functionality. Check for any issues with the padding, compartments, or overall comfort.

If you notice any problems, such as inadequate protection or difficulty accessing gear, make the necessary adjustments.

Adjust the padding, compartments, or straps as needed to improve the bag’s performance.

If certain areas are too tight or too loose, reconfigure the padding or add additional inserts to achieve a better fit. Ensure that the bag’s weight distribution is balanced and comfortable for extended use.

Regularly review and refine the setup to maintain optimal protection and organization for your camera gear. A well-tested and adjusted camera bag will provide reliable performance and ease of use during your photography adventures.

5 Methods to turn a normal bag into a camera bag

1. Use Padded Dividers

One effective method to convert a normal bag into a camera bag is by using padded dividers. These dividers create separate compartments within the bag, helping to organize and protect your camera gear.

Padded dividers can be purchased from camera stores or online and are available in various sizes and configurations.

To implement this method, start by measuring the interior dimensions of your bag. Cut the dividers to fit the size of the bag or choose pre-cut dividers that match your bag’s dimensions.

Insert the dividers into the bag and arrange them to create compartments that will hold your camera body, lenses, and accessories securely. Ensure that each compartment is padded to provide cushioning and prevent impact.

For added flexibility, opt for adjustable dividers that can be repositioned to accommodate different gear configurations.

Secure the dividers in place using Velcro or adhesive strips, ensuring they do not shift or move during transport. Properly positioned dividers will prevent your equipment from bumping against each other, reducing the risk of damage.

If you need a custom solution, you can make your own dividers using foam sheets or fabric.

Cut the foam to size, wrap it in fabric for added durability, and secure it with Velcro strips or adhesive. This method allows for personalized compartment sizes and configurations tailored to your specific gear.

2. Add Foam Padding

Adding foam padding is another practical method for converting a normal bag into a camera bag. Foam padding provides cushioning to protect delicate camera equipment from shocks and impacts.This method is particularly useful for bags that lack built-in compartments or padding.

Start by selecting foam padding that is thick enough to absorb shock yet flexible enough to fit the contours of your bag.

Measure the interior dimensions of your bag and cut the foam to size using a ruler and a sharp utility knife. Ensure that the foam pieces fit snugly inside the bag without leaving gaps.

Place the foam padding along the interior walls of the bag and create custom compartments by arranging the foam pieces to fit your gear.

You can also use foam inserts to create dividers and sections for different types of equipment, such as camera bodies, lenses, and accessories.

Secure the foam padding in place using adhesive strips or fabric tape to prevent it from shifting. For additional protection, consider lining the foam with soft fabric or using padded inserts that can be easily removed or adjusted.

Regularly check the condition of the foam padding to ensure it continues to provide adequate protection for your gear.

3. Incorporate Camera Inserts

Camera inserts are specialized accessories designed to convert normal bags into camera bags.

These inserts are typically made of padded material and are designed to fit snugly within various types of bags, including backpacks, totes, and messenger bags. They offer a convenient and modular solution for organizing and protecting camera gear.

To use camera inserts, first, measure the dimensions of your bag and choose an insert that fits within those measurements.

Camera inserts often come with adjustable dividers, allowing you to customize the compartments to suit your gear. Simply place the insert inside your bag and adjust the dividers to create sections for your camera body, lenses, and accessories.

Ensure the insert is securely positioned within the bag and that it does not shift during transport. Some camera inserts come with additional features such as extra pockets or weather-resistant materials, providing enhanced protection and organization.

Camera inserts are a versatile option because they can be easily removed and used in different bags. This method is ideal for those who want a flexible and portable solution without permanently altering their normal bag.

4. Add Customizable Velcro Straps

Customizable Velcro straps are a practical method for adapting a normal bag into a camera bag. Velcro straps can be used to create adjustable compartments and secure your camera equipment, providing a customizable solution for organizing and protecting your gear.

Start by purchasing Velcro straps or adhesive Velcro strips from a hardware store or online.

Cut the Velcro to the desired length and attach one side of the Velcro to the interior of your bag. You can place the Velcro strips along the walls or base of the bag to create adjustable sections.

Use the remaining Velcro strips to secure your camera gear in place. Wrap the straps around your camera body, lenses, or other accessories to hold them securely within the compartments. Adjust the length and positioning of the Velcro straps to fit your specific gear and preferences.

This method allows for flexible organization, as you can easily reposition the Velcro straps to accommodate different gear configurations.

Velcro straps also provide a quick and convenient way to secure your equipment, reducing the risk of movement and potential damage during transport.

5. Repurpose Existing Pouches and Inserts

Repurposing existing pouches and inserts is a cost-effective method to convert a normal bag into a camera bag. Many people have extra pouches, organizers, or inserts from other uses that can be adapted for camera gear.Start by gathering any pouches, organizers, or inserts you have on hand.

These might include small travel pouches, makeup bags, or tool organizers. Examine their size and shape to determine how they can fit into your bag and be used to store camera accessories.

Arrange the pouches and inserts inside your normal bag to create compartments for your camera gear.

Use larger pouches for camera bodies and lenses, and smaller ones for accessories like memory cards and batteries. Secure the pouches with Velcro strips, clips, or by placing them in existing pockets within the bag.

Here, =”yoast-text-mark” href=”https://camerabaggeek.com/how-to-use-different-camera-bag-inserts/”>>how to use different camera bag inserts?

If necessary, modify the pouches by adding additional padding or lining them with soft fabric to enhance protection. Repurposing these items allows you to create a customized camera bag setup without additional cost, making it an efficient and practical solution.

5 Benefit to turn a normal bag into a camera bag

1. Cost-Effective Solution

Turning a normal bag into a camera bag is a cost-effective way to protect your camera gear without investing in a specialized camera bag. Instead of purchasing a new, often expensive, camera bag, you can repurpose a bag you already own or find affordable materials to customize it.Adding padding, dividers, or inserts to an existing bag allows you to create a protective solution tailored to your needs without significant expenditure.

This approach is particularly beneficial for hobbyists or occasional photographers who may not require a high-end camera bag but still need reliable protection for their equipment.

By utilizing materials you already have or inexpensive alternatives, you save money while achieving a functional and personalized camera carrying solution.

2. Personalization and Customization

Repurposing a normal bag into a camera bag allows for a high degree of personalization and customization.

You can tailor the interior layout to suit your specific gear, arranging compartments and padding to fit your camera body, lenses, and accessories exactly as you need. This customization ensures that your equipment is organized in a way that enhances accessibility and efficiency.

Additionally, you can choose the style and design of the original bag, preserving your personal aesthetic preferences.

This flexibility means you can create a bag that not only meets your functional requirements but also aligns with your personal taste and style, offering both practicality and visual appeal.

3. Versatility

A normal bag converted into a camera bag offers versatility that specialized camera bags may not.

By adding removable padding, adjustable dividers, or inserts, you can easily reconfigure the bag for different uses beyond carrying camera gear.

For example, you might use the bag for everyday activities, travel, or other hobbies when you’re not carrying your camera equipment. This adaptability allows you to get more use out of the bag, making it a multifunctional accessory.

Whether you’re shifting between different types of gear or switching to a different activity, the ability to adjust and repurpose the bag enhances its overall functionality and value.

4. Familiarity and Comfort

Using a normal bag as a camera bag means you can retain the comfort and familiarity of a bag you already like.

Many people have a preferred bag with features such as ergonomic straps, a specific size, or an ideal shape that they find comfortable. Converting this bag into a camera bag preserves the comfort and usability you’re accustomed to.

This is especially advantageous if you have an existing bag that fits well and suits your carrying style.

By adapting a familiar bag, you avoid the discomfort of adjusting to a new bag’s design and can maintain the ergonomic benefits and convenience you’re used to.

5. Sustainability

Converting a normal bag into a camera bag is an environmentally friendly choice that promotes sustainability. Instead of purchasing a new camera bag, which contributes to manufacturing and packaging waste, repurposing an existing bag reduces your environmental footprint.

By using materials you already have or modifying a bag that might otherwise go unused, you minimize waste and make the most of existing resources.

This approach supports the principles of recycling and upcycling, contributing to a more sustainable lifestyle.

Additionally, it encourages creativity and resourcefulness, as you find innovative ways to repurpose and extend the life of your belonging.

Here, how to use caden camera bag?

Related faq’s

What types of normal bags can be converted into camera bags?

You can convert various types of normal bags into camera bags, including backpacks, messenger bags, tote bags, and even duffel bags.

The key is to choose a bag with a sturdy structure and enough internal space to accommodate your camera gear. Ensure the bag has or can be fitted with padding and compartments to provide protection and organization for your equipment.

What materials do I need to convert a normal bag into a camera bag?

To convert a normal bag, you typically need padding materials like foam or padded inserts, adjustable dividers, Velcro strips, and possibly waterproof covers. These materials help protect and organize your camera gear.

You may also need fabric adhesive or sewing supplies if you’re making custom adjustments or creating dividers from scratch.

How do I measure and cut foam padding for a camera bag?

Measure the interior dimensions of your bag, including length, width, and height. Use these measurements to cut foam padding to size.

A sharp utility knife and a ruler are helpful for precise cutting. Make sure the foam pieces fit snugly inside the bag and provide adequate cushioning. Arrange the foam to create compartments for each piece of camera equipment.

Can I use a camera bag insert instead of DIY padding?

Yes, camera bag inserts are a convenient alternative to DIY padding. These inserts come with pre-made compartments and padding designed specifically for camera gear.

They are available in various sizes and can be easily placed inside your normal bag.

Inserts often feature adjustable dividers, making them a flexible and user-friendly solution for organizing and protecting your equipment.

How do I ensure my camera gear is secure in the converted bag?

To secure your camera gear, use adjustable dividers or Velcro straps to create compartments that fit each piece of equipment snugly.

Ensure that padding or inserts hold the gear firmly in place to prevent movement and potential damage. Regularly check the setup to make sure everything remains secure and adjust as needed for a snug fit.

What are the best methods to protect my camera gear from weather in a converted bag?

To protect your camera gear from weather conditions, consider using a waterproof cover or rain sleeve designed for camera equipment.

You can also line your bag with water-resistant materials or use weather-resistant pouches for added protection.

Ensure that any openings or zippers are covered or sealed to prevent moisture from getting inside the bag.

How can I make the converted camera bag more comfortable to carry?

To enhance comfort, ensure that the bag’s straps are adjustable and padded. If the bag lacks ergonomic features, you might add extra padding to the shoulder straps or back panel.

Make sure the bag is balanced and not overly heavy to prevent strain. Regularly adjust the straps for a secure and comfortable fit to accommodate different carrying loads and reduce fatigue.

Conclusion

Turning a normal bag into a camera bag is a practical and cost-effective solution for protecting your camera gear.

By adding padded dividers, foam inserts, or customizable Velcro straps, you can create a tailored and organized space within your bag. Repurposing existing pouches and using weather-resistant covers further enhance functionality and protection.

This approach not only saves money but also allows you to maintain the comfort and style of a bag you already like.

With careful customization, a normal bag can effectively meet your camera-carrying needs while offering versatility and a personalized touch.

Leave a Reply