
Table of Contents
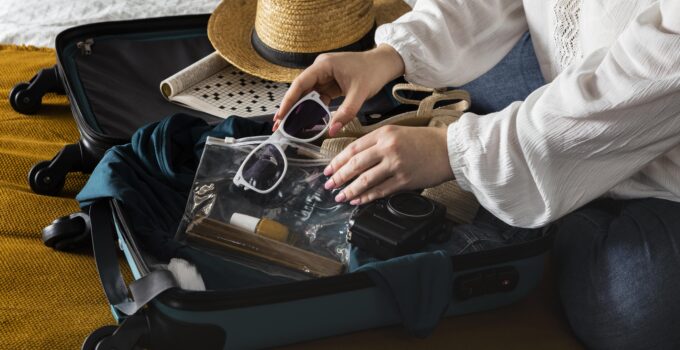
ToggleHave you ever wondered how to transform your trusty suitcase into a versatile camera bag?
Whether you’re a traveling photographer or just need an efficient way to carry your gear, repurposing a suitcase can be a game-changer.
With some creativity and a few essential materials, you can customize your suitcase to securely hold your camera equipment.
This DIY project not only saves money but also ensures your gear is protected and organized on the go.
In this guide, we’ll walk you through the steps to convert your suitcase into a functional and stylish camera bag, perfect for all your photography adventures.
What is suitcase?
A suitcase is a portable, typically rectangular container with a handle, used for carrying clothes and other personal items during travel.
Suitcases are often made from durable materials such as plastic, leather, or fabric, and they come in various sizes to accommodate different travel needs.
Many modern suitcases feature wheels and an extendable handle, making them easier to maneuver through airports and other travel environments.
Inside, suitcases are usually divided into compartments or sections to help organize belongings. Some also include security features like locks or zippers that can be secured with a padlock.
The design and functionality of suitcases have evolved to meet the demands of contemporary travelers, combining practicality with style.
Which type of suitcase can you turn into camera bag?
To turn a suitcase into a camera bag, choose a hard-shell or semi-hard-shell suitcase that offers durability and protection.
Look for one with customizable compartments or a modular interior, which can be adapted to securely hold camera equipment.
Many photographers prefer cases with padded dividers that can be rearranged to fit various lenses, bodies, and accessories, ensuring each item is snug and protected.
Alternatively, you can use a suitcase with a deep main compartment and add a padded camera insert or foam padding to create custom slots for your gear.
Suitcases with multiple compartments or pockets are also beneficial for organizing smaller items like memory cards, batteries, and cables.
Ensure the suitcase has strong, reliable zippers and, if possible, built-in locks for added security.
Wheels and an extendable handle can make transporting your camera equipment easier, especially when navigating airports or urban environments.
Is it worth to turn a suitcase into a camera bag?
Turning a suitcase into a camera bag can be worth it, especially for photographers who need to transport a large amount of gear safely and conveniently.
This DIY approach allows for customization, ensuring that each piece of equipment is securely housed in its own padded compartment.
Using a suitcase offers more space than traditional camera bags, making it ideal for professional shoots or extended trips where additional equipment is necessary.
Additionally, a suitcase provides better protection due to its sturdy exterior, safeguarding expensive camera gear against impacts and rough handling. The wheels and extendable handle can make it easier to move heavy equipment, reducing physical strain.
However, this setup may not be as practical for everyday use or quick access during shoots, as suitcases are generally bulkier and less accessible than dedicated camera bags.
Weighing these pros and cons can help determine if converting a suitcase into a camera bag is the right choice for your needs.
Things to know before turning a suitcase into a camera bag
Before turning a suitcase into a camera bag, consider the following:
- Size and Capacity: Ensure the suitcase is large enough to accommodate all your camera gear, including bodies, lenses, tripods, and accessories.
- Durability: Choose a hard-shell or semi-hard-shell suitcase for better protection against impacts and rough handling.
- Interior Customization: Opt for a suitcase with a modular interior or enough space to add padded dividers or foam inserts. Customizable compartments will keep your gear organized and secure.
- Weight and Portability: Consider the weight of the suitcase itself and how heavy it will be when filled with equipment. Wheels and an extendable handle can make transportation easier.
- Security: Look for suitcases with strong zippers and built-in locks to protect your valuable gear.
- Accessibility: Assess how easy it is to access your equipment quickly during shoots. Traditional camera bags might offer more convenience in this regard.
- Weather Resistance: Ensure the suitcase offers some level of weather protection to safeguard your gear from rain and moisture.
How to turn a suitcase into a camera bag?
To turn a suitcase into a camera bag, follow these steps:
- Choose the Right Suitcase: Select a hard-shell or semi-hard-shell suitcase with sufficient space and compartments.
- Get Padded Dividers: Purchase customizable padded dividers or foam inserts designed for camera equipment. These can be found at photography stores or online.
- Measure and Cut Foam: If using foam, measure your equipment and cut the foam to fit each item snugly. Ensure each piece has its own slot for protection.
- Install Dividers: Arrange the padded dividers or foam inserts inside the suitcase, creating compartments for your camera bodies, lenses, and accessories. Velcro-backed dividers are easy to adjust.
- Secure Small Items: Use smaller pouches or zippered pockets for batteries, memory cards, and cables. Attach these to the dividers or secure them in existing compartments.
- Add Extra Padding: Ensure there is additional padding around the edges to protect your gear from impact.
- Test and Adjust: Place your equipment inside, close the suitcase, and shake it gently to check for movement. Adjust the padding as needed.
This setup ensures your gear is organized, protected, and easy to transport.
7 Steps to turn a suitcase into a camera bag
Turning a suitcase into a camera bag can be a creative and practical solution. Here are seven steps you can follow:
- Choose the Right Suitcase: Select a suitcase that is sturdy and spacious enough to accommodate your camera gear and accessories. Hard-shell suitcases often work well because they provide more protection.
- Gather Materials: You’ll need foam padding or dividers (like those used in camera bags), Velcro strips, a utility knife or scissors, fabric or lining material, and a hot glue gun.
- Plan the Layout: Decide how you want to organize your camera equipment within the suitcase. Consider compartments for camera bodies, lenses, batteries, memory cards, and accessories.
- Cut and Fit Foam Padding: Measure and cut foam padding to fit the interior of the suitcase. Create separate compartments for each piece of equipment using the foam. You can stack layers of foam to create different depths for lenses and cameras.
- Attach Dividers: Use Velcro strips to attach dividers to the foam padding. This allows you to adjust the compartments as needed and secure them firmly in place.
- Line the Interior: Line the interior of the suitcase with fabric or soft lining material. This helps to protect your gear from scratches and adds a professional finish to your DIY camera bag.
- Final Touches: Secure any loose ends with hot glue or double-sided tape. Make sure all compartments are well-padded and secure. Test the bag by placing your camera equipment inside to ensure everything fits snugly and securely.
By following these steps, you can transform a regular suitcase into a customized camera bag that meets your specific needs for organization and protection of your photography gear.
5 Methods to turn a suitcase into a camera bag
Method 1: Using Padded Dividers
Overview: This method involves purchasing pre-made padded dividers specifically designed for camera gear and arranging them inside your suitcase.
Steps:
- Choose the Right Dividers: Purchase padded dividers that fit the dimensions of your suitcase. Look for adjustable ones with Velcro strips for flexibility.
- Measure and Plan: Measure your camera gear and plan the layout. Ensure there is enough space for all your equipment, including cameras, lenses, flashes, and accessories.
- Install the Dividers: Place the dividers inside the suitcase and arrange them to create compartments for each piece of equipment. Make sure each item has its own snug compartment.
- Secure the Dividers: Use Velcro to secure the dividers in place, ensuring they don’t shift during transport.
- Test and Adjust: Place your equipment in the compartments and close the suitcase. Shake it gently to check for movement and adjust the dividers as needed.
Benefits: This method is quick and provides a high level of protection and organization for your gear. The adjustable nature of the dividers allows for easy reconfiguration as your equipment changes.
Method 2: Foam Inserts
Overview: Custom foam inserts provide excellent protection by creating custom-fit slots for each piece of equipment.
Steps:
- Select the Foam: Purchase high-density foam that fits inside your suitcase. Look for foam specifically designed for camera cases.
- Trace Your Gear: Lay out your gear on the foam and trace around each item with a marker. Ensure there is enough space between items to provide adequate cushioning.
- Cut the Foam: Use a sharp utility knife to carefully cut out the traced shapes. Make sure the cuts are clean and precise to ensure a snug fit.
- Layer the Foam: Depending on the thickness of the foam and the depth of the suitcase, you may need to use multiple layers. Cut and stack the layers to achieve the desired depth for each compartment.
- Assemble the Foam Inserts: Place the foam inserts into the suitcase, ensuring each piece fits securely. Add additional padding around the edges if necessary to prevent movement.
Benefits: This method offers a high level of customization and protection. Each piece of equipment is securely cradled in its own foam slot, reducing the risk of damage during transport.
Method 3: Using Camera Bag Inserts
Overview: Camera bag inserts are padded compartments that can be placed inside a suitcase to create a custom camera bag.
Steps:
- Purchase Camera Bag Inserts: Buy camera bag inserts that fit the dimensions of your suitcase. These inserts come in various sizes and configurations.
- Measure and Plan: Measure your suitcase and plan the layout. Ensure the inserts fit snugly and leave room for all your equipment.
- Install the Inserts: Place the camera bag inserts inside the suitcase. Arrange them to create compartments for your camera bodies, lenses, and accessories.
- Secure the Inserts: Some inserts come with Velcro or straps to secure them in place. Make sure they are firmly attached to prevent movement.
- Organize Your Gear: Place your equipment in the compartments. Ensure each item fits snugly and is protected by the padded walls of the inserts.
Benefits: This method is easy to implement and provides good protection for your gear. The inserts are often adjustable, allowing for flexibility as your equipment needs change.
Method 4: DIY Padded Liners
Overview: Create custom padded liners for your suitcase using fabric and foam. This method allows for a high level of customization and protection.
Steps:
- Gather Materials: Purchase foam, fabric, and adhesive. Choose durable, protective materials to ensure the longevity of your liners.
- Measure and Cut: Measure the interior dimensions of your suitcase and cut the foam to fit. Cut the fabric slightly larger to allow for wrapping around the foam.
- Assemble the Liners: Wrap the fabric around the foam and secure it with adhesive. Make sure the fabric is tight and the edges are smooth.
- Install the Liners: Place the padded liners inside the suitcase, covering all sides. Ensure a snug fit to prevent movement.
- Create Compartments: Use additional foam and fabric to create dividers and compartments. Secure them in place with Velcro or adhesive.
Benefits: This method offers a high level of customization and protection. The padded liners can be tailored to fit your specific gear, providing excellent cushioning and organization.
Method 5: Hybrid Approach
Overview: Combine different methods to create a versatile and highly protective camera bag.
Steps:
- Assess Your Needs: Evaluate your equipment and travel requirements to determine the best combination of methods. Consider using padded dividers, foam inserts, and camera bag inserts together.
- Plan the Layout: Plan the layout of your suitcase, ensuring each piece of equipment has a secure and easily accessible compartment.
- Install the Base Layer: Start with a base layer of foam or padded liner to provide overall protection. Ensure it fits snugly in the suitcase.
- Add Dividers and Inserts: Place padded dividers or camera bag inserts on top of the base layer to create compartments. Adjust as needed to fit your gear.
- Customize Further: Use foam inserts for additional protection and customization. Cut and place the foam around specific pieces of equipment to ensure a snug fit.
Benefits: This method offers maximum flexibility and protection. By combining different methods, you can tailor the interior of the suitcase to your exact needs, ensuring each piece of equipment is securely housed and protected.
5 Benefits to turn a suitcase into a camera bag
Benefit 1: Cost-Effective
Overview: Turning a suitcase into a camera bag can save money compared to buying a high-end dedicated camera bag.
Explanation: High-quality camera bags can be expensive, especially those designed to carry a lot of equipment. By repurposing a suitcase you already own, you can create a custom camera bag at a fraction of the cost.
You only need to invest in foam inserts, padded dividers, or camera bag inserts, which are generally more affordable than buying a new specialized camera bag.
Additionally, suitcases often have larger capacities, allowing you to carry more gear without purchasing multiple smaller bags.
This approach is particularly beneficial for photographers who need to transport a variety of equipment but are on a budget. Overall, converting a suitcase into a camera bag is a cost-effective solution that doesn’t compromise on protection and organization.
Benefit 2: Customization
Overview: A converted suitcase allows for personalized organization tailored to your specific gear and needs.
Explanation: One of the main advantages of turning a suitcase into a camera bag is the ability to customize the interior layout.
Unlike off-the-shelf camera bags, which have fixed compartments, a DIY camera bag lets you design the interior to fit your unique equipment setup.
You can use adjustable padded dividers, foam inserts, or camera bag inserts to create compartments that match the exact dimensions of your camera bodies, lenses, and accessories.
This level of customization ensures that each item is securely housed, reducing the risk of damage during transport.
Furthermore, as your gear changes or expands, you can easily reconfigure the interior to accommodate new items, maintaining an optimal organization system.
Customization offers a flexible and adaptable solution, making your camera bag truly personalized and efficient.
Benefit 3: Enhanced Protection
Overview: Using a sturdy suitcase provides superior protection for your camera gear compared to many standard camera bags.
Explanation: Suitcases, especially hard-shell models, are designed to withstand rough handling and protect their contents. When converted into a camera bag, this inherent durability offers excellent protection for sensitive and expensive camera equipment.
The hard exterior guards against impacts, drops, and crushing forces, while the customizable padded interior keeps your gear securely in place and cushioned against shocks. This level of protection is particularly important for professional photographers who frequently travel or work in challenging environments.
Additionally, many suitcases are water-resistant or waterproof, providing an extra layer of protection against the elements.
Enhanced protection ensures that your valuable equipment remains safe, minimizing the risk of damage and the associated costs of repairs or replacements.
Benefit 4: Versatility
Overview: A converted suitcase offers versatility in use, accommodating a variety of equipment and accessories.
Explanation: Unlike dedicated camera bags, which are often designed for specific types of gear, a converted suitcase can be adapted to carry a wide range of items.
This versatility is particularly useful for photographers who need to transport not only camera equipment but also other essentials like clothing, personal items, or larger accessories.
The spacious interior of a suitcase allows for the inclusion of additional compartments or sections that can hold non-camera-related items, making it a multi-functional travel solution.
Furthermore, the ability to reconfigure the interior layout means that your bag can evolve with your needs, accommodating new gear or different setups for various projects.
Versatility enhances the utility of your camera bag, ensuring it meets diverse and changing requirements effectively.
Benefit 5: Convenience
Overview: Suitcases with wheels and extendable handles offer ease of transport, especially when carrying heavy camera gear.
Explanation: Camera equipment can be heavy and cumbersome to carry, especially for professional photographers who need to transport multiple cameras, lenses, and accessories.
Suitcases typically come with built-in wheels and extendable handles, making them easier to maneuver through airports, train stations, and urban environments.
This feature significantly reduces physical strain, allowing you to transport your gear more comfortably and efficiently. Additionally, the larger capacity of a suitcase means you can consolidate all your equipment into a single, easily portable bag, rather than juggling multiple smaller bags.
Convenience in transport not only enhances your travel experience but also ensures that your equipment is always organized and readily accessible, improving your overall workflow and efficiency.
Related faq’s
What Type of Suitcase is Best for Converting into a Camera Bag?
Answer: The best type of suitcase for converting into a camera bag is a hard-shell or semi-hard-shell suitcase.
These types offer superior protection against impacts and rough handling. Additionally, choose a suitcase with enough interior space and compartments to accommodate your camera gear.
Suitcases with wheels and an extendable handle are also beneficial for easy transport, especially when carrying heavy equipment.
FAQ 2: What Materials Do I Need to Convert a Suitcase into a Camera Bag?
Answer: To convert a suitcase into a camera bag, you will need padded dividers, foam inserts, or camera bag inserts. High-density foam and fabric can also be used to create custom padded liners.
Adhesive, Velcro, and a utility knife for cutting foam are essential tools.
These materials help create secure compartments for your camera gear, providing both protection and organization.
FAQ 3: How Do I Measure and Cut Foam Inserts for My Camera Gear?
Answer: Start by laying out your camera gear on the foam and tracing around each item with a marker. Ensure there is enough space between items to provide adequate cushioning.
Use a sharp utility knife to carefully cut out the traced shapes, making sure the cuts are clean and precise.
Depending on the thickness of the foam and the depth of the suitcase, you may need to use multiple layers to achieve the desired depth for each compartment.
How Can I Ensure My Camera Gear Stays Secure During Transport?
Answer: To ensure your camera gear stays secure during transport, use padded dividers, foam inserts, or camera bag inserts to create snug compartments for each piece of equipment.
Secure the dividers with Velcro or adhesive to prevent movement.
Test the setup by placing your gear in the compartments and gently shaking the suitcase to check for any shifting. Adjust the padding and dividers as needed for a tight fit.
How Do I Add Extra Padding to My Converted Camera Bag?
To add extra padding to your converted camera bag, start by lining the interior of the suitcase with a base layer of foam or padded fabric.
Ensure that the padding covers all sides, including the bottom and lid. You can also use additional foam pieces around the edges of each compartment to further cushion your gear. Secure the padding with adhesive or Velcro to keep it in place.
Can I Reconfigure the Interior of My Camera Bag as My Gear Changes?
Yes, you can reconfigure the interior of your camera bag as your gear changes. Using adjustable padded dividers or removable foam inserts allows for flexibility in organizing your equipment.
Simply rearrange or replace the dividers and foam inserts to accommodate new items or different setups. This adaptability ensures that your camera bag remains functional and organized as your needs evolve.
How Do I Ensure My Converted Camera Bag is Weather-Resistant?
To ensure your converted camera bag is weather-resistant, choose a suitcase made from water-resistant or waterproof materials.
You can also add a weatherproof cover or liner to the interior to protect against moisture.
Make sure all zippers and closures are tightly sealed and consider using desiccant packets inside the bag to absorb any excess moisture. This will help keep your camera gear dry and safe in various weather conditions.
Conclusion
Converting a suitcase into a camera bag is a cost-effective, customizable, and practical solution for photographers.
By using padded dividers, foam inserts, or camera bag inserts, you can create secure compartments tailored to your specific gear.
This setup offers enhanced protection, versatility, and convenience, especially when using a durable, wheeled suitcase.
The ability to reconfigure the interior as your equipment changes ensures long-term utility.
With careful planning and the right materials, a converted suitcase can provide a reliable and efficient way to transport and organize your valuable camera gear.


