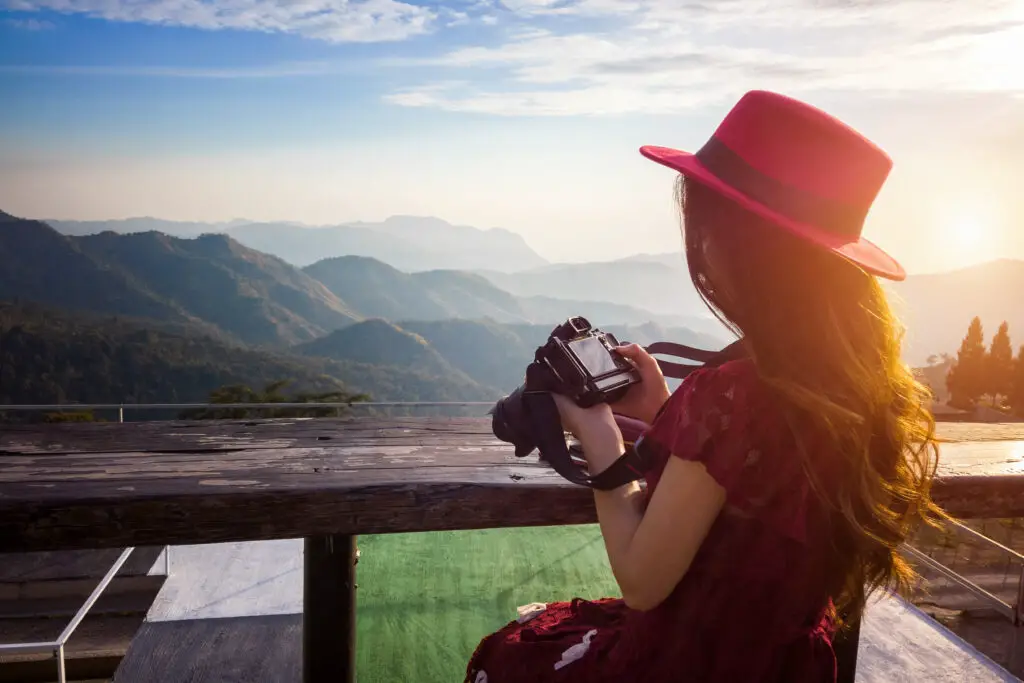
Looking to protect and organize your camera gear with style? Choosing the right camera bag inserts can make a world of difference.
Whether you’re a seasoned photographer or just starting out, using different camera bag inserts allows you to customize your bag to fit your specific needs.
These inserts come in various sizes and configurations, helping you to secure lenses, bodies, and accessories efficiently.
By selecting the appropriate inserts, you not only safeguard your equipment but also streamline your workflow, making it easier to grab what you need on the go.
Discover how versatile and practical these inserts can be for your photography adventures.
Here 10 best stylish DSLR camera bag?
Is it typical to use camera bag insert?
Yes, using a camera bag insert is quite common among photographers. These inserts are designed to organize and protect camera gear within a bag or backpack.
They come in various sizes and configurations to fit different camera systems, offering padded compartments for cameras, lenses, and accessories.

By using an insert, you can convert a regular bag into a camera bag, making it easier to access your equipment and keep everything secure.
Inserts help prevent damage from bumps and knocks, and they can also help keep your gear organized, saving you time and effort when you need to find specific items.
For those who need to carry both camera gear and personal items, a bag insert is a flexible solution, allowing for a customized setup that fits individual needs.
Here, how to store your camera in bag?
Is it worth to know how to use camera bag insert?
Yes, knowing how to use a camera bag insert is definitely worth it for photographers.
Proper use of an insert enhances the protection and organization of your gear, which is crucial for preventing damage and ensuring quick access to your equipment.
By arranging your camera, lenses, and accessories in a structured manner, you reduce the risk of scratches, impacts, and other issues that can arise from jostling or bumping.
Additionally, using an insert allows you to repurpose existing bags, saving money and space.
Understanding how to configure an insert effectively means you can tailor it to your specific gear, making it easier to find what you need and work more efficiently.
Overall, mastering the use of a camera bag insert can greatly improve the longevity of your equipment and streamline your photography workflow.
Why to use camera bag insert?
Using a camera bag insert offers several key benefits for photographers.
Primarily, it provides organization and protection for your gear.
Inserts come with padded dividers that help keep cameras, lenses, and accessories separated, reducing the risk of scratches and impacts.
This organization ensures that you can quickly and easily find the equipment you need, which is crucial during shoots.
Additionally, inserts allow you to repurpose existing bags, transforming them into camera-specific carriers without having to purchase a new camera bag.
This versatility is both cost-effective and convenient. Overall, a camera bag insert enhances the safety, accessibility, and functionality of your gear, making it an invaluable tool for both amateur and professional photographers.
How to use different camera bag inserts?
To use different camera bag inserts effectively, start by selecting an insert that fits the dimensions of your bag and suits your gear. First, lay out your camera, lenses, and accessories to determine the best configuration.
Most inserts come with adjustable dividers, so arrange them to create compartments that fit each item snugly.
Secure the dividers in place and then place your gear into the designated compartments. For optimal protection, ensure that each piece is adequately cushioned and that nothing is overcrowded.
If your bag has additional pockets or spaces, utilize them for accessories like memory cards, batteries, or cables. Finally, check that the insert fits well within the bag and that you can easily access your equipment.
By customizing the arrangement to your needs, you enhance both the organization and safety of your gear.
9 types of different camera bag insert
1. Padded Dividers Insert
A padded dividers insert is a versatile option designed to protect your camera gear from impact and scratches.
It consists of soft, cushioned partitions that you can rearrange to fit different pieces of equipment. The dividers are usually made of foam or other padding materials and are secured inside a fabric-lined shell.
This type of insert is highly customizable, allowing you to create compartments of varying sizes to accommodate various cameras, lenses, and accessories.
Here, how to spot a fake ysl lou camera bag?
It is ideal for those who need flexibility and protection in their camera bag. To use it, simply adjust the dividers to fit your gear and place it inside your bag.
The padding helps absorb shocks, ensuring that your equipment remains safe during transport.
This insert is well-suited for photographers who carry multiple pieces of gear and need to organize them effectively.
2. Hard Shell Insert
A hard shell insert offers a higher level of protection compared to padded dividers. It is constructed from rigid materials such as plastic or reinforced fabric, providing a robust barrier against impacts and drops.
This type of insert is designed to fit snugly inside a camera bag, creating a secure and protective environment for your gear.
The interior is often lined with foam or soft material to cushion your equipment, while the exterior resists external pressure.
Hard shell inserts are ideal for those who travel frequently or work in challenging environments where extra protection is necessary.
To use a hard shell insert, place your gear inside the compartments and ensure that the insert fits securely within your bag. This type of insert is perfect for photographers who prioritize maximum protection for their valuable equipment.
3. Modular Insert
Modular inserts are highly flexible and customizable, consisting of individual, removable compartments that can be arranged according to your needs.
This type of insert allows you to create a personalized layout within your camera bag, adapting to different gear configurations and sizes. Each compartment can be adjusted or removed, providing the versatility to change the setup as needed.
Modular inserts are ideal for photographers who frequently switch between different types of gear or who need to accommodate various pieces of equipment.
To use a modular insert, start by arranging the individual compartments in a way that best fits your gear.
Secure the compartments in place and adjust as necessary. This type of insert offers a high degree of customization, making it suitable for those who require a tailored organization system.
4. Sling Bag Insert
Sling bag inserts are designed for use in sling-style camera bags, which are popular for their quick access and convenience.
These inserts are typically compact and fit snugly into the sling bag, providing padded compartments for your gear.
The design of a sling bag insert often includes adjustable dividers to accommodate various camera and lens sizes. This type of insert is ideal for photographers who need to access their equipment quickly and on the go.
To use a sling bag insert, place it inside the sling bag and adjust the dividers to fit your gear.
The insert’s compact size ensures that your equipment remains secure while allowing for easy access. Sling bag inserts are perfect for those who prefer a hands-free, accessible way to carry their camera gear.
5. Backpack Insert
Backpack inserts are specifically designed to fit inside standard backpacks, converting them into camera bags.
These inserts typically feature padded dividers to protect your gear and can be adjusted to fit various camera and lens configurations.
Here, how to hide a camera in a bag?
The design often includes additional pockets for accessories such as batteries and memory cards. Backpack inserts are ideal for photographers who want to use their everyday backpack for carrying camera gear.
To use a backpack insert, place it inside your backpack and arrange the dividers to suit your equipment.
The insert’s padding ensures that your gear is well-protected, while the additional pockets help keep accessories organized.
This type of insert offers a practical solution for those who prefer the versatility of a backpack while carrying camera equipment.
6. Waist Pack Insert
Waist pack inserts are designed for use in camera waist packs, providing a compact and convenient way to carry essential gear.
These inserts are typically small and feature padded compartments for a camera and a few accessories. They are ideal for photographers who need to keep their gear easily accessible while on the move.
Waist pack inserts often include adjustable dividers to customize the layout and ensure a snug fit for your equipment.
To use a waist pack insert, place it inside the waist pack and adjust the dividers as needed.
The insert’s compact size and padded protection make it suitable for those who need a lightweight, hands-free solution for carrying camera gear.
7. Modular Lens Insert
Modular lens inserts are designed specifically to protect and organize lenses within a camera bag.
These inserts feature padded compartments or sleeves tailored to different lens sizes and types. The modular design allows you to configure the insert based on the number and size of lenses you need to carry.
This type of insert is ideal for photographers who have multiple lenses and need to keep them organized and protected.
To use a modular lens insert, place your lenses into the designated compartments and adjust the layout to fit your gear.
The padding helps prevent damage and ensures that your lenses remain in good condition during transport. Modular lens inserts are perfect for those who need a specialized solution for lens storage.
8. Rolling Insert
Rolling inserts are designed to provide protection and mobility for camera gear. They come with built-in wheels and a telescoping handle, allowing you to roll the insert like a suitcase.
The insert features padded compartments for cameras, lenses, and accessories, and the wheels make it easier to transport heavy equipment.
This type of insert is ideal for photographers who travel frequently or need to carry a lot of gear.
To use a rolling insert, pack your gear into the padded compartments, close the insert, and use the handle and wheels to move it.
The rolling feature reduces strain on your back and shoulders, making it a practical choice for those who need to transport their equipment over long distances or through airports.
9. Vertical Insert
Vertical inserts are designed to fit into camera bags with a vertical orientation, providing a streamlined and efficient way to carry gear.
Here, how to wear camera shoulder strap?
These inserts often feature padded compartments that align with the vertical layout of the bag, allowing for easy access and organization. The design typically includes adjustable dividers to accommodate various camera and lens sizes.
Vertical inserts are ideal for photographers who prefer a bag that stands upright or has a vertical opening. To use a vertical insert, place it inside your vertical camera bag and arrange the dividers to fit your equipment.
The vertical orientation helps keep your gear organized and easily accessible while ensuring that it is well-protected. This type of insert is perfect for those who prefer a sleek, upright bag for their camera gear.
7 Steps to use different camera bag insert
1. Assess Your Gear
Before choosing and configuring a camera bag insert, start by assessing your gear. Lay out all the equipment you plan to carry, including cameras, lenses, batteries, memory cards, and any other accessories.
Take note of the sizes and shapes of each item, as this will help you select the most suitable insert and determine the optimal arrangement.
For instance, if you have a mix of large and small lenses, you’ll need an insert with adjustable compartments to accommodate the different sizes.
Understanding the dimensions and quantity of your gear is crucial in ensuring that you select an insert that offers adequate protection and organization.
Additionally, consider how often you switch out equipment or accessories, as this will influence whether a modular or fixed divider system is more appropriate.
By thoroughly assessing your gear, you set the foundation for an effective and organized camera bag setup.
2. Choose the Right Insert
Based on your gear assessment, select an insert that fits your specific needs. Consider the type of bag you’ll be using and the protection level required for your equipment.
For example, if you need high protection, a hard shell insert might be best, while for more flexibility, a modular insert would be ideal.
Ensure the insert’s dimensions match those of your bag, and check that it provides enough compartments and padding for your gear. If you frequently travel, a rolling insert might be suitable for ease of mobility.
If you use a backpack or sling bag, ensure the insert is compatible with its shape and features. Choosing the right insert is essential for maintaining the safety and organization of your equipment.
Research different types and read reviews to make an informed decision, ensuring that the insert you select meets your needs.
3. Arrange Dividers
Once you have your insert, begin arranging the dividers to fit your gear. Most inserts come with adjustable dividers that can be repositioned to create compartments of varying sizes.
Start by placing your largest items, such as cameras or large lenses, to determine the minimum space required for each. Next, arrange smaller items like batteries and memory cards in the remaining spaces.
Ensure that each piece of equipment has a snug but not overly tight fit to prevent movement and potential damage.
Secure the dividers in place according to the insert’s design, and make sure there is enough cushioning between each item to absorb shocks.
Proper arrangement of dividers helps optimize the use of space and ensures that your gear is well-organized, making it easier to find and access everything when you need it.
4. Insert Gear into Compartments
With the dividers arranged, begin placing your gear into the designated compartments. Carefully load each piece of equipment into its corresponding section, ensuring that the fit is secure but not overly tight.
Start with larger items like cameras and lenses, and then add smaller accessories such as batteries, chargers, and memory cards.
Ensure that each item is positioned in a way that prevents movement and potential collisions with other gear. For added protection, consider using lens pouches or additional padding if needed.
As you place each item, double-check that there is sufficient cushioning around all sides to protect against impacts.
This step is crucial for maintaining the safety of your equipment and ensuring that it remains organized and accessible. Make any necessary adjustments to the dividers or layout as you go.
5. Check for Proper Fit
After placing your gear into the insert, check for a proper fit within your camera bag. Ensure that the insert fits snugly into the bag without leaving too much extra space.
The insert should sit securely and not shift or move around. If there is excess space, consider adjusting the dividers or adding additional padding to fill the gaps.
A well-fitting insert prevents your gear from shifting during transport, which reduces the risk of damage. Additionally, verify that the bag can be closed properly and that you can easily access all compartments.
Test the bag’s zippers or closures to ensure they function smoothly with the insert in place.
Here, ruggard camera bag how to use?
This step ensures that your equipment is secure and that the overall setup is practical and efficient for your needs.
6. Test Accessibility
Once the insert is in place and properly fitted, test the accessibility of your gear.
Open your camera bag and check that you can easily reach each piece of equipment without difficulty. Ensure that the layout allows for quick retrieval of items, especially those you use frequently.
If the insert’s design or arrangement makes it challenging to access certain items, consider rearranging the dividers or adjusting the compartment sizes.
Accessibility is crucial for efficiency, particularly in situations where you need to quickly grab or replace gear. Take some time to practice accessing and storing your equipment to ensure that the setup meets your needs.
This step helps identify any issues with the layout and ensures that you can efficiently use your gear in various shooting scenarios.
7. Secure the Insert
After confirming that everything fits and is easily accessible, secure the insert inside your camera bag.
Ensure that it is properly positioned and that any fastening mechanisms, such as straps or Velcro, are securely fastened. Check that the insert does not shift or move around inside the bag when you handle it.
Some camera bags may have specific attachment points or straps to keep the insert in place, so make sure to use these if available. Properly securing the insert ensures that your gear remains stable and protected during transport.
Additionally, check that the bag’s closure mechanisms, such as zippers or buckles, function smoothly with the insert in place.
Securing the insert properly finalizes the setup, making sure your equipment is well-protected and organized for your next shoot.
5 Methods to use different camera bag insert
1. Custom Configuration Method
The Custom Configuration Method involves using a modular camera bag insert to tailor the interior of your camera bag according to your specific gear needs.
This method is ideal for those who frequently change their equipment setup or have a variety of gear types.
Start by laying out all your camera gear and accessories to visualize how you want to organize them. Choose a modular insert that allows for adjustable dividers or removable compartments.
Arrange the dividers to create compartments that fit the size and shape of each piece of gear. For example, place larger items like camera bodies and big lenses in spacious sections and use smaller compartments for accessories such as batteries and memory cards.
Secure the dividers in place and load your gear into the designated compartments. This method ensures that each item is protected and easily accessible, allowing you to customize your bag according to the needs of different shoots or travel situations.
The flexibility of a modular insert helps maintain organization and protection across varying equipment configurations.
2. Layered Protection Method
The Layered Protection Method uses a camera bag insert with multiple layers of padding or compartments to safeguard your equipment.
This method is particularly useful for protecting delicate or high-value gear from impacts and rough handling. Begin by selecting an insert with thick, cushioned padding or a hard-shell exterior for maximum protection.
Organize your gear into different layers based on its level of protection needs.
Place your most fragile items, like camera bodies or expensive lenses, in the innermost, most padded compartments. Add extra padding or lens pouches around these items if necessary.
Store less sensitive accessories, like cables and chargers, in the outer layers or pockets. This method ensures that the most valuable equipment is shielded from potential damage while still keeping everything organized and accessible.
By layering your protection, you provide a heightened level of security for your gear, especially during travel or challenging conditions.
3. Quick Access Method
The Quick Access Method focuses on organizing your camera bag insert for immediate and efficient retrieval of equipment.
This method is ideal for photographers who need to access their gear rapidly during shoots or in dynamic environments.
Choose an insert that allows for easy access, such as one with top-loading compartments or quick-release flaps.
Arrange your gear in a way that places frequently used items, like your main camera body or primary lens, in the most accessible compartments.
Consider using a top-loading or side-access insert to minimize the need to fully open your bag. For smaller accessories, use easily reachable pockets or quick-access flaps.
This setup ensures that you can quickly grab or stow away your equipment without fumbling or wasting time.
The Quick Access Method is particularly valuable for capturing spontaneous moments or when you’re on the move and need immediate access to your gear.
4. Travel-Friendly Method
The Travel-Friendly Method involves organizing your camera bag insert to accommodate the needs of frequent travelers.
This method ensures that your gear is secure, organized, and easily manageable during trips. Start by selecting a lightweight, compact insert that fits well within your travel bag or suitcase.
Utilize compartments to separate your camera body, lenses, and accessories, and consider adding additional padding for extra protection. For travel convenience, choose an insert with a handle or strap for easy carrying or integration with rolling luggage.
Also, organize smaller items, like memory cards and batteries, in dedicated pockets to prevent them from getting lost. By preparing your insert for travel, you enhance the ease of carrying and accessing your gear while on the go.
This method helps streamline your travel experience, making it easier to manage your equipment through airports and various transportation modes.
5. Multi-Function Method
The Multi-Function Method involves using a camera bag insert that can adapt to different types of gear and scenarios. This method is ideal for photographers who use their equipment for various purposes or who need to switch between different types of shoots.
Start by selecting an insert that offers flexibility, such as one with removable or adjustable compartments that can be reconfigured based on your needs.
Organize your gear by considering the different scenarios you might encounter.
For example, if you need to switch between portrait and landscape photography, adjust the compartments to accommodate different lenses and accessories for each type of shoot.
The Multi-Function Method allows you to modify the insert’s layout quickly and easily, adapting to different equipment requirements or shooting styles.
This versatility ensures that you can effectively manage your gear across a range of activities, maximizing the functionality of your camera bag insert for diverse photographic needs.
5 Benefits to use different camera bag insert
1. Enhanced Protection
Using different camera bag inserts significantly enhances the protection of your gear. Each type of insert offers a unique level of safeguarding, tailored to various needs.
Padded dividers, for example, provide cushioning that absorbs shocks and impacts, preventing scratches and dents on your camera body and lenses.
Hard shell inserts take this a step further by offering a rigid barrier that resists pressure and drops, making them ideal for travel or rugged environments.
The enhanced protection reduces the risk of equipment damage, which is crucial for maintaining the longevity and functionality of your gear.
With well-protected equipment, you can travel with peace of mind, knowing that your valuable camera gear is shielded from potential harm.
This benefit is especially important for professional photographers who rely on their equipment for critical work and need to ensure it remains in top condition.
2. Improved Organization
Different camera bag inserts improve organization by providing dedicated compartments for various pieces of gear.
Modular inserts, for example, allow you to customize the layout of your bag according to your equipment’s specific needs, while padded dividers keep each item separated and easily accessible.
This organized structure helps prevent items from shifting around, which can lead to damage or difficulty finding what you need.
An organized camera bag makes it easier to quickly locate and retrieve your gear, streamlining your workflow and saving valuable time during shoots.
It also helps in maintaining a clean and orderly setup, reducing the likelihood of forgetting or misplacing essential accessories.
Improved organization ensures that everything has its place, contributing to a more efficient and hassle-free photographic experience.
3. Customizability
One of the key benefits of using different camera bag inserts is the ability to customize the interior of your bag to suit your specific needs.
Modular and adjustable inserts offer flexibility in arranging compartments, allowing you to configure the layout based on the size and shape of your gear.
This customizability ensures that you can create a setup that best fits your equipment, whether you’re carrying multiple lenses, camera bodies, or accessories.
Customizable inserts also adapt to different shooting scenarios, making it easier to switch between various types of equipment or shooting styles.
For instance, you can adjust the compartments for a portrait shoot, then reconfigure them for a landscape session. This adaptability provides a tailored solution that enhances both the functionality and efficiency of your camera bag.
4. Versatility
Camera bag inserts offer versatility by allowing you to use a variety of bags for carrying your gear. Instead of being limited to a specific camera bag, you can convert everyday backpacks, sling bags, or even roller bags into camera carriers with the appropriate insert.
This versatility means you can select a bag that suits your personal style or travel needs while still protecting your equipment.
For photographers who frequently switch between different types of bags or travel with various gear setups, this versatility is invaluable.
It enables you to repurpose existing bags, potentially saving money and reducing the need for multiple specialized camera bags.
Versatile inserts also allow you to adapt your gear-carrying solution to different environments, from urban settings to outdoor adventures.
5. Convenience
The convenience offered by different camera bag inserts is a major benefit for photographers on the go.
Inserts are designed to make it easy to transport and access your gear, with features such as quick-access compartments, padle handles, and customizable layouts.
This convenience is particularly useful for those who need to rapidly switch between different pieces of equipment or who frequently move between locations.
A well-designed insert allows for quick packing and unpacking, minimizing the time spent organizing your gear.
It also makes it easier to maintain a clean and efficient workflow, as everything is neatly arranged and readily accessible.
The convenience of using camera bag inserts enhances your overall photographic experience, ensuring that you can focus more on capturing great shots and less on managing your equipment.
Related faq’s
What is a camera bag insert and why should I use one?
A camera bag insert is a protective and organizational tool designed to fit inside your camera bag, providing padded compartments and dividers for your camera gear.
It helps keep your equipment organized and secure by separating and cushioning each item. Using an insert prevents gear from shifting, reduces the risk of damage, and makes it easier to access your equipment quickly.
It’s particularly useful for photographers who need to transport multiple pieces of gear safely and efficiently.
How do I choose the right camera bag insert for my gear?
To choose the right camera bag insert, start by assessing the size and type of your gear. Consider the dimensions of your camera body, lenses, and accessories, and choose an insert that offers adequate padding and adjustable dividers to fit your equipment.
Look for an insert that matches the size of your camera bag and offers the level of protection you need, whether that’s basic cushioning or a hard shell for maximum security.
Modular inserts offer flexibility, while pre-configured ones provide a straightforward solution.
Can I use a camera bag insert in any type of bag?
Yes, you can use a camera bag insert in many types of bags, including backpacks, sling bags, and even regular duffel bags.
The key is to choose an insert that fits well within your bag and provides the necessary protection for your gear.
Inserts are available in various shapes and sizes, so select one that matches the dimensions of your bag and accommodates your equipment. For best results, ensure the insert is snugly fitted and does not shift around.
How do I set up the dividers in a modular camera bag insert?
To set up the dividers in a modular camera bag insert, first arrange your gear to determine how many compartments you need and their sizes.
Remove and reposition the dividers to create compartments that fit each piece of equipment securely.
Secure the dividers in place according to the insert’s design, and check that each item has enough padding around it. Make adjustments to ensure that your gear is well-organized and protected from impacts.
How can I maximize the protection of my camera gear using an insert?
To maximize the protection of your camera gear using an insert, ensure that the insert provides adequate padding and that each piece of equipment is snugly fit within its compartment.
Use additional padding or lens pouches for fragile items if necessary. Choose a hard shell insert if you need extra protection from external pressures or impacts.
Organize your gear so that heavier items are at the bottom and more delicate items are cushioned well. Regularly check the padding and adjust compartments to maintain optimal protection.
Can I use different inserts for different types of gear or shooting scenarios?
Yes, you can use different inserts for various types of gear or shooting scenarios.
Modular inserts are particularly useful for adapting to different setups, as you can rearrange the dividers to suit your specific needs.
For example, you might use one configuration for a landscape shoot with multiple lenses and another for a portrait session with fewer, larger lenses.
Having multiple inserts allows you to quickly switch between setups. Thus, based on the type of shoot or travel requirements, offering flexibility and convenience.
How do I clean and maintain my camera bag insert?
To clean and maintain your camera bag insert, first, remove it from your bag and empty all compartments.
Use a soft, damp cloth to wipe down the exterior and interior surfaces, avoiding excessive moisture that could damage the padding.
For stubborn stains, use a mild detergent and water, and spot-clean the affected areas. Allow the insert to air dry completely before reinserting it into your camera bag.
Regularly check for any signs of wear or damage and replace the insert if it no longer provides adequate protection or organization.
Conclusion
Using different camera bag inserts enhances the protection, organization, and versatility of your gear.
By choosing the right insert, configuring dividers, and arranging compartments according to your specific needs. Thus you can ensure that your equipment is best and easily accessible.
Whether you need a custom setup for varying shoots, a protective hard shell, or a travel-friendly design.
Thus, the appropriate insert can significantly improve your workflow.
Proper use and maintenance of these inserts ensure that your camera gear remains in excellent condition, making your photography experience more efficient and enjoyable.


