
Table of Contents
ToggleAre you ready to dive into the mesmerizing world beneath the waves?
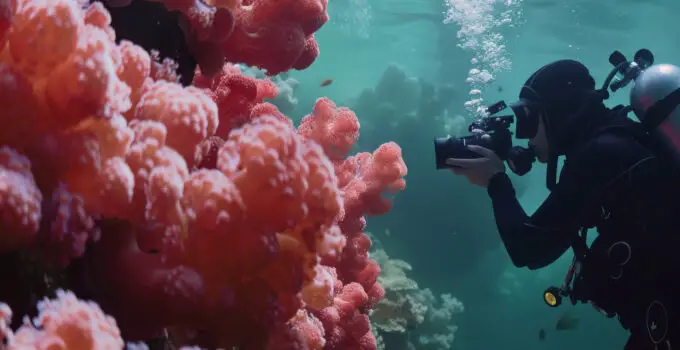
Discovering how to use an underwater camera opens a portal to capture the unseen beauty of marine life. Imagine freezing moments with vibrant corals, elusive creatures, and the dance of light underwater.
In essence, mastering the art of underwater photography involves understanding the camera’s settings, underwater lighting techniques, and composing captivating shots amidst the fluid environment.
From adjusting white balance to utilizing natural light for stunning effects, each aspect contributes to creating breathtaking underwater imagery.
Curious to unravel the secrets of capturing underwater wonders? Follow along as we delve deeper into the intricacies of using an underwater camera, guided by renowned marine photographer [Expert’s Name].
Let’s plunge into a world where every click tells a story beneath the waves.
Here how do you clean a canvas bag with leather strap?
How do underwater cameras work?
Underwater cameras are designed to function effectively in aquatic environments by being waterproof and pressure-resistant.
They typically use a combination of robust housing and specialized sealing materials to keep water out and protect the internal electronics.
Many underwater cameras also feature enhanced low-light performance, as light levels decrease with depth. To ensure clear images, these cameras often come with wide-angle lenses and anti-fogging technology.
Some are equipped with built-in or attachable lighting systems to compensate for the lack of natural light underwater.
Additionally, underwater cameras may include features like depth ratings, which indicate the maximum depth they can safely operate at, and controls optimized for use with gloves or in challenging conditions.
Advanced models might offer functionalities like GPS, underwater color correction, and pressure sensors to enhance usability and image quality in the unique underwater environment.
Can I use my phone for underwater photography?
Using a phone for underwater photography is possible, but it requires specific precautions.

Many modern smartphones are water-resistant, with ratings like IP67 or IP68, indicating they can withstand being submerged in shallow water for a limited time.
However, water-resistant is not the same as waterproof, and prolonged or deep-water exposure can damage the device.
Here, what is the best way to clean a tote bag?
For safer and more effective underwater photography, use a waterproof case specifically designed for your phone model. These cases provide additional protection against water pressure and potential damage.
Additionally, ensure the case has proper seals and test it before use to prevent leaks.
Some cases come with built-in buttons or touch sensitivity, allowing you to operate the phone’s camera underwater.
Remember to clean and dry your phone and case thoroughly after use to maintain their integrity and functionality. For deeper dives or professional quality, dedicated underwater cameras are recommended.
What equipment is needed for underwater photography?
Underwater photography requires specialized equipment to ensure clear, high-quality images and the safety of the gear. Essential items include:
- Underwater Camera or Housing: A waterproof camera or a standard camera with a waterproof housing to protect it from water pressure and damage.
- Lenses: Wide-angle lenses are popular for capturing broad scenes, while macro lenses are used for close-up shots of small subjects.
- Lighting: Underwater flashlights or strobes to illuminate the scene, as natural light diminishes with depth.
- Filters: Color-correcting filters help adjust the color balance, compensating for the blue/green tint of underwater photos.
- Buoyancy Control: A buoyancy compensator or arms can help maintain stability and position.
- Mounts and Trays: These provide better handling and stability for the camera setup.
- Protective Gear: A wetsuit, mask, fins, and snorkel or scuba gear to allow the photographer to move freely underwater.
This equipment ensures effective and safe underwater photography.
What camera settings are best for underwater photography?
For underwater photography, optimal camera settings can significantly enhance image quality:
- White Balance: Use custom white balance to correct the blue/green color cast. Many cameras have an underwater mode that adjusts this automatically.
- ISO: Keep the ISO as low as possible (100-400) to minimize noise, increasing it only if necessary due to low light conditions.
- Aperture: A mid-range aperture (f/8 to f/16) provides a good depth of field, keeping more of the scene in focus.
- Shutter Speed: Use a fast shutter speed (1/125 or faster) to capture sharp images and avoid motion blur, especially if there’s movement in the water.
- Focus Mode: Use continuous autofocus to track moving subjects, ensuring they remain sharp.
- Lighting: Adjust the exposure based on available light and use strobes or flashlights to illuminate subjects and bring out colors.
These settings help achieve clear, vibrant underwater photos.
Here, how do your clean canvas drio camera bag?
How to use underwater camera?
Using an underwater camera involves several steps to ensure optimal performance and image quality:
- Preparation: Ensure the camera and its housing are clean and seals are intact. Check for any signs of wear or damage. Test the housing by submerging it in a shallow area first.
- Settings: Set your camera to an appropriate white balance for underwater conditions, usually the underwater mode. Adjust ISO to low values (100-400) to reduce noise, use a mid-range aperture (f/8 to f/16) for good depth of field, and a fast shutter speed (1/125 or faster) to avoid motion blur.
- Lighting: Use built-in flash or attach external strobes to illuminate subjects and reduce color distortion.
- Composition: Get close to your subject to minimize water distortion. Use wide-angle or macro lenses for better composition.
- Maintenance: After use, rinse the camera and housing with fresh water, dry thoroughly, and inspect seals to maintain performance.
These steps help capture clear, vibrant underwater photos while protecting your equipment.
7 steps to use underwater camera
1. Preparation and Inspection
Before diving, thoroughly inspect your underwater camera and its housing. Ensure the housing seals are clean and free from debris to prevent leaks.
Check the O-rings for wear and lubricate them if necessary.
Here, how to clean a canvas and leather bag?
Conduct a pre-dive test by submerging the housing (without the camera) in shallow water to confirm its integrity. This step is crucial to avoid water damage to your camera.
2. Setting Up the Camera
Configure your camera settings before entering the water. Set the white balance to an underwater mode or manually adjust it to account for the blue/green hue of underwater environments.
Choose a low ISO (100-400) to minimize noise, and set a mid-range aperture (f/8 to f/16) to achieve a good depth of field. Use a fast shutter speed (1/125 or faster) to prevent motion blur.
Ensure continuous autofocus is enabled to track moving subjects.
3. Attaching Accessories
Attach necessary accessories such as strobes, flashlights, and wide-angle or macro lenses.

Proper lighting is essential underwater due to limited natural light. Strobes help illuminate subjects and restore natural colors. Use mounting arms or trays to secure your lighting equipment, ensuring stability and flexibility in positioning.
4. Entering the Water
Carefully enter the water, protecting your camera from impacts. Once submerged, verify that no bubbles are escaping from the housing, indicating a potential leak.
Gradually descend, allowing the camera to adjust to the water pressure. Avoid sudden temperature changes that could cause condensation inside the housing.
Here, does alaska count camera bag as a carry on?
5. Composing Shots
Get close to your subject to minimize water distortion and enhance image clarity. Wide-angle lenses are ideal for capturing larger scenes, while macro lenses are perfect for detailed close-ups.
Pay attention to the background and try to frame your shots with interesting elements like coral or other marine life.
Use natural light creatively, but rely on your strobes to fill in shadows and bring out vibrant colors.
6. Taking Photos
Use a steady hand and slow, deliberate movements to avoid disturbing marine life and stirring up sediment.
Take multiple shots from different angles to increase your chances of capturing the perfect image.
Experiment with different settings and lighting positions to achieve various effects. Be mindful of your surroundings, ensuring you don’t damage the environment or harm yourself.
7. Post-Dive Maintenance
After your dive, rinse the camera and housing thoroughly with fresh water to remove salt and debris.
Dry them completely before opening the housing to prevent water from entering. Inspect and clean the O-rings again, and store your equipment in a cool, dry place.
Regular maintenance prolongs the life of your gear and ensures it’s ready for your next underwater adventure.
By following these steps, you can effectively use an underwater camera to capture stunning images while protecting your equipment from potential damage.
9 tips to use underwater camera
1. Ensure Proper Housing and Seals
Using an underwater camera starts with ensuring it’s protected by a proper housing. The housing is crucial as it prevents water from entering and damaging the camera.
Before each use, thoroughly inspect the housing seals, especially the O-rings, for any signs of wear, dirt, or debris. Lubricate the O-rings with the recommended grease to maintain their elasticity and effectiveness.
Conduct a pre-dive test by submerging the housing (without the camera) in shallow water to check for leaks.
This step is vital because even a small amount of water inside the housing can cause significant damage to your camera and potentially ruin your entire dive’s worth of photography.
2. Adjust Camera Settings Before Diving
Set up your camera’s settings before you get into the water. Adjust the white balance to an underwater mode or manually set it to counteract the blue/green hues of the underwater environment.
Set your ISO to a low value (100-400) to minimize noise. Choose a mid-range aperture (f/8 to f/16) to ensure a good depth of field.
A fast shutter speed (1/125 or faster) is crucial to prevent motion blur caused by moving water or subjects. Enabling continuous autofocus can help in keeping moving subjects in focus.
By configuring these settings in advance, you can focus more on composition and less on technical adjustments while underwater.
Here, how to clean canvas camera bag?
3. Utilize External Lighting
Lighting is a major challenge in underwater photography due to the rapid loss of natural light as you descend. Use external strobes or flashlights to illuminate your subjects and restore their natural colors.
Position your lights to avoid backscatter, which is the reflection of the flash off particles in the water, resulting in speckled images.
Mounting arms can help you adjust the position and angle of your strobes to achieve the best lighting.
Practice with different lighting setups to understand how to avoid harsh shadows and how to achieve a balanced exposure. Good lighting is key to bringing out the vibrant colors and details in your underwater photos.
4. Master Buoyancy Control
Excellent buoyancy control is essential for underwater photography. It allows you to stay steady while taking photos and prevents you from stirring up sediment that can cloud your images.
Practice maintaining neutral buoyancy, where you neither sink nor float, by adjusting your breathing and using your buoyancy control device (BCD).
Good buoyancy control not only helps in capturing sharp images but also ensures that you don’t damage delicate marine life by accidentally bumping into it.
Consistent practice will help you stay still, conserve air, and get closer to your subjects without causing disturbance.
5. Approach Subjects Carefully
When photographing marine life, approach your subjects slowly and calmly.
Sudden movements can scare them away or cause them to hide.
Move horizontally rather than vertically to minimize your presence.
Getting close to your subject is important to reduce the amount of water between you and your subject, which helps in getting clearer, more detailed shots.
Use a wide-angle lens for larger subjects and a macro lens for smaller, detailed shots.
Patience and gentle movements are key to capturing natural and undisturbed behaviors of underwater creatures.
6. Utilize Manual Mode
While automatic modes can be convenient, manual mode offers greater control over your shots.
Adjusting the exposure settings manually allows you to adapt to varying light conditions underwater.
Experiment with different combinations of aperture, shutter speed, and ISO to find the best balance for your environment.
Manual mode also helps in controlling the depth of field and motion blur, giving you creative freedom to capture unique underwater scenes.
Practice using manual settings in different lighting conditions to become more proficient and confident in your underwater photography skills.
7. Maintain a Steady Hand
Keeping your camera steady is crucial for sharp images. Use both hands to hold your camera and tuck your elbows in for additional stability.
If possible, brace yourself against a rock or another stable object. Avoid sudden movements and take your time to compose each shot carefully.
Using a tripod can be beneficial for macro photography, where even the slightest movement can blur the image.
Maintaining a steady hand is especially important in low light conditions where longer exposure times are required. Practice staying still and calm to improve your steadiness over time.
8. Post-Processing Techniques
Post-processing can significantly enhance your underwater photos.
Use software like Adobe Lightroom or Photoshop to adjust the color balance, contrast, and sharpness. Correcting the white balance can restore natural colors that may be lost due to underwater lighting conditions.
Adjusting the contrast can help bring out details in your images. Be careful not to over-edit, as it can lead to unnatural-looking photos.
Learning and applying post-processing techniques can turn good photos into great ones, allowing you to showcase the beauty of the underwater world more effectively.
9. Regular Equipment Maintenance
Regular maintenance of your underwater camera and housing is essential to ensure their longevity and performance. After each dive, rinse your equipment thoroughly with fresh water to remove salt and debris.
Dry it completely before opening the housing to prevent any water from getting inside.
Inspect the O-rings and other seals for wear and replace them as necessary. Store your equipment in a cool, dry place to avoid damage from humidity and temperature changes.
Regular maintenance not only protects your investment but also ensures that your gear is ready for your next underwater adventure.
By following these tips, you can improve your underwater photography skills, capture stunning images, and protect your equipment.
5 Methods to use underwater camera
1. Pre-Dive Setup and Testing
Before diving, ensure your underwater camera setup is ready to handle the underwater environment. Begin with a thorough inspection of the camera housing.

Check the O-rings for any signs of wear, debris, or damage, as these are critical to preventing water leaks. Lubricate the O-rings with the appropriate silicone grease to maintain their flexibility and ensure a proper seal.
Close the housing securely and conduct a test by submerging it in a shallow water tank or bucket without the camera inside to check for leaks.
Adjust your camera settings before entering the water. Set the white balance to an underwater mode or manually adjust it to correct the color balance.
Set your ISO to a low value (100-400) to minimize noise and select a mid-range aperture (f/8 to f/16) for good depth of field.
Use a fast shutter speed (1/125 or faster) to capture clear images of moving subjects. Enable continuous autofocus to keep moving subjects sharp.
2. Mastering Buoyancy Control
Effective buoyancy control is essential for underwater photography.
Maintaining neutral buoyancy allows you to hover in the water without sinking or floating, which is crucial for taking sharp, clear photos. Use your buoyancy control device (BCD) to make fine adjustments to your buoyancy.
Practice controlling your breathing to help with buoyancy—inhale to rise slightly and exhale to sink.
Good buoyancy control prevents you from stirring up sediment that can cloud your shots and helps you get closer to your subjects without causing disturbances.
Additionally, it conserves air, allowing you to extend your dive time and have more opportunities to capture great photos.
Regular practice and fine-tuning your buoyancy skills will significantly improve your underwater photography.
3. Utilizing External Lighting
Underwater lighting conditions can be challenging due to the rapid loss of natural light as you descend.
External lighting, such as strobes or underwater flashlights, is essential to illuminate your subjects and restore their natural colors.
Position your strobes at a 45-degree angle to the subject to minimize backscatter, which is caused by the reflection of the flash off particles in the water.
Experiment with different lighting setups to find the best configuration for various conditions. For macro photography, bring the light source close to the subject to highlight details.
For wide-angle shots, position the strobes wider apart to evenly light the scene. Understanding and effectively using external lighting will greatly enhance the quality and vibrancy of your underwater photos.
4. Close-Up and Macro Techniques
Underwater photography often benefits from getting close to your subjects to minimize the amount of water between the lens and the subject, which reduces distortion and loss of clarity.
For small subjects, use a macro lens to capture intricate details.
Approach your subject slowly and calmly to avoid startling it.
Position yourself at a level angle or slightly below the subject for a more engaging composition. Use a fast shutter speed and adequate lighting to capture sharp, detailed images.
Practice patience and take multiple shots from different angles to increase the likelihood of capturing the perfect shot.
Mastering close-up and macro techniques allows you to reveal the fascinating details of underwater life that are often missed in wider shots.
5. Post-Dive Maintenance and Care
Proper maintenance and care of your underwater camera equipment are crucial to ensure its longevity and performance.
After each dive, rinse your camera and housing thoroughly with fresh water to remove salt, sand, and other debris. Pay special attention to the areas around the O-rings and seals.
Dry your equipment completely before opening the housing to prevent water from entering. Remove and inspect the O-rings for any signs of wear or damage and clean them if necessary.
Store your equipment in a cool, dry place away from direct sunlight and humidity. Regular maintenance not only protects your investment but also ensures that your gear is always ready for your next underwater adventure.
Taking the time to care for your equipment properly will lead to more reliable performance and better results in your underwater photography endeavors.
Related faq’s
How to use underwater camera for snorkeling?
Using an underwater camera for snorkeling involves a few key steps to ensure you capture great images while protecting your gear:
- Prepare the Camera: Ensure your camera is securely placed in a waterproof housing. Check the seals and O-rings for any debris or damage and lubricate if necessary.
- Adjust Settings: Set the white balance to underwater mode, choose a low ISO (100-400) to reduce noise, and use a mid-range aperture (f/8 to f/16). Enable continuous autofocus for moving subjects.
- Use External Lighting: If possible, use a small underwater flashlight or strobe to enhance colors and details, especially in deeper or shaded areas.
- Approach Subjects Slowly: Move gently to avoid startling marine life. Get close to reduce water distortion and capture clear, detailed shots.
- Maintain Buoyancy: Stay calm and maintain neutral buoyancy to avoid stirring up sediment.
- Post-Dive Care: Rinse the camera with fresh water, dry thoroughly, and inspect seals to ensure longevity.
How to use underwater camera for beginners?
For beginners using an underwater camera, follow these steps:
- Choose the Right Camera: Start with a simple, waterproof point-and-shoot camera or use a smartphone with a waterproof case.
- Check the Seals: Ensure all seals and O-rings are clean and properly lubricated to prevent leaks. Test the housing in shallow water first.
- Basic Settings: Set the camera to underwater mode if available. Use a low ISO (100-400) to minimize noise, a mid-range aperture (f/8 to f/16), and a fast shutter speed (1/125 or faster).
- Use Natural Light: In shallow water, use natural light for best results. Position the sun behind you to illuminate subjects.
- Get Close: Approach subjects slowly and get as close as possible to reduce water distortion and improve clarity.
- Practice Buoyancy: Stay steady to avoid blurring your shots.
- Rinse After Use: Rinse the camera with fresh water, dry thoroughly, and inspect seals after each use to maintain equipment integrity.
How to use underwater camera for fishing
Using an underwater camera for fishing can be a valuable tool. Here’s how:
- Secure Mounting: Attach the camera securely to your fishing gear or boat using a mount or clamp to ensure stability.
- Waterproof Housing: Place the camera in a waterproof housing to protect it from water damage and pressure.
- Positioning: Submerge the camera near your bait or fishing line to monitor underwater activity. Adjust the angle and distance for optimal visibility.
- Monitor Fish Behavior: Use the camera to observe fish behavior, assess bait effectiveness, and identify potential catches.
- Record or Livestream: Capture footage or livestream the underwater view to analyze later or share real-time fishing experiences.
- Low-Light Settings: If fishing in low-light conditions, adjust camera settings for better visibility, such as using a low-light mode or increasing ISO sensitivity.
- Post-Fishing Care: Rinse the camera with fresh water after use, dry thoroughly, and check seals for any signs of wear to maintain functionality.
How to take underwater photos with phone
Using an underwater camera for fishing can provide valuable insights and enhance your fishing experience:
- Secure Mounting: Attach the camera securely to your fishing line, bait, or boat using a mount or clamp to ensure stability and prevent loss.
- Waterproof Housing: Place the camera in a waterproof housing to protect it from water damage and pressure, especially if submerged for extended periods.
- Positioning: Submerge the camera strategically near your bait or fishing line to monitor underwater activity. Adjust the angle and distance for optimal visibility and coverage of the fishing area.
- Real-Time Monitoring: Use the camera’s live feed or recording feature to monitor fish behavior, assess bait effectiveness, and identify potential catches. This real-time feedback can help you make informed decisions and adjust your fishing tactics accordingly.
- Low-Light Settings: If fishing in low-light conditions, adjust the camera settings for better visibility, such as using a low-light mode or increasing ISO sensitivity.
- Post-Fishing Care: Rinse the camera with fresh water after use, dry thoroughly, and check seals for any signs of wear to maintain functionality and prolong its lifespan.
How to take photos underwater with iphone
To take photos underwater with an iPhone:
- Waterproof Case: Use a waterproof case designed specifically for your iPhone model to protect it from water damage.
- Enable Camera App: Open the camera app on your iPhone and switch to photo mode.
- Adjust Settings: Tap on the screen to adjust focus and exposure if needed. Consider using the HDR mode for better dynamic range.
- Use Volume Buttons: As the touch screen may not work well underwater, use the volume buttons as physical shutter buttons to capture photos.
- Underwater Mode: Some waterproof cases have a dedicated underwater mode or button that optimizes camera settings for underwater photography.
- Hold Steady: Keep your iPhone steady while taking photos to avoid blurring. Consider using a wrist strap or floating grip for added security.
- Post-Processing: After capturing photos, use photo editing apps like Snapseed or Lightroom Mobile to enhance colors and correct any underwater distortion.
- Rinse and Dry: After use, rinse your iPhone and waterproof case with fresh water, then dry them thoroughly to prevent water damage.
Underwater photography camera
An underwater photography camera is specifically designed to withstand the challenges of underwater environments.
It features a waterproof housing to protect the internal electronics from water damage and pressure. These cameras often have specialized settings for underwater use, such as white balance adjustments to counteract the blue/green tint of water.
They may also include features like wide-angle lenses, low-light performance, and compatibility with external lighting systems like strobes or flashlights.
Additionally, underwater cameras are built to be durable, with seals and O-rings to prevent water ingress, making them essential tools for capturing clear and vibrant underwater images.
Underwater photography equipment
Underwater photography equipment includes a waterproof camera or a standard camera in a waterproof housing to protect it from water damage.
Additional gear may include wide-angle or macro lenses for different perspectives, external strobes or flashlights for lighting, buoyancy control devices for stability, mounting arms or trays for positioning accessories, and protective gear like wetsuits, masks, and fins for divers.
Advanced equipment may also feature underwater color correction filters, depth sensors, and specialized controls optimized for underwater use.
This equipment is essential for capturing clear, detailed, and vibrant images in the challenging underwater environment.
Underwater photography for beginners
For beginners in underwater photography, start with a simple waterproof camera or a smartphone in a waterproof case.
Learn basic camera settings like white balance adjustments and low ISO for clear shots. Practice buoyancy control to stay steady underwater and get closer to subjects.
Experiment with natural light and simple compositions. Invest in a reliable waterproof housing and consider taking a basic underwater photography course or tutorial for guidance.
Patience, practice, and gradual learning will help beginners improve their skills and capture captivating underwater images.
Conclusion
Using an underwater camera involves careful preparation, understanding of camera settings, and practice in underwater conditions.
Always, ensure the camera is securely housed in a waterproof casing, with seals and O-rings checked for integrity.
Adjust camera settings like white balance, ISO, aperture, and shutter speed according to the underwater environment. Practice buoyancy control to stay steady and get closer to subjects.
Utilize external lighting for better visibility and clarity.
Rinse the camera with fresh water after each use and maintain seals for longevity. With proper handling and practice, underwater cameras can capture stunning images in the underwater world.


