Are you tired of constantly digging through your camera bag to find the lens or accessory you need? It’s time to learn how to use the dividers in your camera bag to keep your gear organized and easily accessible.
In short, dividers are customizable partitions that can be adjusted to fit your camera gear.
By using dividers, you can create compartments for different lenses, camera bodies, and accessories, making it easy to find what you need without having to rummage through your bag.
But what’s the best way to use dividers in your camera bag? In this article, we’ll provide you with tips and tricks from professional photographers on how to maximize the use of dividers in your camera bag.
From organizing your gear by size and weight to utilizing the front pockets for smaller accessories, we’ll help you transform your camera bag into a well-organized and efficient workspace.
So, let’s dive in and take your photography game to the next level!
Understanding Dividers
Before we dive into how to use dividers, let’s first understand what they are.
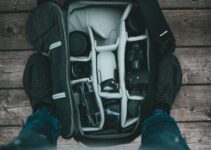
Dividers are flexible, padded panels that can be moved and rearranged within your camera bag to create custom compartments. They come in various sizes and shapes and can be adjusted to fit your gear.
Benefits of Using Dividers
Using dividers in your camera bag offers several benefits. Here are a few reasons why you should consider using them:
- Customization: With dividers, you can create custom compartments that fit your gear precisely. This allows you to organize your bag efficiently and keep your equipment safe and protected.
- Accessibility: Dividers make it easy to access your gear quickly. You won’t have to dig through your bag to find what you need.
- Protection: Dividers provide an extra layer of protection for your equipment. They help prevent your gear from banging around and getting damaged while in transit.
How do you use a camera bag divider? 7 Steps revealed
Camera bag dividers are used to separate and organize different pieces of camera equipment within a camera bag. Here are the steps to use a camera bag divider:
- Open your camera bag and locate the dividers that are included with it. Most camera bags come with several dividers of varying lengths and widths.
- Decide how you want to organize your equipment. Consider which items you want to group together, how much space you need for each item, and how much padding or protection each item requires.
- Select a divider that matches the length and width of the area you want to separate. If necessary, you can use multiple dividers to create smaller compartments.
- Fold the divider along the crease lines to create a “U” shape.
- Place the divider in the camera bag, positioning it where you want to separate the equipment.
- Repeat the process with additional dividers to create more compartments as needed.
- Once all the dividers are in place, adjust them as necessary to ensure a snug fit around your camera gear.
By using camera bag dividers, you can keep your camera gear organized and protected, making it easier to access the items you need quickly while on the go.

Thus, now lookup in detail.
How to use your dividers in your camera bag? (7 steps)
Now that you understand the benefits of using dividers let’s explore how to use them effectively in your camera bag.
Step 1: Empty Your Bag
The first step is to empty your camera bag completely. This will allow you to start with a clean slate and create a customized layout that fits your gear.
Step 2: Evaluate Your Gear
Next, evaluate your gear and determine how you want to organize it. You may want to group similar items together, such as lenses, cameras, and accessories. This will make it easier to find what you need quickly.
Step 3: Choose Your Dividers
Choose the appropriate dividers for your gear. Most camera bags come with a set of dividers, but you may need to purchase additional ones if you have a lot of equipment.
Step 4: Create Compartments
Start creating compartments by laying your dividers in your bag. Place them strategically to fit your gear, making sure they’re snug and secure. You can adjust them as needed to create custom compartments that fit your equipment precisely.
Step 5: Test Your Layout
Test your layout by placing your gear in the compartments you’ve created. Make sure everything fits properly and is easy to access. If necessary, adjust the dividers to create a better layout.
Step 6: Fine-Tune Your Layout
Fine-tune your layout until you’re satisfied with the organization. You may need to rearrange your gear and dividers a few times before you find the perfect layout.
Step 7: Protect Your Gear
Once you’ve created a layout that works for you, it’s essential to protect your gear.
Make sure everything is snug and secure in its compartment, and that there’s no empty space that could cause your equipment to shift during transport.
Here you can check out how to attached camera to bag.
Conclusion
Using dividers in your camera bag is an effective way to keep your equipment organized and protected. By following the steps outlined above, you can create a customized layout that fits your gear precisely.
Remember to evaluate your gear, choose the appropriate dividers, and test your layout to ensure everything fits properly.
With a little bit of time and effort, you can organize your camera bag like a pro.


