
Table of Contents
ToggleAre you looking for a convenient way to carry your camera gear while staying comfortable on the go?
A camel bag camera, also known as a camera backpack, is an ideal solution for photographers who need hands-free access to their equipment.
Designed for both functionality and comfort, these bags allow you to easily transport your camera, lenses, and accessories while keeping them secure.
With adjustable straps, ample storage, and smart organization features, camel bags ensure you’re prepared for any photography adventure.
In this guide, we’ll explore how to wear a camel bag camera effectively for optimal comfort and accessibility.
Here what do you use as a bike camera bag?
What is camel bag camera?
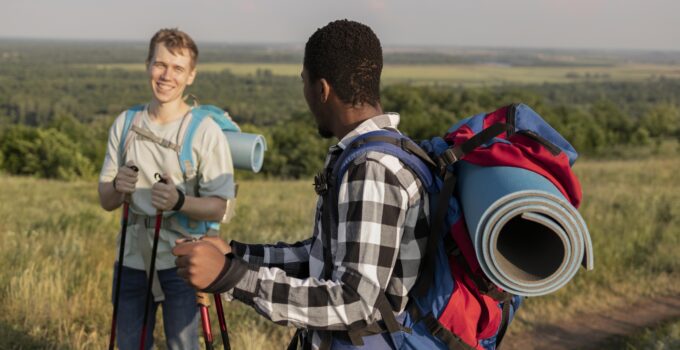
A camel bag camera, often referred to as a “camelbak camera” or “camel camera bag,” is a specialized camera bag designed for photographers who need to carry their gear comfortably while on the move.
Inspired by the design of hydration packs, these bags often feature a streamlined shape and ergonomic design, making them ideal for outdoor or adventure photography.
Typically, a camel bag camera includes padded compartments to protect lenses and cameras, adjustable straps for a secure fit, and sometimes hydration bladders or pockets to carry water.
This allows photographers to stay hydrated during long shoots without sacrificing convenience or comfort.
The bags come in various sizes, catering to different equipment needs, from compact mirrorless systems to larger DSLRs, ensuring that photographers can carry essential gear while remaining mobile and agile in diverse environments.
Is it important to know how to make a camel bag camera?
Knowing how to make a camel bag camera can be beneficial for photographers who require a functional and customized solution for carrying their gear.
Here, what size dry bag should you use?
While many commercial options are available, creating your own allows for tailored design, ensuring the bag meets specific needs regarding size, weight, and accessibility.
Understanding how to construct a camel bag can also enhance your overall photography experience.
It enables you to integrate features that suit your shooting style, such as additional compartments for accessories or hydration systems for long shoots. Additionally, making your own bag can foster creativity and a deeper connection to your equipment.
However, it’s not strictly essential; many photographers find well-made, ready-to-use bags that meet their needs.
Ultimately, whether to learn this skill depends on personal preferences, budget, and the specific demands of your photography practice.
Is it worth to know how to make a camel bag camera?
Learning how to make a camel bag camera can be worth it for several reasons.
First, it offers the opportunity for customization, allowing you to design a bag that perfectly fits your gear and shooting style. This can lead to increased efficiency and comfort during shoots, especially on long outdoor adventures.
Additionally, making your own bag can be a cost-effective solution, especially if you have specific needs that commercial bags don’t address. It also provides a creative outlet, enabling you to experiment with different materials and designs.
However, the time and effort required to create a functional bag might not appeal to everyone. For those who prefer convenience, purchasing a pre-made bag might be the better option.
Ultimately, whether it’s worth it depends on your personal interests, budget, and how often you engage in photography that demands such a specialized solution.
Things to know before wearing a camel bag camera
Before wearing a camel bag camera, consider a few important factors.
First, ensure the bag fits your specific equipment needs; check if it can comfortably accommodate your camera, lenses, and accessories. Look for adjustable compartments to protect your gear while allowing for easy access.
Comfort is crucial, so pay attention to the fit and padding of the straps. A well-fitted bag will distribute weight evenly, reducing strain during long shoots. Consider the bag’s weight; lighter options can enhance mobility.
Hydration features are also important for extended outings, so check for integrated water bladders or pockets. Weather resistance can protect your gear from environmental elements, so consider a bag made with durable materials.
Here, how to put on tripod strap on a camera?
Finally, practice wearing the bag with your gear to ensure you can move freely and access your equipment easily, allowing for a seamless photography experience in various settings.
7 steps to wear a camel bag camera
Sure! Here are seven steps to wear a camel bag camera, with detailed explanations for each.
Step 1: Choose the Right Bag
Selecting the right camel bag camera is crucial for comfort and functionality. Begin by assessing your photography needs, such as the type and amount of gear you carry.
Look for a bag that accommodates your camera body, lenses, and accessories while providing adequate protection and organization.
Consider features like padded compartments, adjustable dividers, and external pockets for easy access to essentials. Additionally, evaluate the bag’s size and weight—lighter options are preferable for long shoots.
Check for ergonomic designs with well-padded straps to prevent discomfort during extended wear. Research various models and read reviews to find a bag that fits your requirements.
This initial step lays the foundation for a successful photography experience, as the right bag will ensure your gear is secure and accessible, allowing you to focus on capturing stunning images.
Step 2: Adjust the Straps
Once you have your camel bag camera, the next step is to adjust the straps for a comfortable fit. Start by loosening all straps to give yourself ample room to put the bag on.
After placing the bag on your back, pull the shoulder straps until they fit snugly without being overly tight.
Make sure the bag rests evenly on your back and does not tilt to one side. The weight should be distributed across your shoulders and back, minimizing strain. Some bags feature chest or waist straps; these can provide additional support and stability.
Adjust these straps to ensure the bag remains secure during movement. Taking the time to achieve the right fit will enhance comfort and prevent fatigue during long shoots, allowing you to concentrate on photography without discomfort or distraction.
Step 3: Organize Your Gear
Effective organization is essential for a smooth photography experience.
Before wearing your camel bag camera, carefully arrange your gear inside the bag. Start by placing your camera body in a padded compartment, ensuring it is secure.
Next, arrange your lenses and accessories, such as batteries, memory cards, and filters, in designated pockets or compartments. Use adjustable dividers to create a layout that suits your workflow, ensuring easy access to frequently used items.
Here, how to use camera bag dividers?
Consider keeping heavier items closer to your back for better weight distribution and balance. If your bag has external pockets, reserve them for items like a water bottle or quick-access accessories.
A well-organized bag will enable you to quickly find what you need during shoots, preventing unnecessary delays and allowing you to focus on capturing the perfect shot.
Step 4: Hydration Considerations
Staying hydrated is crucial, especially during long photography sessions. When wearing a camel bag camera, consider hydration options to ensure you can easily access water.
Many camel bags come with built-in hydration reservoirs or pockets designed for water bottles. If your bag includes a hydration system, fill it before heading out and ensure the tube is easily accessible.
If using an external pocket for a water bottle, ensure it is positioned where you can reach it without having to take off the bag.
Staying hydrated will help maintain your energy levels and concentration, allowing you to focus on your photography.
Additionally, consider the weather and conditions—on hot days, prioritize hydration even more, and plan your shoot around access to water sources if needed.
Preparing for hydration can significantly impact your overall shooting experience.
Step 5: Practice Wearing the Bag
Before heading out for a shoot, practice wearing your camel bag camera to ensure comfort and ease of movement.
Start by putting the bag on as you would during a shoot, adjusting the straps as necessary.
Move around your home or workspace, simulating the actions you would take while photographing. Bend, stretch, and reach to see how the bag responds and whether it remains comfortable.
Pay attention to any pressure points or areas of discomfort, adjusting straps or repositioning the bag as needed.
This practice will help you identify any issues before you’re on location, ensuring that you can focus on your photography without distractions.
Familiarizing yourself with the bag’s weight distribution and accessibility will also boost your confidence, allowing you to move freely and efficiently when capturing images.
Step 6: Secure Loose Items
To ensure a smooth photography experience, it’s essential to secure any loose items in your camel bag camera.
Start by checking for any small accessories, such as lens caps, filters, or cords, that may not have designated storage.
Place these items in specific compartments or pockets to prevent them from shifting during movement. If your bag has exterior straps or loops, use them to secure items like tripods or jackets.
Properly securing loose items not only protects your gear but also helps maintain an organized space, making it easier to access your equipment when needed.
Here, how to clean manfrotto camera bag?
Additionally, a well-secured bag reduces the risk of losing important accessories during your shoot.
Taking the time to organize and secure your items will ultimately enhance your overall shooting experience and efficiency.
Step 7: Adjust for Comfort During Use
As you begin your photography session, continuously assess the comfort of your camel bag camera and make adjustments as needed.
Throughout your shoot, pay attention to how the bag feels on your back and shoulders.
If you notice any discomfort, take a moment to readjust the straps for a better fit. Shift the weight distribution by repositioning the bag or adjusting any chest or waist straps to relieve pressure points.
Periodically, check the organization of your gear; if you find certain items are hard to reach, consider rearranging them during breaks. Staying mindful of your comfort level will help you maintain focus and energy throughout your shoot.
Remember, a well-adjusted bag enhances mobility and allows you to concentrate fully on capturing the perfect shots, ultimately leading to a more enjoyable and productive photography experience.
5 Methods to wear a camel bag camera
Here are five methods to wear a camel bag camera, explained in detail.
Method 1: Backpack Style
Wearing your camel bag camera in a traditional backpack style is one of the most common and effective methods.
This approach involves placing both shoulder straps over your shoulders, allowing for even weight distribution across your back. Start by loosening the straps before putting the bag on, making it easier to adjust as needed.
Once the bag is on, tighten the straps until the bag sits snugly against your back without excessive pressure on your shoulders.
This method is ideal for long shoots, as it reduces fatigue and allows for hands-free mobility. It’s important to ensure that the bag remains balanced and doesn’t sway excessively while moving.
If the bag includes additional chest or waist straps, use them to enhance stability and distribute the weight further.
By employing the backpack style, you can carry your camera gear comfortably while still maintaining quick access to your equipment during shoots.
Here, how to clean tenba polyethelene camera bag?
Method 2: Sling Style
The sling style is a versatile method that allows quick access to your camera while maintaining a secure fit. In this method, you wear the bag over one shoulder, with the strap running diagonally across your body.
To use this method, simply place the bag on your shoulder and adjust the strap so the bag rests against your hip or lower back. This positioning allows for easy access to your camera without having to take the bag off completely.
Slinging the bag is particularly advantageous in crowded or dynamic environments where quick shots are needed. It enables you to swing the bag around to your front effortlessly, providing immediate access to your gear.
However, be mindful of weight distribution; if the bag feels heavy on one side, it may cause discomfort over time.
Periodically switching the bag to the opposite shoulder can help balance the load and prevent fatigue during long shooting sessions.
Method 3: Chest Harness
Wearing a camel bag camera using a chest harness method offers enhanced stability and comfort, especially during active shooting situations.
This approach involves using a specialized harness that holds the bag close to your torso, distributing weight evenly.
To use this method, first, secure the chest harness according to the manufacturer’s instructions, ensuring it fits snugly but comfortably. Attach the camel bag to the harness, making sure it is accessible yet secure.
The chest harness is particularly beneficial for outdoor photographers or those engaged in action photography, as it minimizes movement and keeps the bag stable while you move. This method also allows for quick access to your gear without removing the bag.
Adjust the harness and bag as needed to prevent any restrictions in movement, ensuring that you can easily lift your camera for quick shots. Overall, the chest harness method is a practical solution for maintaining comfort and efficiency during photography sessions.
Method 4: Waist Style
Wearing a camel bag camera in a waist style is another effective method, especially for those who prefer low-profile carrying options.
In this method, the bag is positioned around your waist, often utilizing a hip belt or low-slung strap. Start by securing the bag around your hips, adjusting the strap to ensure it fits snugly without being overly tight.
This method is particularly useful for photographers who want to maintain a hands-free experience while still having quick access to their gear.
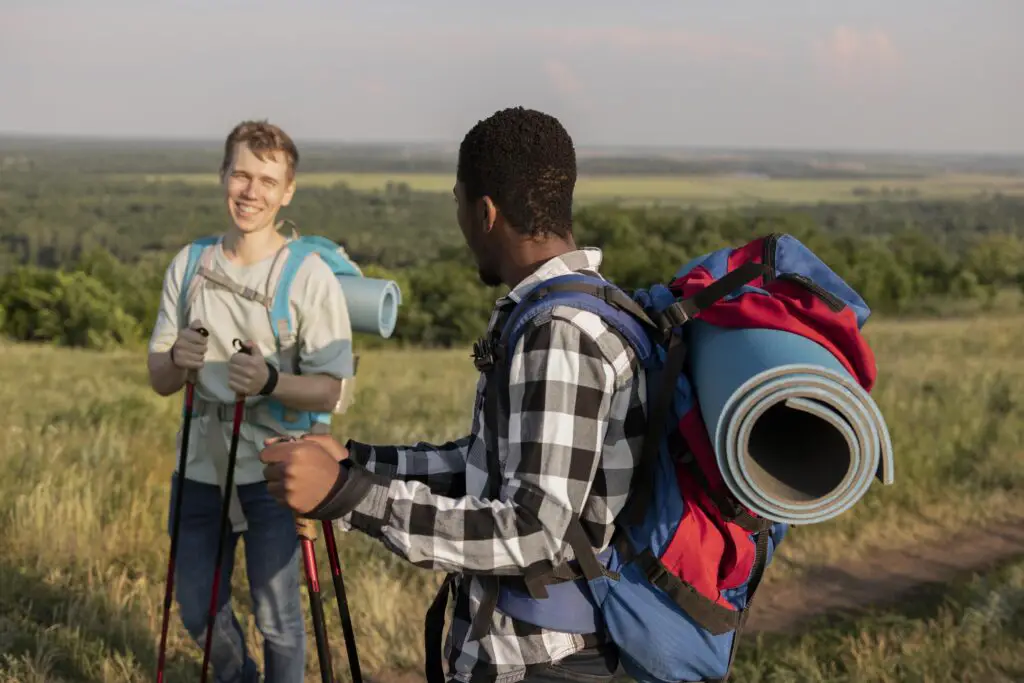
The waist style is ideal for hiking or adventure photography, as it keeps the bag out of the way while allowing for easy movement. By positioning the bag lower on your body, you can maintain better balance and stability, especially on uneven terrain.
Ensure that any loose items are secured to prevent them from bouncing or shifting during movement. This method can also help reduce strain on your shoulders and back, making it a comfortable choice for long photography sessions.
Method 5: Crossbody Style
The crossbody style is a practical method for wearing a camel bag camera that offers both convenience and stability. In this method, you wear the bag across your body, with the strap going from one shoulder to the opposite hip.
To use this method, simply adjust the strap length so the bag sits comfortably against your side. This positioning allows for quick access to your camera while keeping the bag secure and stable during movement.
The crossbody style is particularly advantageous in urban environments or crowded areas, where swift access to your gear is essential.
Here, how to support a heavy camera lens?
It also provides a layer of security, as the bag is less likely to be bumped or snagged compared to traditional shoulder wear.
Additionally, this method distributes weight more evenly than a single-shoulder carry, reducing the risk of discomfort during prolonged use. Be sure to regularly check that the bag remains secure and that your gear is properly organized, ensuring a smooth shooting experience.
5 Benefits to wear a camel bag camera
Here are five benefits of wearing a camel bag camera, explained in detail.
Benefit 1: Enhanced Comfort
Wearing a camel bag camera significantly enhances comfort during photography sessions. Traditional camera bags can often be bulky and difficult to manage, leading to discomfort and fatigue.
Camel bags, designed with ergonomics in mind, distribute weight evenly across your back and shoulders, reducing strain during long shoots.
With padded straps and adjustable fittings, these bags provide a snug yet comfortable fit, allowing photographers to carry their gear for extended periods without feeling burdened.
This is particularly important for outdoor and adventure photographers who may spend hours on the move.
The improved comfort leads to a more enjoyable shooting experience, enabling you to focus on capturing stunning images rather than worrying about your equipment.
Moreover, many camel bags include additional support features, such as chest or waist straps, which help stabilize the load further.
By prioritizing comfort, camel bag cameras empower photographers to explore diverse environments and engage in dynamic shooting without the constant distraction of discomfort.
Benefit 2: Quick Access to Gear
One of the standout benefits of wearing a camel bag camera is the quick access it provides to your gear.
Photographers often need to capture spontaneous moments, and having easy access to your camera and accessories is crucial.
Camel bags are designed with strategically placed compartments and pockets that allow you to reach your equipment without having to remove the bag completely.
This design facilitates swift transitions from carrying to shooting, enabling you to capture that perfect shot in an instant. Many camel bags also feature side access panels or front openings, making it easier to retrieve your camera or lenses quickly while on the go.
This benefit is particularly useful in dynamic environments, such as crowded events or fast-paced outdoor shoots, where time is of the essence.
Ultimately, the ability to access your gear efficiently not only enhances your shooting experience but also improves your overall productivity, allowing you to focus on creativity rather than logistics.
Benefit 3: Improved Organization
Wearing a camel bag camera significantly improves the organization of your photography gear. A well-organized bag allows you to categorize and store your equipment systematically, reducing the risk of losing essential items.
Camel bags often come equipped with multiple compartments, pockets, and dividers specifically designed to accommodate cameras, lenses, batteries, and accessories.
This thoughtful design enables photographers to customize their bag layout according to their workflow, ensuring that everything has a designated space.
Improved organization means you can quickly locate and access the items you need, whether it’s a spare battery during a shoot or a filter for a specific lens.
Additionally, many camel bags include external pockets for quick-access items like memory cards or water bottles, further enhancing your efficiency.
Here, If you have shoulder pain what kind of camera bag should you use?
Ultimately, better organization leads to a more streamlined shooting experience, allowing you to focus on creativity rather than scrambling to find your gear. It also instills confidence, knowing that all your essentials are within easy reach and securely stored.
Benefit 4: Hydration Convenience
Another significant benefit of wearing a camel bag camera is the hydration convenience it offers.
Many camel bags are designed with built-in hydration systems or designated pockets for water bottles, making it easier for photographers to stay hydrated during long shoots.
Staying properly hydrated is essential, especially for those spending extended periods outdoors or in challenging environments.
With a hydration system integrated into the bag, you can sip water without needing to stop or remove the bag, ensuring that you maintain energy levels and focus throughout your photography session.
This feature is especially beneficial during hikes or outdoor events where access to water may be limited.
Moreover, being able to drink water on the go helps prevent fatigue and keeps your mind sharp, allowing you to concentrate on your photography rather than being distracted by thirst.
Ultimately, the hydration convenience offered by camel bags promotes both physical well-being and improved performance, making it a valuable benefit for any photographer.
Benefit 5: Versatility and Adaptability
Wearing a camel bag camera offers exceptional versatility and adaptability for photographers. These bags are designed to meet a variety of needs, accommodating different styles of photography, environments, and personal preferences.
Many camel bags come with adjustable compartments and customizable layouts, allowing you to adapt the bag to fit your specific gear requirements.
Whether you’re a landscape photographer needing extra lenses and filters or a street photographer looking for a lightweight setup, a camel bag can be tailored to suit your situation.
Additionally, these bags are often made with durable, weather-resistant materials, making them suitable for various outdoor conditions, from sunny days to light rain.
The versatility extends to how the bag can be worn—options like backpack, sling, or crossbody styles allow photographers to choose the most comfortable carrying method for their activity.
This adaptability not only enhances the overall shooting experience but also makes camel bags a practical investment for photographers of all levels, as they can cater to a wide range of shooting scenarios.
What’s the best way to attach a Camel back to an Assault pack?
To attach a CamelBak to an assault pack, follow these steps for a secure fit. First, ensure your CamelBak has a compatible attachment system, like MOLLE webbing or straps.
If your assault pack features MOLLE, align the CamelBak’s straps with the webbing, threading them through the loops to secure it tightly.
For packs without MOLLE, use the CamelBak’s adjustable straps to create a snug fit around the pack’s frame or side pockets.
Next, position the CamelBak on the back or side of the assault pack for balance and easy access. Adjust the straps to eliminate any slack, ensuring stability during movement.
Here, what should you use on a bike when you going on forest?
Finally, if available, use any additional clips or buckles on the CamelBak to further secure it to the assault pack.
This method provides hydration convenience while keeping your gear organized and accessible during outdoor activities or tactical missions.
Related faq’s
What is the best way to wear a camel bag camera?
The best way to wear a camel bag camera is as a backpack, with both shoulder straps secured for even weight distribution. This method is ideal for comfort and stability during long shoots.
Can I wear a camel bag camera as a sling?
Yes, wearing a camel bag camera as a sling is a popular method. It allows for quick access to your gear while keeping the bag secure. Simply drape the bag over one shoulder and adjust the strap for comfort.
How do I adjust the straps for comfort?
To adjust the straps, loosen them before putting the bag on, then tighten them until the bag sits snugly against your back. Make sure the weight is evenly distributed and adjust any chest or waist straps for additional support.
Is it safe to wear a camel bag camera while hiking?
Yes, wearing a camel bag camera while hiking is safe, especially if it fits well and is properly adjusted. Ensure the bag is secure to prevent shifting during movement, which helps maintain balance.
How can I ensure quick access to my camera while wearing the bag?
To ensure quick access, choose a camel bag with side access panels or front openings. Practice positioning the bag so you can easily swing it around to reach your camera without removing it.
What should I consider when organizing my gear in the bag?
When organizing your gear, consider using padded compartments for protection, placing heavier items close to your back, and keeping frequently used items in easily accessible pockets to streamline your shooting process.
Can I wear a camel bag camera in different styles?
Yes, you can wear a camel bag camera in various styles, including backpack, sling, chest harness, waist, or crossbody. Choose the style that best suits your shooting environment and personal comfort preferences.
Conclusion
Wearing a camel bag camera effectively enhances your photography experience by providing comfort, accessibility, and organization.
Whether you choose a traditional backpack style, a sling method for quick access, or a chest harness for stability, each option offers unique benefits tailored to your shooting needs.
Properly adjusting the straps and organizing your gear ensures ease of movement and efficiency during shoots.
Ultimately, selecting the right wearing method allows you to focus on capturing stunning images while keeping your equipment secure and within reach, making it an essential skill for any photographer.


